Making homemade pizza is a fun way to bond with family and friends! Start by mixing warm water, yeast, sugar, flour, and salt to create your dough. Let it rise for about 30 minutes, then add your favorite toppings. Bake at 475°F for 15 minutes until it’s nice and crispy. Customize it with fresh veggies, unique sauces, or even a sprinkle of herbs for flavor. If you’re curious about more toppings and tips, there’s plenty more to explore!
Contents
History
When I think about homemade pizza, I can’t help but feel a rush of nostalgia, recalling those cozy family nights spent in the kitchen. The origins of pizza trace back to ancient civilizations, where flatbreads served as a canvas for various toppings. Fast forward to Naples in the 18th century, pizza evolved into the beloved dish we recognize today, reflecting the rich Italian culture. Its cultural significance extends beyond just food; it symbolizes community, family gatherings, and shared moments. Crafting your own pizza allows you to connect with this history while adding your unique twist. So, as you explore this culinary journey, remember that each bite is a delicious nod to the past, blending tradition with your innovative spirit.
Recipe
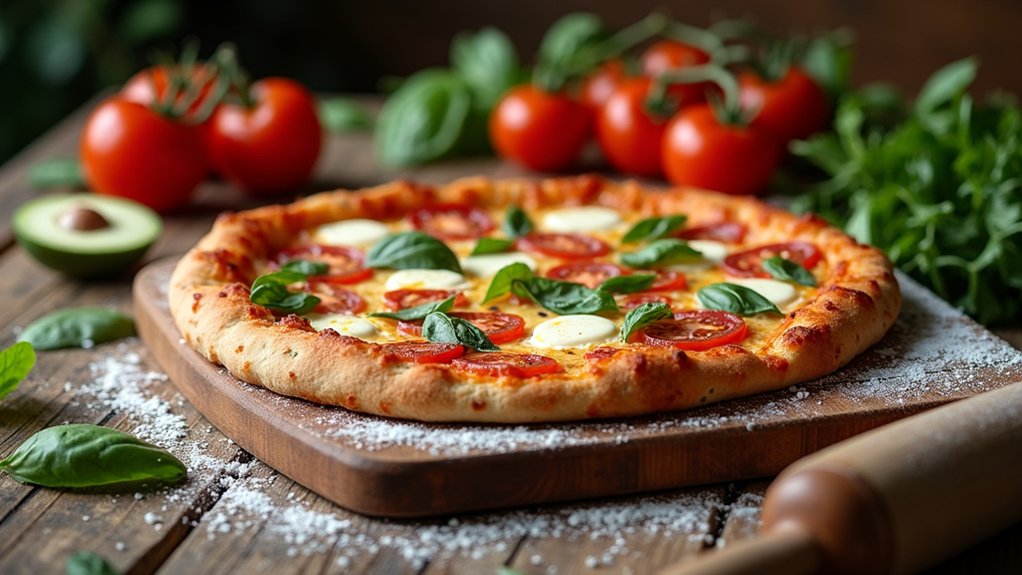
Homemade pizza is a delightful way to enjoy a custom meal with friends and family. Making your own pizza from scratch allows you to control the ingredients, flavors, and toppings, guaranteeing that every bite is tailored to your taste. Whether you prefer a classic Margherita, a loaded meat feast, or a vegetarian delight, crafting a homemade pizza is a fun and satisfying experience.
Creating your own homemade pizza is a joyful way to customize flavors and toppings for a memorable meal with loved ones.
The process begins with creating a delicious dough base that serves as the foundation for your pizza. Once the dough is prepared, you can release your creativity by selecting a variety of toppings and sauces to bring your vision to life. Baking your pizza in a hot oven guarantees a crispy crust and perfectly melted cheese. With this simple recipe, you’ll impress everyone at the dinner table.
Ingredients:
- 2 ¼ teaspoons (1 packet) active dry yeast
- 1 teaspoon sugar
- ¾ cup warm water (about 110°F)
- 2 cups all-purpose flour
- 1 teaspoon salt
- 1 tablespoon olive oil
- ½ cup pizza sauce
- 1½ cups shredded mozzarella cheese
- Toppings of your choice (pepperoni, bell peppers, mushrooms, etc.)
- Cornmeal (for dusting)
Instructions:
In a small bowl, dissolve the yeast and sugar in warm water and let it sit for about 5-10 minutes until it becomes frothy. In a large mixing bowl, combine the flour and salt, then make a well in the center. Pour in the yeast mixture and olive oil. Mix until a dough forms, then knead on a floured surface for about 5-7 minutes until smooth and elastic. Place the dough in a lightly greased bowl, cover it with a clean kitchen towel, and let it rise in a warm area for about 1 hour or until it doubles in size. Preheat your oven to 475°F (245°C). Roll out the dough on a floured surface to your desired thickness, then transfer it to a baking sheet dusted with cornmeal. Spread the pizza sauce evenly on top, sprinkle with mozzarella cheese, and add your chosen toppings. Bake for 12-15 minutes until the crust is golden and the cheese is bubbly.
Extra Tips:
To achieve the best results, make sure your oven is fully preheated before placing the pizza inside; a hot oven is key to a crispy crust. If you prefer a thicker crust, let the dough rise for an additional 30 minutes after shaping it. Experiment with different cheeses and toppings to find your perfect combination, and don’t hesitate to use leftovers for a unique flavor twist. Finally, if you have a pizza stone, preheat it in the oven to help create an even crispier base. Enjoy your homemade pizza experience!
Cooking Steps

Now that we’ve got our ingredients ready, let’s jump into the cooking steps. First, I’ll show you how to prepare the dough mixture and let it rise, which is the foundation of our pizza. After that, we’ll add our favorite toppings and bake it to perfection, creating a delicious homemade treat you’ll love to share!
Step 1. Prepare the Dough Mixture
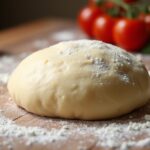
To kick off our pizza adventure, we’ll begin by preparing the dough mixture, which is the foundation of any great pizza. First, I combine warm water, yeast, and a pinch of sugar in a bowl, letting it sit for about five minutes until it froths. Then, I mix in flour and salt, stirring until a shaggy dough forms. Now, here’s where the magic happens: I knead the dough for about ten minutes, focusing on gluten development. This step’s essential because it creates that delightful chewiness we all love in pizza crust. I’m careful to keep the surface lightly floured, allowing the dough to stretch and come together beautifully. Trust me, this dough fermentation is where the flavor starts to bloom!
Step 2. Let Dough Rise for 30 Minutes
After kneading the dough, it’s time to let it rise and do its thing. This essential step allows for dough fermentation, which enhances flavor and texture. I typically cover my dough with a damp cloth and place it in a warm spot, encouraging yeast activation. As the dough expands, you can almost feel the excitement in the air, knowing that each bubble forming is a sign of deliciousness to come. In just 30 minutes, it transforms into a light, airy base for your pizza masterpiece. Don’t rush this process; it’s where the magic happens! So, embrace the wait, and get ready to create something truly special. You won’t regret giving your dough this moment to shine!
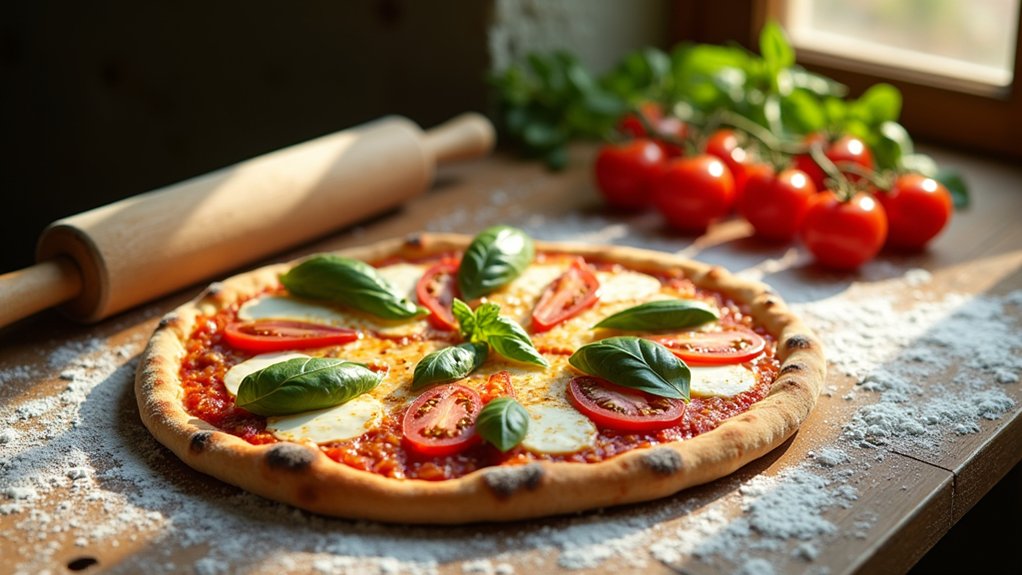
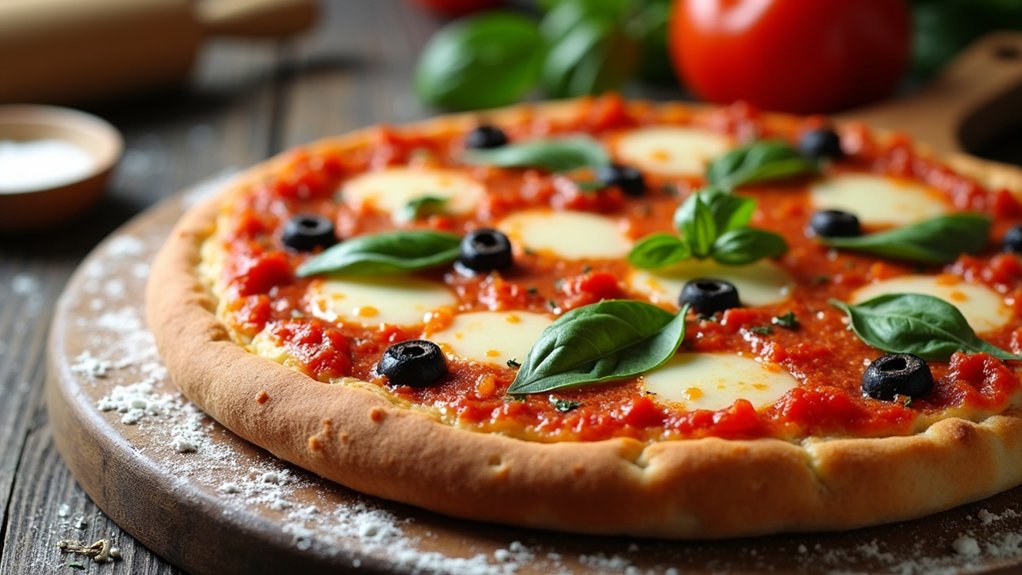
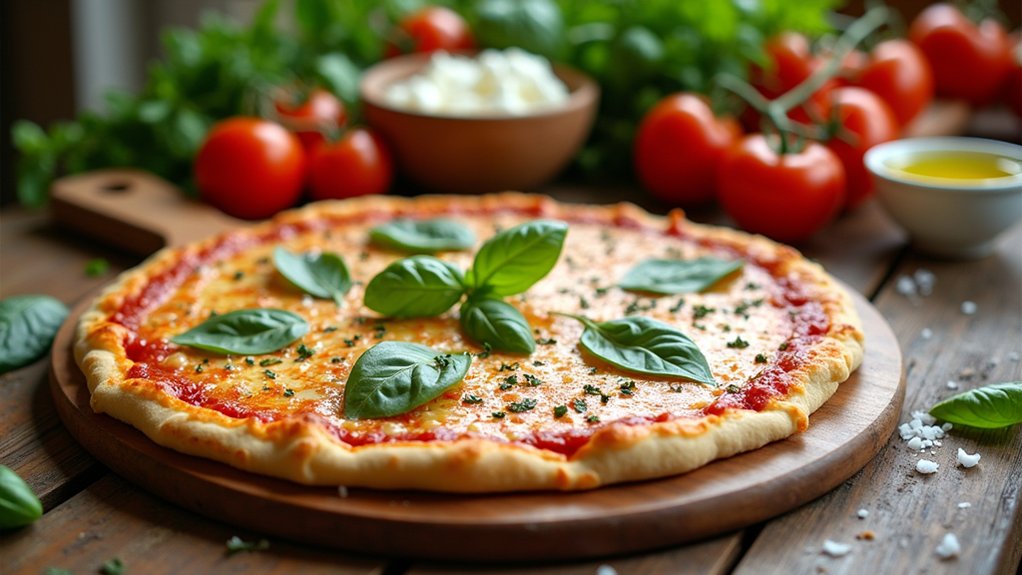
Step 3. Add Toppings of Choice
With your dough all puffed up and ready, it’s time to bring your pizza to life by adding your favorite toppings. This is where the magic happens! I like to play with different topping combinations to create exciting flavor profiles. For a classic twist, try pepperoni and mozzarella, or get adventurous with goat cheese, figs, and arugula for a sweet-savory delight. Don’t shy away from bold flavors; add spicy jalapeños or roasted garlic for a kick! Layer your toppings thoughtfully, starting with sauce and cheese, then pile on your chosen goodies. Remember, the goal is to balance textures and tastes, so mix and match until you find your perfect combo. It’s all about creativity and having fun!
Step 4. Bake at 475°F for 15 Minutes
Now that your pizza is topped and looking delicious, it’s time to bring it to life in the oven! Preheat your oven to an impressive 475°F; this high oven temperature is key for achieving that crisp, golden crust we all crave. This is where the magic of baking techniques comes into play! Carefully slide your pizza onto the middle rack, letting the heat envelop it. Set your timer for 15 minutes, and don’t wander too far—you won’t want to miss that savory aroma filling your kitchen. Keep an eye on the cheese; it should be bubbling and slightly browned. When the timer goes off, pull out your masterpiece and let it rest for a few minutes. Trust me, it’s worth the wait!
Step 5. Slice and Serve Pizza
There’s nothing quite like the moment when you pull a perfectly baked pizza from the oven, and it’s time to slice and serve! As I grab my pizza cutter, I’m filled with anticipation. For pizza cutting, I like to start at the center and work my way out, ensuring each slice is even and generous. Using a rocking motion helps, and don’t forget to let the pizza cool for a couple of minutes—this makes slicing easier. Now, let’s talk serving techniques. I love placing each slice on a warm plate, garnished with fresh basil or a drizzle of olive oil for flair. This little touch elevates the experience, making it not just a meal, but a celebration! Enjoy!
Nutritional Guide
When it comes to enjoying homemade pizza, understanding the nutritional aspects can elevate your cooking experience. I love knowing how my choices impact flavor and health. Here’s a quick look at calorie counts and ingredient benefits that can inspire your next pizza night:
| Ingredient | Benefits |
|---|---|
| Whole Wheat Crust | Higher fiber, more nutrients |
| Tomato Sauce | Rich in antioxidants |
| Mozzarella Cheese | Good source of protein |
| Fresh Veggies | Packed with vitamins |
| Lean Proteins | Helps build muscle |
Each choice can enhance your pizza while keeping it delicious and nutritious. Embrace these insights, and you’ll feel empowered to customize your homemade pizza in innovative ways, all while sharing tasty memories with loved ones. Enjoy!
Final Thoughts
As you wrap up your homemade pizza adventure, it’s important to remember that the joy of cooking comes not just from the food itself, but from the experiences we create around it. Embrace the creativity that comes with experimenting with pizza variations, and don’t shy away from making it your own. Here are some cooking tips to elevate your pizza game:
- Try different sauces like pesto or BBQ for a unique twist.
- Experiment with unexpected toppings—think arugula, figs, or even jalapeños!
- Don’t forget to share your masterpieces with friends or family for a fun pizza night.
Frequently Asked Questions
Can I Use Gluten-Free Flour for the Pizza Dough?
Absolutely, I’ve experimented with gluten-free options and found that using gluten-free flour substitutes works great for pizza dough. It offers a unique texture and flavor, making my homemade pizza nights even more exciting and innovative!
How Do I Store Leftover Homemade Pizza?
I store leftover pizza in airtight pizza containers. If I want to keep it longer, I freeze it. Just make sure to wrap it well, so it stays fresh and tasty for future cravings!
What Is the Best Way to Reheat Pizza?
To reheat pizza, I prefer using oven techniques for crispy crusts. Just preheat it to 375°F and bake for about 10 minutes. Microwave methods work too, but they make the crust a bit soggy.
Can I Make Pizza Dough in Advance?
I often make pizza dough in advance. Just store it in the fridge for a few days or freeze it for longer. It’s a game-changer for quick meals—thaw it before use for ultimate freshness!
What Toppings Are Popular for Homemade Pizza?
Building a pizza is like composing a symphony. I love layering pepperoni slices, a veggie medley, gourmet cheeses, spicy sausage, fresh basil, artichoke hearts, pineapple chunks, and even smoked salmon for a culinary masterpiece!
Conclusion
Making homemade pizza is not just about the delicious results; it’s a chance to create lasting memories. Did you know that around 93% of Americans eat pizza at least once a month? So why not make it special by crafting your own? You can customize every topping to suit your taste, and it’s a fun activity to share with family and friends. I hope you enjoy this recipe as much as I do—happy cooking!