Jello poke cake is a fun and colorful dessert that’s super easy to make! First, bake your favorite cake and let it cool. Then, poke holes in it and pour Jello over the top. After chilling for a few hours, frost it with whipped topping for a delicious finish. It’s perfect for family gatherings or any celebration! Trust me, your friends and family will love it! Stick around, and I’ll share more tips and tricks for this delightful dessert.
Contents
History
When I think about Jello poke cake, I can’t help but feel a wave of nostalgia wash over me, reminding me of family gatherings and summer barbecues. This delightful dessert has roots that trace back to the mid-20th century, when people began experimenting with cake variations and vibrant Jello flavors. It’s fascinating how this simple yet innovative concept took off, becoming a staple at celebrations. I remember watching my relatives poke holes in the cake, pouring in that colorful, flavorful Jello, and transforming an ordinary dessert into something extraordinary. Each slice bursts with flavor and brings back memories, showcasing how creativity in the kitchen can elevate even the simplest dishes. It’s a tasty tradition I love to share!
Recipe
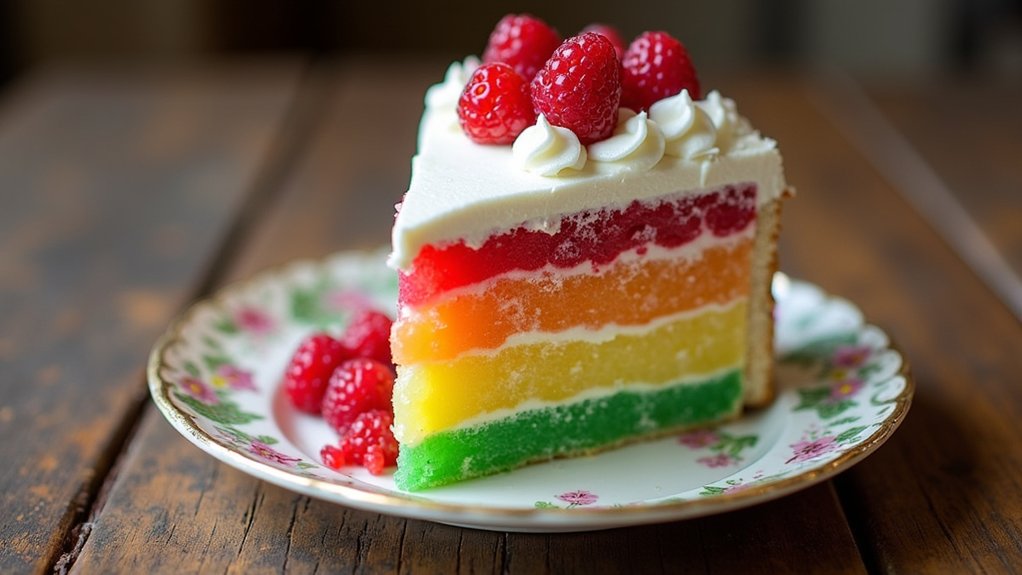
Jello Poke Cake is a delightful dessert that combines the moistness of cake with the fruity flavors of Jello, creating a colorful and delicious treat perfect for any occasion. This recipe is not only simple to make, but it also allows for endless customization based on your favorite flavors and color combinations. The cake is baked, poked with holes, and then infused with Jello, resulting in a sweet surprise with every bite.
This cake is a fantastic addition to potlucks, birthday parties, or family gatherings. With its vibrant appearance and invigorating taste, it’s sure to impress your guests and leave them asking for seconds. Plus, it’s an easy recipe that can be made ahead of time, making it a stress-free dessert option that you can prepare and store before your event.
Ingredients:
- 1 box of yellow or white cake mix
- 1 cup of water
- 1/3 cup of vegetable oil
- 3 large eggs
- 1 box of Jello (any flavor)
- 2 cups of boiling water
- 1 cup of cold water
- Whipped topping (for frosting)
- Fresh fruit or sprinkles (optional, for garnish)
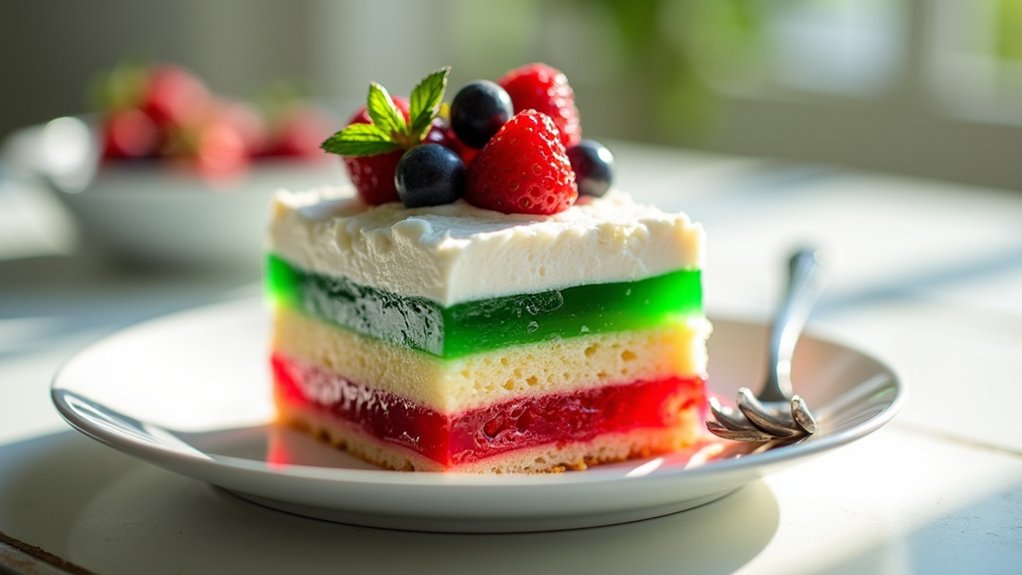
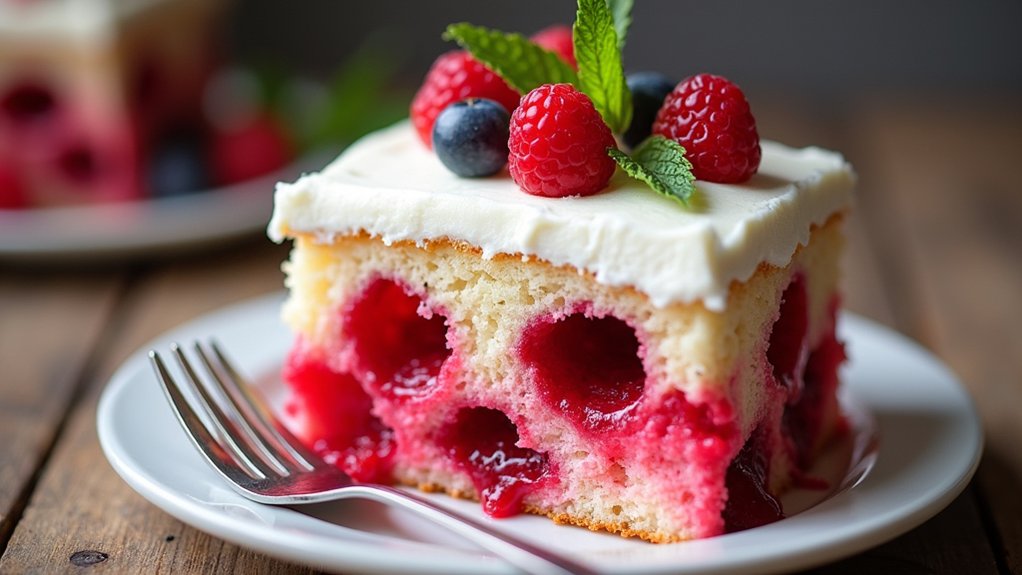
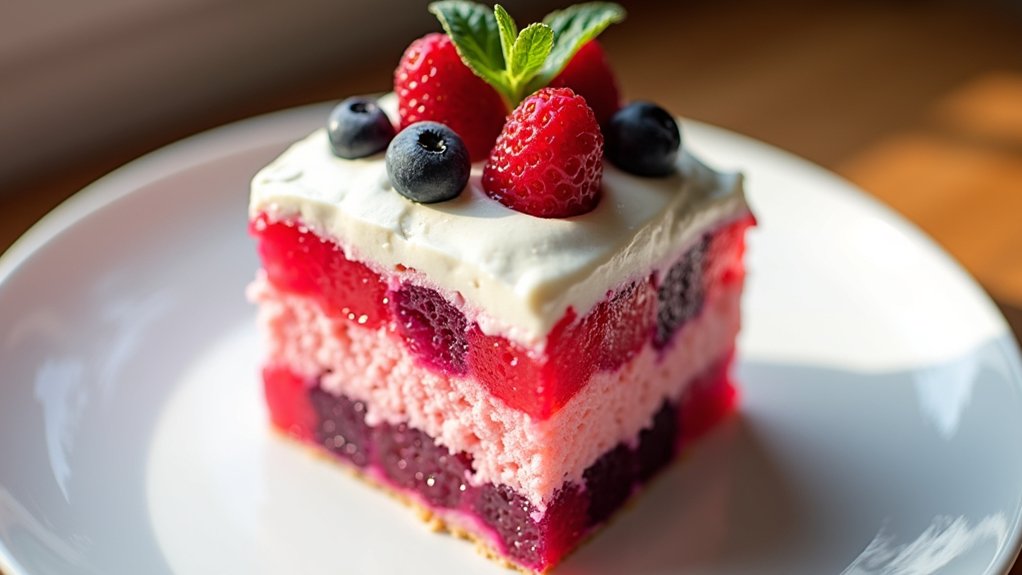
To prepare the Jello Poke Cake, start by preheating your oven to 350°F (175°C). Grease and flour a 9×13 inch baking dish. In a large mixing bowl, combine the cake mix, water, vegetable oil, and eggs. Beat on medium speed for about 2 minutes until well blended. Pour the mixture into the prepared baking dish and bake for 30-35 minutes, or until a toothpick inserted in the center comes out clean. Once baked, allow the cake to cool for about 15 minutes. While the cake is cooling, dissolve the Jello powder in 2 cups of boiling water, then stir in 1 cup of cold water. Once the cake has cooled slightly, use a fork to poke holes all over the surface. Pour the Jello mixture over the cake, making sure it seeps into the holes. Refrigerate for at least 4 hours or overnight. Before serving, spread whipped topping over the top and garnish with fresh fruit or sprinkles if desired.
When making this Jello Poke Cake, feel free to experiment with different cake and Jello flavors to suit your taste or theme of the celebration. For a richer flavor, consider adding a layer of fruit puree or crushed fruit between the cake and whipped topping. Additionally, confirm the cake has cooled adequately before adding the Jello mixture to prevent it from melting. This dessert can be made a day in advance, allowing the flavors to meld beautifully and making it a convenient choice for busy hosts. Enjoy your delicious creation!
Cooking Steps
Now that we’ve got our ingredients ready, let’s get started on the cooking steps! First, I’ll show you how to prepare the cake base, and then we’ll poke holes to let that colorful Jello soak in. Trust me, the anticipation of seeing the final product will make every step worth it!
Step 1. Prepare the Cake Base
Creating the cake base for a Jello poke cake is the first step towards a delicious and delightful treat that’ll impress everyone. Start by choosing your favorite cake flavors; classic vanilla or rich chocolate work wonders. I usually go for a box mix to save time, but feel free to get creative with homemade recipes.
Next, follow the mixing techniques on the box, combining ingredients until the batter is smooth and inviting. It’s essential to mix well, ensuring all elements blend seamlessly for that perfect texture. Pour the batter into a greased baking dish, and bake according to the instructions. As the aroma fills your kitchen, you’ll know you’re one step closer to a cake that’s truly unforgettable.
Step 2. Poke Holes in the Cake
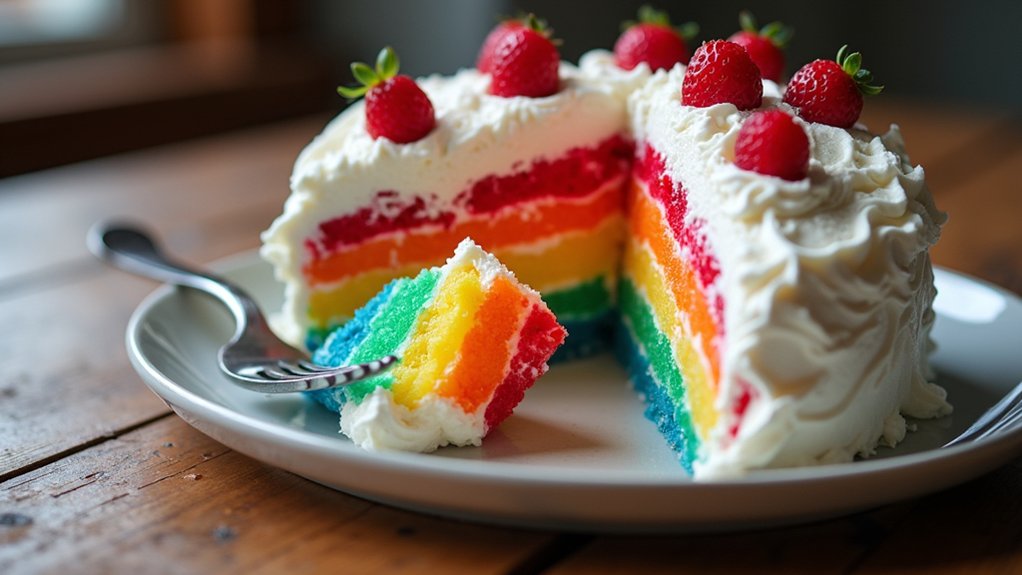
With a toothpick or the handle of a wooden spoon in hand, it’s time to poke holes in the warm cake. I like to create a pattern of holes about an inch apart, ensuring each slice experiences the magic of flavor. This step is essential because it allows the jello flavors to seep deep into the cake, transforming its texture into something delightfully moist and vibrant. Don’t rush this! The more holes you poke, the more luscious the cake will be. You can get creative here—try varying the size of the holes for a unique look. Just imagine slicing into that cake later and revealing those colorful jello pockets! It’s a fun twist that’ll impress everyone at the table.
Step 3. Pour Jello Mixture Evenly
Once you’ve poked those holes, grab your jello mixture and let’s get pouring! I like to use a mix of jello flavors for a vibrant twist; it adds an exciting burst of color and taste to our cake. Carefully pour the mixture over the cake, ensuring it seeps into every hole. This step is essential because it influences the cake texture, allowing the jello to infuse its deliciousness throughout. Don’t rush—take your time to make sure the jello covers the entire surface evenly. You’ll see the colors blend and create a beautiful pattern. Once finished, it’s like a work of art that’s just waiting to be enjoyed. Trust me, the flavor explosion is totally worth the effort!
Step 4. Chill Until Set
Now that you’ve poured the jello mixture over your cake, it’s time for the waiting game! This is when the chilling time comes into play, and patience is key. I usually pop the cake in the fridge for at least four hours, but overnight is even better if you can wait that long. During this setting process, the jello seeps into the cake, transforming it into a moist and vibrant delight. You’ll see the colors mingle beautifully, creating a stunning visual treat that’s hard to resist. While it chills, I like to imagine the deliciousness that’s about to unfold. So, grab a good book or watch a show, and let the magic happen in your fridge!
Step 5. Frost With Whipped Topping
After the cake has chilled and the jello has fully set, it’s time to add that fluffy finishing touch! Frosting with whipped topping not only enhances the flavor, but also elevates your cake decoration game to a whole new level. Here’s how I do it:
- Gently spread the whipped topping over the cake, making sure to fill in those delicious jello holes.
- Use a spatula to create swirls or peaks for a fun texture.
- Add colorful sprinkles or fresh fruit on top for that extra pop!
- Chill the cake again briefly to let the toppings set.
Trust me, this whipped topping layer takes your Jello poke cake from basic to fabulous. Your friends and family will be raving about it!
Nutritional Guide
When it comes to enjoying a delicious Jello poke cake, it’s important to contemplate how it fits into our overall diet. This dessert can be a fun treat, but let’s take a closer look at its caloric content and ingredient benefits.
Here’s a quick guide to help you understand what you’re indulging in:
| Ingredient | Caloric Content (per serving) | Benefits |
|---|---|---|
| Jello (1/2 cup) | 80 | Low in calories, vibrant flavor |
| Cake mix (1 slice) | 150 | Provides carbohydrates for energy |
| Whipped topping (2 tbsp) | 30 | Adds creaminess, light texture |
Enjoying this cake occasionally can be a delightful addition to our diet, especially when shared with friends and family!
Final Thoughts
Although it’s easy to get caught up in the excitement of baking, I find that reflecting on the experience is just as important. The Jello Poke Cake isn’t just a dessert; it’s a canvas for creativity. I love experimenting with different cake variations and serving suggestions that elevate this classic treat.
Here are some ideas to inspire your next creation:
- Try using different flavors of Jello for a unique taste.
- Substitute the cake with a sponge or chocolate version for diversity.
- Serve it with whipped cream or fresh fruit for an added twist.
- Create themed versions for holidays or special occasions.
Frequently Asked Questions
Can I Use a Different Flavor of Jello?
Absolutely, I love experimenting with different Jello flavors! Using various flavors creates exciting Jello cake variations. Don’t be afraid to mix things up; your creativity will lead to delicious, unique results every time!
How Long Does the Cake Need to Chill?
Imagine your cake as a cozy blanket, needing a solid chill for about four hours. This chilling time transforms the cake texture into a delightful, firm masterpiece, inviting you to innovate and savor every bite!
Can I Make This Cake a Day in Advance?
Yes, you can make this cake a day in advance. I love how the flavors meld beautifully! Just cover it well and store it in the refrigerator for ideal flavor enhancement and perfect jello setting.
What Type of Cake Works Best for Poking?
When I first experimented with poke cakes, I discovered that a fluffy vanilla sponge absorbs flavors beautifully, while a rich chocolate cake adds a decadent twist. Both create delightful experiences, transforming simple ingredients into something extraordinary.
How Can I Decorate My Jello Poke Cake?
I love decorating my poke cake with whipped cream frosting and vibrant fruit toppings like strawberries or blueberries. It adds freshness and color, making it a stunning centerpiece for any gathering. Get creative and enjoy!
Conclusion
In the end, making a jello poke cake is more than just baking; it’s a delightful journey back to childhood gatherings and family celebrations. The vibrant colors and sweet flavors create a treat that’s as much about nostalgia as it is about taste. So, whether you’re whipping it up for a party or just to enjoy at home, this cake brings joy to the table. Let’s embrace the fun of cooking and share those delicious moments with loved ones!