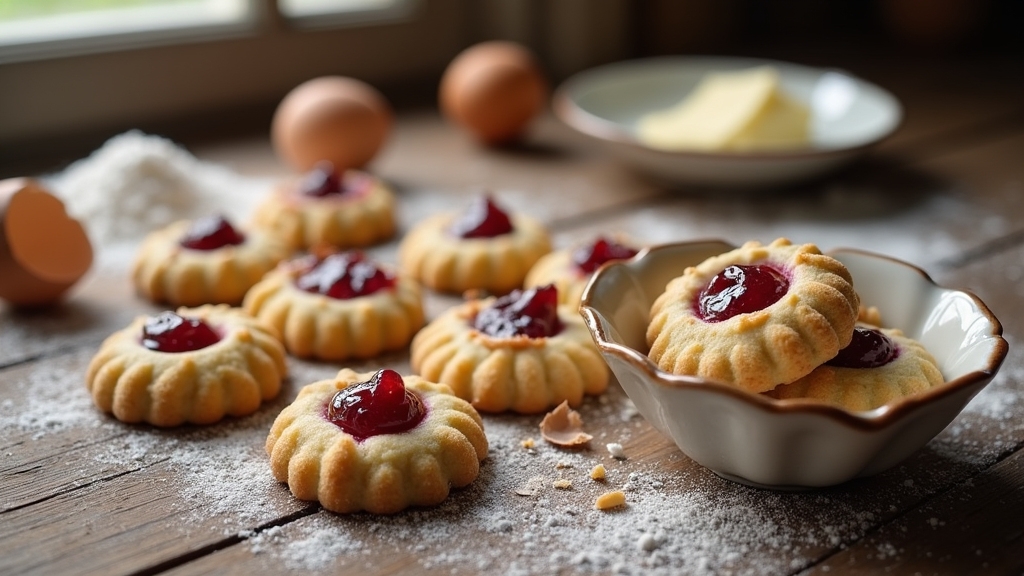
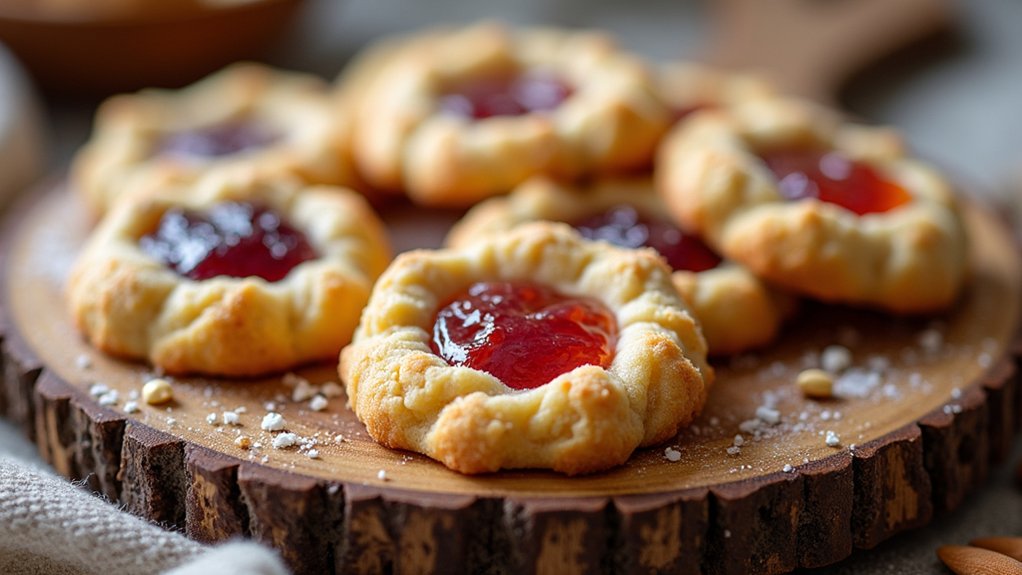
I love making thumbprint cookies! They’re these buttery delights filled with sweet jam or chocolate, perfect for any occasion. To whip them up, you just need butter, sugar, an egg yolk, vanilla, flour, and a pinch of salt. After chilling the dough, I press indents and fill them with my favorite fillings before baking until golden. These cookies not only taste amazing but also bring a sense of nostalgia to my kitchen. If you want to know more about variations and tips, keep going!
Contents
History

When I think about the history of thumbprint cookies, I can’t help but feel a connection to countless bakers who’ve crafted these delightful treats over the years. The cookie origins trace back to Europe, where each culture infused its own twist into the recipe. I imagine the warmth of kitchens filled with the aroma of freshly baked goods, as families passed down their baking traditions. These cookies, with their signature indents, not only showcase creativity but also symbolize a deeper connection to heritage. Originating from simple ingredients, they’ve evolved through time, inspiring innovative flavor combinations. Today, thumbprint cookies invite us to explore our roots while encouraging us to experiment, blending tradition with modern culinary flair.
Recipe
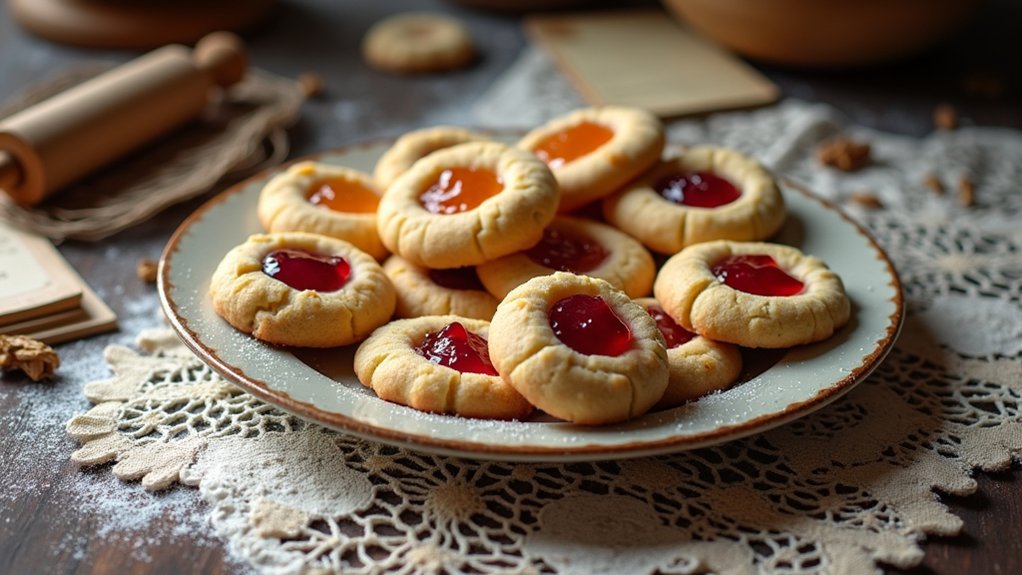
Thumbprint cookies are a delightful treat that combines a buttery, melt-in-your-mouth cookie with a sweet jam or chocolate filling. These cookies are not only easy to make but also a great way to impress friends and family with their beautiful presentation and delicious flavor. Perfect for any occasion or simply as a sweet snack, thumbprint cookies are sure to become a favorite in your household.
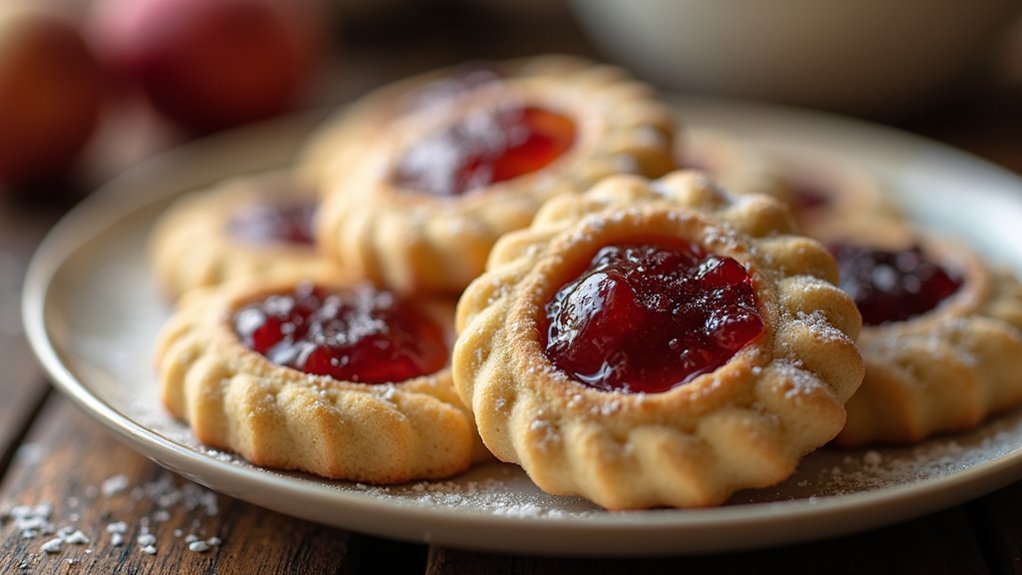
Thumbprint cookies are a buttery delight filled with sweet jam or chocolate, perfect for impressing loved ones and satisfying your sweet tooth.
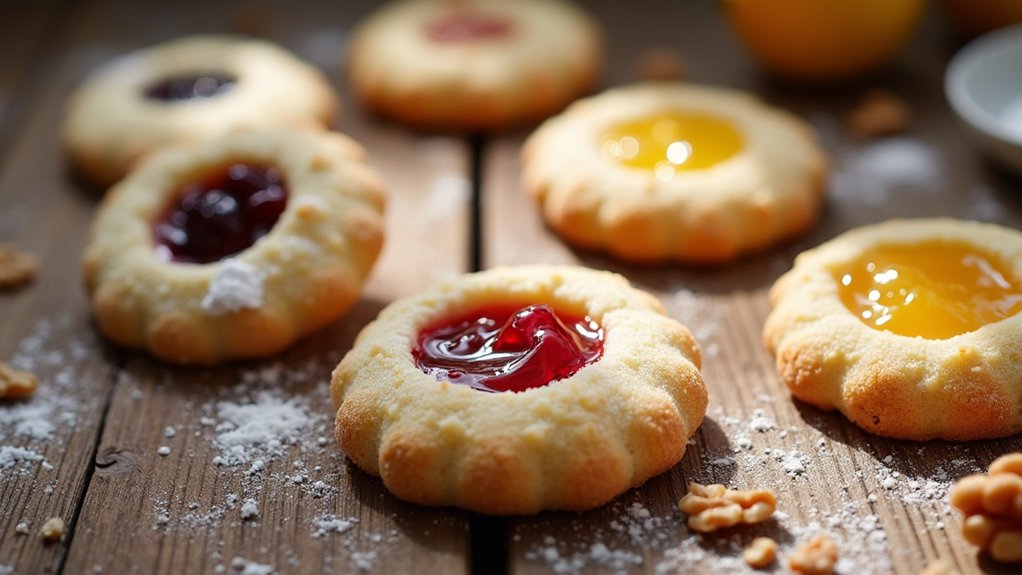
The beauty of thumbprint cookies lies in their versatility. You can fill them with a variety of jams such as raspberry, apricot, or strawberry, or even use chocolate ganache for a decadent twist. The dough is simple to prepare and requires minimal ingredients, making it an accessible recipe for bakers of all levels. Once baked, these cookies are best enjoyed fresh but can be stored for several days, making them ideal for batch baking.
Ingredients:
- 1 cup unsalted butter, softened
- 1 cup granulated sugar
- 1 large egg yolk
- 2 teaspoons vanilla extract
- 2 cups all-purpose flour
- 1/4 teaspoon salt
- 1/2 cup fruit jam or chocolate ganache
Instructions:
Preheat your oven to 350°F (175°C). In a large mixing bowl, cream together the softened butter and granulated sugar until light and fluffy. Mix in the egg yolk and vanilla extract until well combined. Gradually add the flour and salt, mixing until a soft dough forms. Roll the dough into 1-inch balls and place them on a baking sheet lined with parchment paper. Use your thumb or the back of a spoon to make an indentation in the center of each cookie. Fill each indentation with your desired jam or ganache. Bake for 12-15 minutes, or until the edges are lightly golden. Allow the cookies to cool on the baking sheet for a few minutes before transferring them to a wire rack to cool completely.
Extra Tips:
For a fun variation, try adding spices such as cinnamon or nutmeg to the dough for an added depth of flavor. You can also experiment with different fillings, including nut butters or caramel, to create unique combinations. If you find the dough too sticky, chilling it in the refrigerator for about 30 minutes can make it easier to handle. Finally, for a beautiful finish, consider dusting the cooled cookies with powdered sugar before serving. Enjoy your delicious thumbprint cookies!
Cooking Steps
Let’s get started with the cooking steps for those delightful thumbprint cookies! First, I’ll preheat my oven to 350°F, setting the stage for that perfect bake. Then, we’ll add our favorite fillings and chill the dough, creating a treat that’s both simple and delicious.
Step 1. Preheat Oven to 350°F
To kick off the baking process, I always preheat my oven to 350°F. This oven temperature is vital for achieving that perfect texture in my thumbprint cookies. It creates a warm environment that allows the cookies to bake evenly, resulting in a delightful golden-brown finish. I find that taking this step seriously is one of the baking essentials. While the oven warms up, I can gather my ingredients and get into the creative zone, envisioning the flavors I’ll infuse in those little indents. Plus, preheating helps the dough spread just right, ensuring that each cookie bakes beautifully. So, let that oven work its magic while I prepare to fill those thumbprints with deliciousness!
Step 2. Add Filling to Cookies
Once the oven’s warmed up and the cookie dough is ready, it’s time to fill those charming little indents. I love exploring different filling options to elevate my thumbprint cookies. Think classic jams like raspberry or apricot, or get adventurous with lemon curd or chocolate ganache. The beauty lies in the flavor combinations; imagine pairing almond dough with a cherry filling for a delightful surprise or using peanut butter with chocolate for a rich contrast. To fill, simply spoon a small amount into each indent, careful not to overflow. This step not only adds a burst of flavor but also makes your cookies visually stunning. Let your creativity shine as you experiment with these delicious fillings!
Step 3. Chill Dough for 30 Minutes
Chilling the dough for 30 minutes is an essential step that guarantees your thumbprint cookies hold their shape while baking. During this time, the dough’s consistency transforms, allowing the fats to solidify. This chilling benefits not just the structure but also enhances the flavor, as it allows the ingredients to meld harmoniously. I’ve found that when I skip this step, my cookies often spread too much, losing that perfect thumbprint that makes them so delightful. So, while you wait, take a moment to envision the delicious cookies you’ll soon create. Trust me, investing this half-hour will elevate your baking experience and lead to cookies that are not only beautiful but also deliciously satisfying!
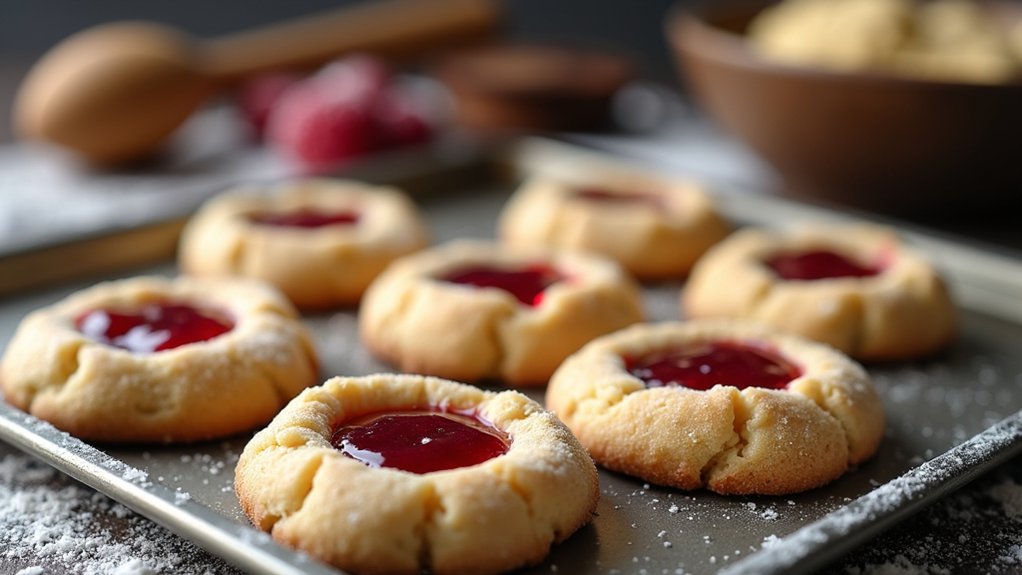
Step 4. Bake for 12-15 Minutes
After the dough has chilled, it’s time to bring your thumbprint cookies to life by baking them for 12 to 15 minutes. Preheat your oven to 350°F (175°C) and line a baking sheet with parchment paper. As I place the cookies inside, the aroma of sweet dough begins to fill the kitchen. Keep an eye on them; the perfect baking time guarantees a golden-brown edge while the center remains delightfully soft. I love how, during this brief wait, the cookies transform into little bites of perfection. The right baking time not only enhances the flavor but also creates a pleasing cookie texture that’s slightly chewy yet melts in your mouth. Trust me, you’ll be amazed!
Step 5. Cool Cookies on Rack
As soon as the cookies come out of the oven, I carefully transfer them to a wire rack to cool. This cooling technique is vital; it allows air to circulate around the cookies, preventing them from becoming soggy. I place the rack in a well-ventilated area, ensuring ideal rack placement for even cooling. Within minutes, the delightful aroma fills the kitchen, and I can hardly wait to taste them! As they cool, I can see the cookies settle into their perfect shapes, with the thumbprint still beautifully defined. This step is essential for achieving that perfect texture—soft in the center with a slight crunch on the edges. Trust me, letting them cool properly makes all the difference in your thumbprint cookies!
Nutritional Guide
When you bite into a thumbprint cookie, you’re not just indulging in a delightful treat; you’re also partaking in a blend of flavors and textures that can vary in nutritional value. Understanding the caloric content can help satisfy your cravings while keeping health in mind. Typically, a serving size is one cookie, and knowing what you’re consuming can enhance your enjoyment.
Here’s a quick nutritional breakdown:
| Nutrient | Amount per Serving |
|---|---|
| Calories | 100 |
| Total Fat | 5g |
| Sugars | 8g |
These cookies can be a part of a balanced diet if enjoyed mindfully. So, savor that sweet goodness, but remember to keep an eye on those serving sizes!
Final Thoughts
While I love indulging in a thumbprint cookie, I also appreciate the joy that comes from sharing them with friends and family. These delightful treats are not only a reflection of the art of baking but also an invitation to experiment. With a few baking tips, like chilling the dough for easier handling, you can elevate your cookie game. Don’t hesitate to explore different cookie variations—think chocolate hazelnut spread or tangy lemon curd! Each unique filling can turn this classic into a personal favorite. So, whether you’re hosting a gathering or simply treating yourself, thumbprint cookies offer a perfect blend of nostalgia and creativity. Immerse yourself in this baking adventure; I promise you won’t regret it!
Frequently Asked Questions
Can I Substitute the Jam With Chocolate or Caramel?
I often swap jam for chocolate variations or caramel options in my cookies. It adds a delightful twist, creating rich flavors that elevate the classic treat. Experimenting opens up delicious possibilities you’ll love!
How Should I Store Leftover Thumbprint Cookies?
Imagine your cookies as treasures; to keep them safe, I store leftovers in airtight storage containers. This way, I extend their shelf life and preserve their delightful flavor, ensuring each bite feels like a fresh discovery.
Can I Freeze Thumbprint Cookies for Later?
Absolutely, I freeze my thumbprint cookies! For freezing tips, I recommend wrapping them individually to maintain cookie texture. Thawing them gently restores their delightful taste and softness, making them just as delicious as fresh-baked.
What Types of Flour Can I Use for Gluten-Free Cookies?
For gluten-free cookies, I love using almond flour for its nutty flavor and coconut flour for a light texture. Both options create delicious, innovative treats that satisfy my cravings without compromising on taste or quality.
How Can I Make Thumbprint Cookies Vegan?
To make thumbprint cookies vegan, I use flaxseed meal as an egg substitute and coconut oil instead of butter. Experimenting with different nut butters creates delightful cookie variations that everyone can enjoy, regardless of dietary preferences!
Conclusion
As I savor each bite of these delightful thumbprint cookies, I can’t help but appreciate their rich history, dating back to the 18th century. Did you know that in the U.S. alone, around 60% of households bake cookies during the holiday season? It’s a reflection of how these sweet treats bring people together. So, whether you’re sharing them with loved ones or enjoying them solo, these cookies are sure to warm your heart and home.