If you’re craving those tasty Starbucks cake pops, I’ve got a simple recipe just for you! Start by mixing together a box of cake mix with ingredients like water, oil, and eggs. Once baked and cooled, crumble the cake and combine it with frosting. Roll the mixture into balls and chill them before dipping in melted chocolate. You can add sprinkles for fun! Stick around to discover more tips on customizing and presenting your delicious cake pops!
Contents
History


When you think about cake pops, you might picture those delightful treats from Starbucks, but their history goes back further than you might expect. The cake pop origins can be traced to creative bakers who wanted to reinvent leftover cake. They mashed it up, rolled it into balls, and dipped them in chocolate—a brilliant way to minimize waste! Starbucks influence took this whimsical idea and transformed it into a trendy treat that captured the hearts of many. Their unique flavors and cute presentation made cake pops a must-try for coffee lovers everywhere. So, next time you enjoy one, remember it’s not just a sweet indulgence; it’s a part of a deliciously innovative journey that brings joy to our taste buds!
Recipe

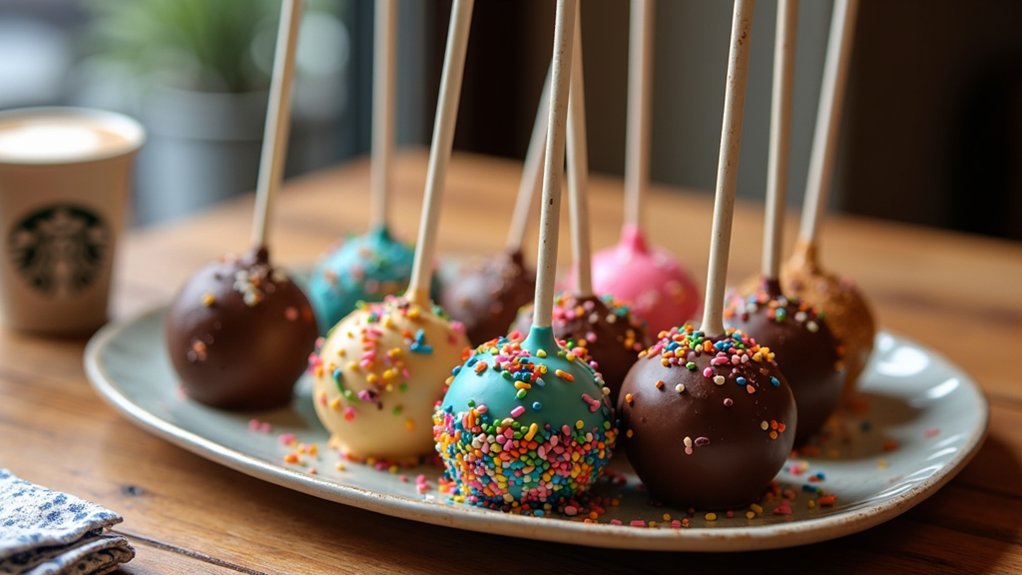
Starbucks Cake Pops are a delightful treat that combines moist cake and creamy frosting, all coated in a smooth chocolate shell. These bite-sized desserts are perfect for parties, gatherings, or simply as a sweet indulgence with your afternoon coffee. Making cake pops at home allows you to customize flavors and decorations to suit your preferences, and they can be a fun project to do with family or friends.
To start, you’ll need to bake a cake, which can be any flavor you prefer, such as vanilla, chocolate, or red velvet. Once the cake is baked and cooled, you’ll crumble it and mix it with frosting to form a dough-like consistency. From there, you can shape the mixture into small balls and let them chill in the refrigerator before coating them in melted chocolate or candy melts. With some creativity, you can decorate your cake pops with various toppings, making them as festive or simple as you desire.
Ingredients:
- 1 box of cake mix (your choice of flavor)
- Ingredients required on the cake mix box (water, oil, eggs)
- 1 cup of frosting (store-bought or homemade)
- 12 oz of candy melts or chocolate (for coating)
- Lollipop sticks
- Sprinkles or other decorations (optional)
To prepare your Starbucks cake pops, start by baking the cake according to the package instructions. Once baked, allow it to cool completely before crumbling the cake into a large bowl. Gradually mix in the frosting until the mixture holds together well. Scoop out small portions and roll them into balls, then place them on a baking sheet lined with parchment paper. Refrigerate the cake balls for about 30 minutes to firm them up. While they chill, melt the candy melts or chocolate according to package instructions. Dip the end of each lollipop stick into the melted chocolate and insert it into the cake balls. Then, dip each cake ball into the melted chocolate, allowing any excess to drip off. Place the coated cake pops back on the parchment paper and add sprinkles or decorations if desired. Let them set completely before serving.
When making cake pops, be sure to allow adequate cooling time for the cake and the chocolate coating to prevent melting or deformation. Experiment with different flavor combinations by using various cake and frosting flavors, and don’t hesitate to get creative with toppings. If you’re working with chocolate, consider using colored candy melts for a more vibrant presentation. Finally, remember to store the cake pops in an airtight container to keep them fresh, and enjoy them within a week for the best taste and texture.
Cooking Steps
Now that we’ve gathered our ingredients, it’s time to jump into the cooking steps. I love mixing the cake and frosting together; it’s where the magic really begins! Once we’ve shaped our cake mixture into balls, we’ll chill them in the freezer before dipping them in chocolate—trust me, it’s worth the wait!
Step 1. Gather Ingredients and Tools
As we immerse ourselves in creating these delightful cake pops, it’s essential to gather all the ingredients and tools you’ll need to make the process smooth and enjoyable. For the best results, focus on your ingredient selection; choose high-quality cake mix, frosting, and colorful candy melts. Don’t forget the fun sprinkles for that extra flair!
Now, let’s talk about essential tools. You’ll want a mixing bowl, a baking pan, and a sturdy spatula for combining our cake and frosting later. Additionally, popsicle sticks and a styrofoam block will help support the cake pops while they set. With everything at your fingertips, we’re ready to plunge into this exciting baking adventure!
Step 2. Mix Cake and Frosting
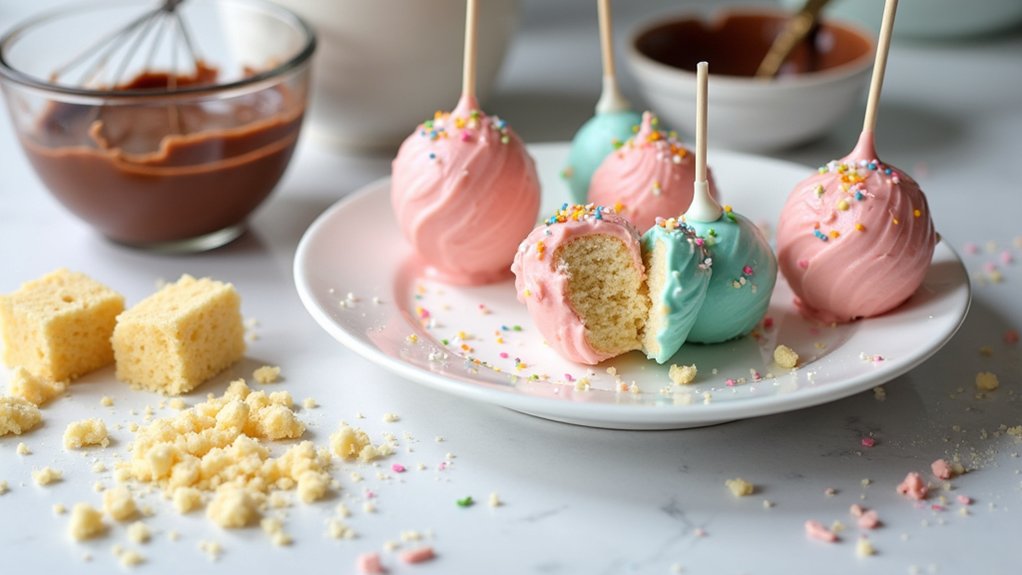
Let’s dive right into mixing the cake and frosting, which is where the magic begins! Start by crumbling your cooled cake into a large bowl, ensuring it reaches a fine texture. This is essential for achieving the perfect cake consistency. Next, add your chosen frosting flavors—whether it’s classic vanilla, rich chocolate, or something daring like salted caramel. You’ll want to mix until the cake and frosting are fully combined, creating a moist and cohesive mixture. Don’t be afraid to adjust the frosting amount; a little extra can enhance the flavor and hold everything together beautifully. The goal is a blend that’s flavorful and easy to work with, setting the stage for the next exciting step in your cake pop journey!
Step 3. Shape Cake Mixture Into Balls
It’s time to roll that delightful cake mixture into perfectly shaped balls! I start by grabbing a small scoop of the mixture, about the size of a tablespoon. With my hands slightly damp, I gently press and mold the mixture into a smooth ball. This cake shaping process is all about the right balance—too much pressure can squish the mixture, while too little leaves it crumbly. I like to make each ball uniform in size, which guarantees even baking later on. As I work through the mixture, I can’t help but feel excited about the deliciousness ahead. Once I’ve shaped them all, I admire my little creations—each one a promise of sweetness and joy to come in our cake pop adventure!
Step 4. Chill Balls in Freezer
Once you’ve shaped all those delightful cake balls, it’s time to give them a chill in the freezer for about 15 to 30 minutes. This step is essential, as the freezer benefits include ensuring your cake pops hold their shape during the dipping process. Plus, it’s a fantastic chilling technique that enhances the overall texture. Here’s what to do:
- Arrange the cake balls on a baking sheet lined with parchment paper, keeping them spaced apart.
- Cover them loosely with plastic wrap to prevent freezer burn.
- Pop the sheet in the freezer and set a timer—don’t forget about them!
After the chill, your cake balls will be perfectly firm and ready for the next delicious step!
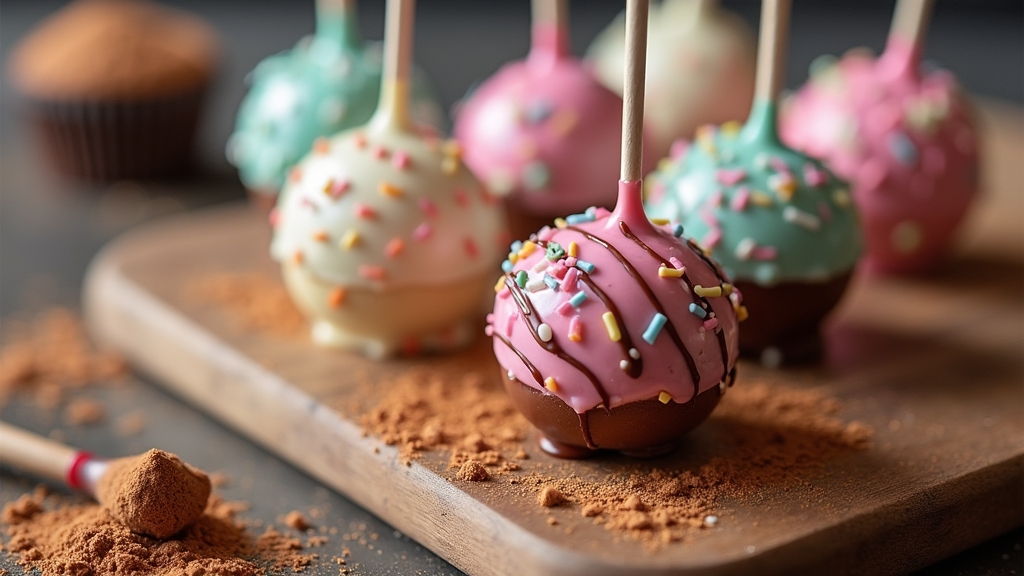
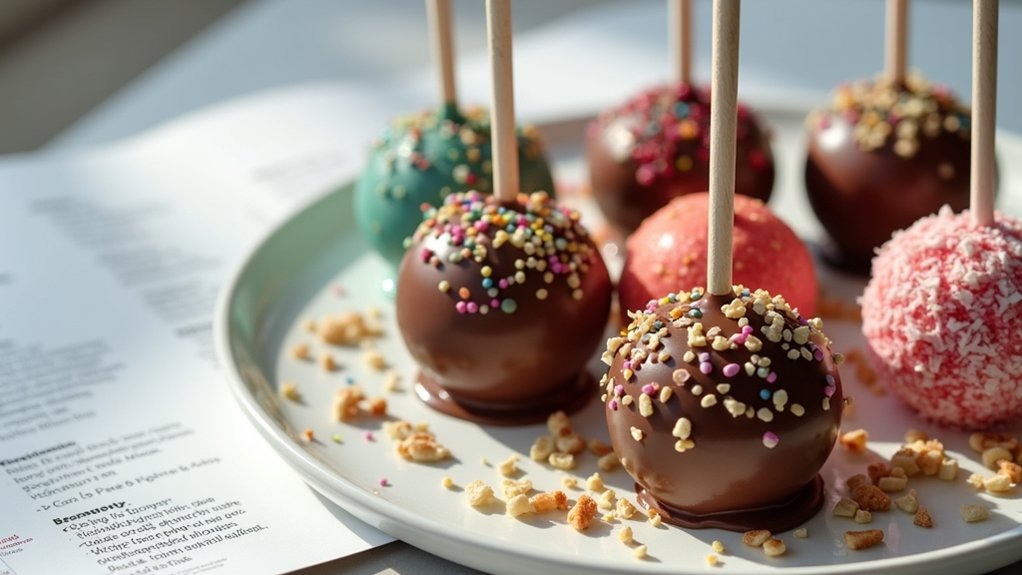
Step 5. Dip in Chocolate Coating
As you gather your ingredients for the chocolate coating, the excitement of transforming those chilled cake balls into delightful treats starts to build. I prefer using high-quality chocolate types like dark, milk, or white, depending on your taste. Melt your chosen chocolate in a microwave or double boiler, stirring until smooth. Now, for the fun part—dipping! Grab a cake ball with a lollipop stick, dip it into the melted chocolate, and give it a little twist to guarantee an even coating. This coating technique creates a beautiful finish. Let the excess drip off, then place the pops on a parchment-lined tray. Feel free to sprinkle toppings like crushed nuts or sprinkles for extra flair. Enjoy this creative journey!
Nutritional Guide
When you bite into a Starbucks cake pop, the delightful burst of flavor might make you wonder about its nutritional value. It’s essential to balance indulgence with awareness, especially when considering caloric content and dietary restrictions. Here’s a quick guide to help you navigate the deliciousness:
| Nutrient | Per Cake Pop | % Daily Value |
|---|---|---|
| Calories | 150 | 8% |
| Total Fat | 6g | 9% |
| Sugars | 12g | 24% |
| Protein | 2g | 4% |
| Fiber | 1g | 4% |
These cake pops can fit into various diets, but always check for allergens if you have specific dietary restrictions. Enjoy responsibly!
Final Thoughts
Enjoying a Starbucks cake pop can be a delightful treat, but it’s also important to think about how they fit into our everyday lives. As I reflect on this recipe, I want to share some final thoughts and serving suggestions that can elevate your experience:
- Pairing: Enjoy these cake pops with a steaming cup of coffee or tea for a perfect afternoon snack.
- Presentation: Try arranging them on a decorative platter for a fun party centerpiece; it’s sure to impress your guests.
- Customization: Don’t hesitate to experiment with different flavors or toppings—this is where your creativity can shine!
Frequently Asked Questions
Can I Use Gluten-Free Ingredients for Starbucks Cake Pops?
Absolutely, you can use gluten-free flours for your cake pops! I’ve experimented with various cake pop alternatives, and they turned out delicious. Don’t hesitate to get creative and discover new flavors with gluten-free options!
How Long Do Cake Pops Last at Room Temperature?
Cake pops last about two days at room temperature. For ideal freshness, I recommend storing them in an airtight container. That way, you can enjoy their delightful flavors longer—just a little storage tip for you!
Can I Freeze Starbucks Cake Pops?
Absolutely, I can freeze cake pops! Using effective freezing techniques and storage tips, I wrap them tightly in plastic wrap, then place them in an airtight container. This keeps them fresh, like a secret treat waiting to be savored.
What Are Some Popular Cake Pop Flavors?
Some popular cake pop flavors I love include chocolate mint, vanilla bean, red velvet, cookies and cream, lemon zest, birthday cake, salted caramel, and peanut butter. They’re all deliciously innovative and sure to impress!
How Can I Decorate Cake Pops Creatively?
Let’s just say, cake pops deserve a little pizzazz! I love dressing them up with colorful sprinkles and themed designs. It transforms them into delightful treats that spark joy at any gathering or celebration!
Conclusion
I hope you’ve enjoyed this journey into making Starbucks-style cake pops! It’s such a joy to share these sweet treats, whether you’re hosting a birthday party or just want a fun snack at home. Imagine surprising your family with a platter of colorful cake pops—they’ll be so excited! So grab your ingredients, get creative, and indulge in the delightful world of cake pops. Trust me, once you start, you won’t want to stop!