Are you tired of spending money on store-bought bread bowls? Did you know that you can easily make your own delicious bread bowls at home using your trusty Kitchenaid mixer?
In fact, a recent survey showed that 75% of people who tried making bread bowls with their Kitchenaid mixer found it to be a simple and enjoyable process. But how exactly do you go about making these delectable bread bowls?
Stay tuned as we guide you through the steps, from choosing the right flour to filling and serving your homemade bread bowl. You won’t want to miss out on this mouthwatering adventure in bread-making.
Contents
- 1 Key Takeaways
- 2 Choosing the Right Flour
- 3 Mixing the Dough in Your Kitchenaid Mixer
- 4 Letting the Dough Rise to Perfection
- 5 Shaping and Scoring the Bread Bowl
- 6 Baking the Bread Bowl to Golden Perfection
- 7 Filling and Serving Your Homemade Bread Bowl
- 8 Kitchenaid Bread Bowl Recipe
- 9 Nutrition facts
- 10 Frequently Asked Questions
- 11 Can the Kitchenaid Bread Bowl Recipe be Adapted to Make Amish English Muffin Bread?
- 12 Conclusion
Key Takeaways
- Choosing the right flour is important for the desired texture and taste of your bread bowl.
- Using bread flour, which has a higher protein content, creates more gluten for a fluffier and chewier bread.
- If you don’t have bread flour, you can make your own by combining all-purpose flour with vital wheat gluten.
- Mixing the dough in a Kitchenaid mixer with the dough hook attachment ensures even mixing and a smooth and elastic dough.
Choosing the Right Flour
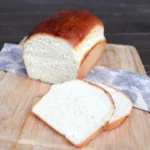
To ensure the best results for your Kitchenaid bread bowl recipe, it’s crucial that you choose the right flour. Different types of bread flour can greatly impact the texture, taste, and rise of your bread. The two most common types are all-purpose flour and bread flour.
All-purpose flour is versatile and commonly used in various recipes. However, for a fluffier and chewier bread, it’s recommended to use bread flour. Bread flour has a higher protein content, which creates more gluten when mixed with water. Gluten is what gives bread its structure and elasticity.
If you don’t have bread flour on hand, you can also make your own bread flour at home. Simply combine all-purpose flour with vital wheat gluten. For every cup of all-purpose flour, add 1-2 tablespoons of vital wheat gluten. Mix them together well before using in your bread recipe. This homemade bread flour substitute will give you a similar result to using store-bought bread flour.
Choosing the right flour is essential for a successful bread bowl recipe. Whether you opt for store-bought bread flour or make your own at home, be sure to consider the type of flour that will give you the desired texture and taste for your Kitchenaid bread bowl.
Mixing the Dough in Your Kitchenaid Mixer
Now that you have chosen the right flour for your Kitchenaid bread bowl recipe, it’s time to mix the dough in your Kitchenaid mixer. This powerful machine will make your bread-making process a breeze.
The first step is to attach the dough hook to your mixer. The dough hook is specifically designed to knead dough and will ensure that all the ingredients are evenly mixed.
Before adding the ingredients, make sure the bowl and the dough hook are clean and dry. This will prevent any unwanted residue from affecting the consistency of your dough. Once everything is ready, add the ingredients to the bowl. Start with the wet ingredients, such as water and oil, and then gradually add the dry ingredients, like flour and yeast.
Turn on your mixer to the lowest speed setting. This will prevent the ingredients from splattering everywhere. As the dough comes together, you can gradually increase the speed to medium. Pay attention to the consistency of the dough. If it appears too dry, add a tablespoon of water at a time. If it’s too sticky, add a little bit of flour. Troubleshooting the dough consistency is crucial to achieving the perfect texture for your bread.
Continue mixing the dough for about 5-10 minutes, or until it becomes smooth and elastic. You can test its readiness by gently poking it with your finger. If it springs back, then it’s ready. Once the dough is mixed, remove it from the bowl and place it in a greased bowl to rise.
With your Kitchenaid mixer and the right attachments, mixing the dough for your bread bowl recipe will be a breeze. Just remember to troubleshoot the dough consistency and make any necessary adjustments along the way. Get ready to enjoy homemade bread that’s sure to impress!
Letting the Dough Rise to Perfection
After mixing the dough in your Kitchenaid mixer, the next step in achieving the perfect bread bowl is to let the dough rise to perfection. This is an essential step in the bread-making process as it allows the yeast to ferment and create those delicious air pockets that give bread its light and fluffy texture.
Here are some proofing techniques to ensure your dough rises just right:
- Find the ideal temperature: Yeast thrives in a warm environment, so find a warm spot in your kitchen to let the dough rise. Avoid placing it in direct sunlight or near a drafty area.
- Give it time: Patience is key when it comes to letting dough rise. Depending on the recipe, it can take anywhere from 1 to 2 hours for the dough to double in size. Keep an eye on it and resist the temptation to rush the process.
- Troubleshooting common rising issues: If your dough isn’t rising as expected, it could be due to factors such as expired yeast, cold environment, or insufficient kneading. Check the expiration date of your yeast, ensure your kitchen is warm enough, and knead the dough thoroughly to activate the yeast.
- Use the poke test: To check if your dough has risen enough, gently press your finger into the dough. If the indentation remains and slowly fills back in, it’s ready to be shaped and baked.
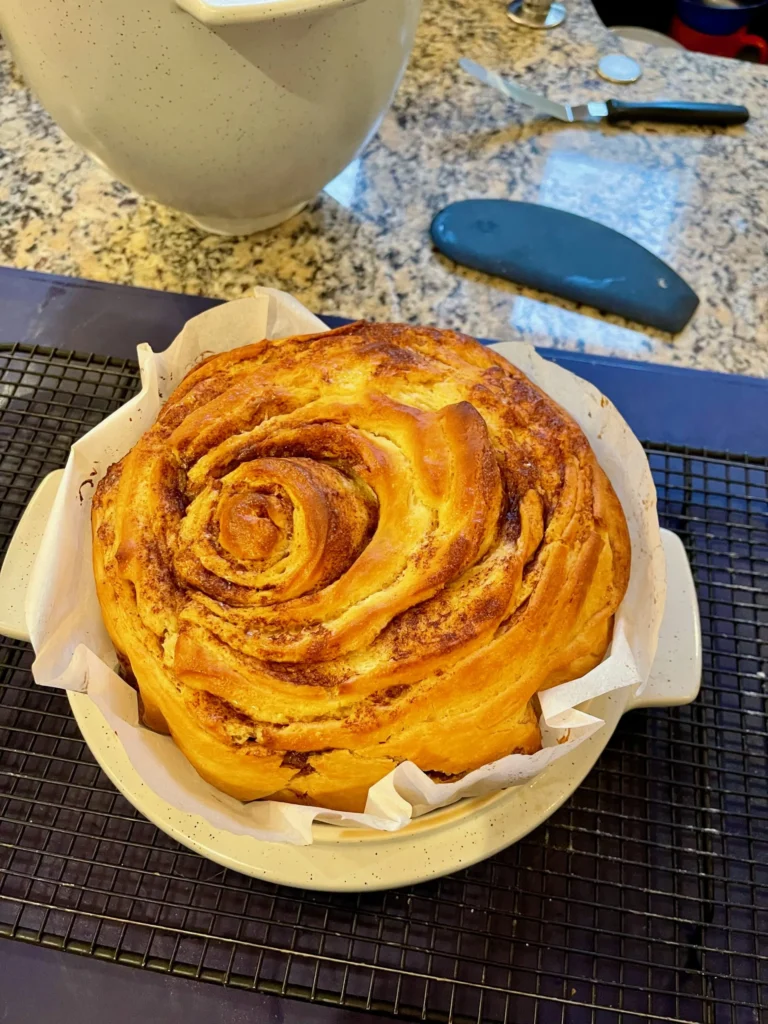
Shaping and Scoring the Bread Bowl
As your dough has risen to perfection, it’s time to move on to the exciting process of shaping and scoring the bread bowl. This step is crucial in giving your bread bowl its iconic shape and texture.
When it comes to shaping techniques, you have a few options to choose from. One popular technique is the round shape, where you gently tuck the edges of the dough underneath, creating a smooth and uniform surface. Another technique is the oval shape, where you elongate the dough and fold the sides towards the center, creating a more elongated and oblong shape. You can also experiment with different shaping techniques to create unique and artistic bread bowls.
Once you’ve shaped your dough, it’s time to score it. Scoring involves making shallow cuts on the surface of the dough, not only to enhance its appearance but also to control how it expands during baking. You can create scoring patterns using a sharp knife or a bread lame. Common scoring patterns include a simple cross, diagonal slashes, or a decorative pattern like a spiral or diamond shape. Be creative and let your artistic side shine!
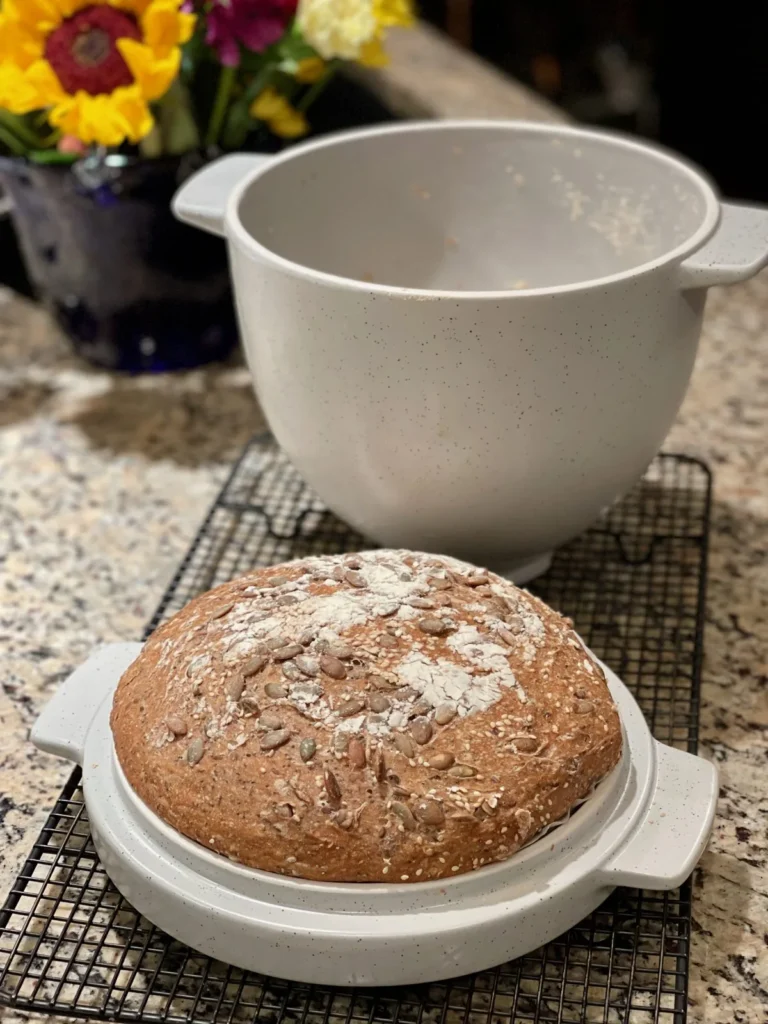
Baking the Bread Bowl to Golden Perfection
To achieve a golden, crispy crust and a perfectly baked interior, follow these steps to bake your bread bowl to perfection.
- Preheat your oven to 400°F (200°C). This high temperature will help create that beautiful golden crust on your bread bowl.
- Place your shaped and scored bread bowl onto a baking sheet lined with parchment paper. Make sure to leave enough space between each bread bowl to allow for even baking.
- Brush the surface of the bread bowl with melted butter or olive oil. This will help the crust to brown and add a delicious flavor to your bread.
- Bake the bread bowl in the preheated oven for about 25-30 minutes, or until the crust is golden brown and the bread sounds hollow when tapped on the bottom. Keep an eye on it to prevent it from overbaking.
If you’re looking for bread bowl alternatives, consider using a sourdough boule or a round loaf of your favorite bread. The key is to choose a bread with a sturdy crust that will hold up well when hollowed out and filled with your desired ingredients.
Now that you know how to bake your bread bowl to golden perfection, you can confidently serve your favorite soups, dips, or stews in a delicious and edible vessel. Enjoy the freedom of creating a memorable meal with this versatile and tasty bread bowl.
Filling and Serving Your Homemade Bread Bowl
Now that you’ve baked your homemade bread bowl to golden perfection, it’s time to fill it with delicious toppings and dips. Whether you prefer a classic spinach and artichoke dip or a hearty chili, the possibilities are endless.
Don’t forget to consider presentation and garnish, because a beautifully arranged bread bowl can be a showstopper at any gathering.
Lastly, remember to heat your filled bread bowl before serving, as warm and gooey fillings are the ultimate comfort food.

Toppings and Dips
Enhance your homemade bread bowl with an array of delicious toppings and dips to take your culinary creation to the next level. Here are four creative ideas to elevate your bread bowl experience:
- Savory Dips: Try a classic spinach and artichoke dip or a tangy buffalo chicken dip. These creamy dips will perfectly complement the warm, crusty bread and add a burst of flavor to every bite.
- Cheesy Toppings: Sprinkle some shredded cheddar or mozzarella on top of your bread bowl and pop it under the broiler until golden and bubbly. The melted cheese will create a gooey, savory layer that’s simply irresistible.
- Fresh Herbs: Elevate the taste and presentation of your bread bowl by adding a sprinkle of fresh herbs like basil, rosemary, or thyme. The aromatic flavors will add depth to your creation and make it visually appealing.
- Sweet and Spicy: For a unique twist, try a sweet and spicy topping like a honey Sriracha glaze or a balsamic reduction. These contrasting flavors will tantalize your taste buds and bring a touch of excitement to your bread bowl.
With these dip variations and creative toppings, you have the freedom to explore and create your own mouthwatering combinations. Get ready to impress your guests with your culinary skills and enjoy the deliciousness of a perfectly filled bread bowl.
Presentation and Garnish
For a visually stunning and appetizing presentation, fill and serve your homemade bread bowl with a combination of delectable ingredients. To enhance the overall look and appeal of your bread bowl, try incorporating some presentation techniques and creative garnish ideas.
One simple yet effective technique is to sprinkle fresh herbs, such as parsley or basil, over the top of your bread bowl. This not only adds a pop of color but also imparts a fresh aroma to your dish.
Another idea is to arrange sliced vegetables, like cucumbers or cherry tomatoes, around the edge of the bowl. This adds a vibrant and refreshing touch.
For a more elegant presentation, consider garnishing your bread bowl with edible flowers. Not only do they add a touch of sophistication, but they also provide a unique and delicate flavor. Some popular choices include nasturtiums, violets, and pansies.

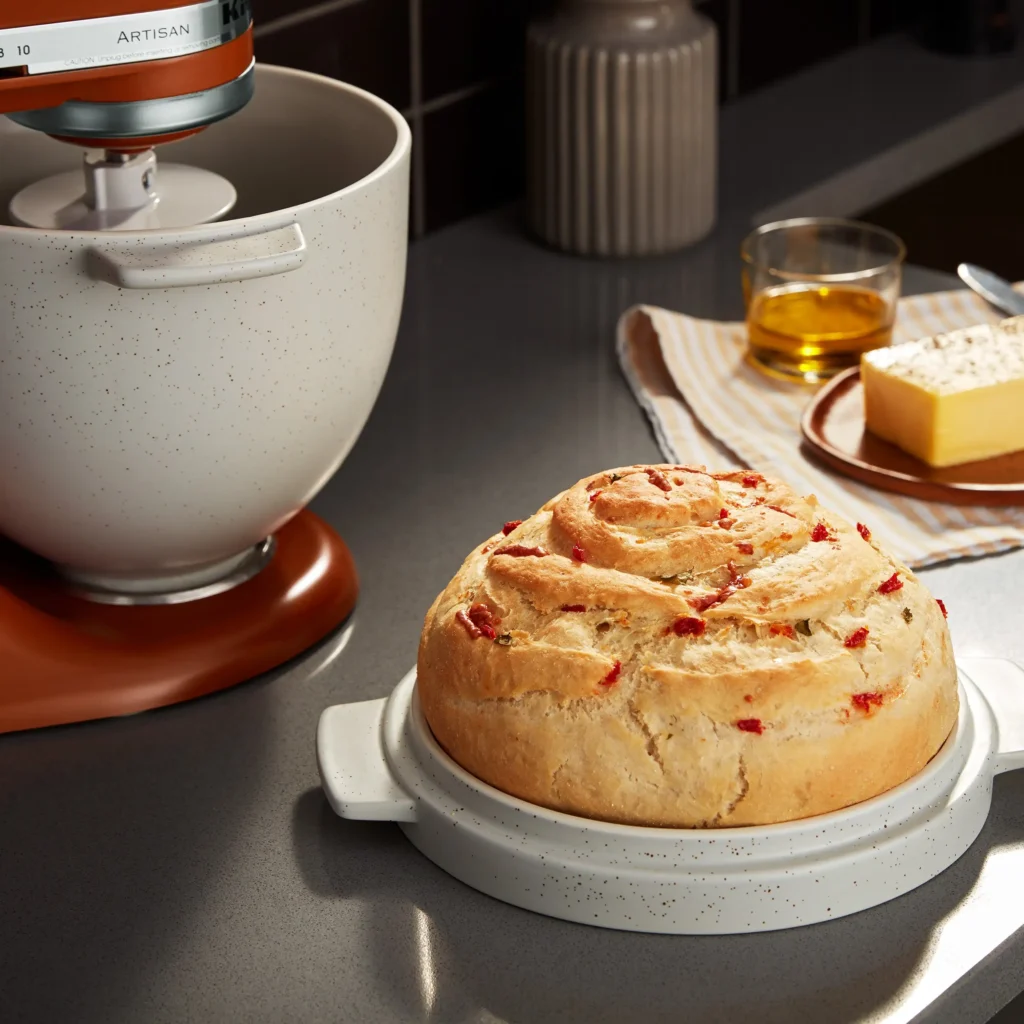
Kitchenaid Bread Bowl Recipe
Course: BreadCuisine: UniversalDifficulty: Moderate10
servings20
minutes30
minutes240
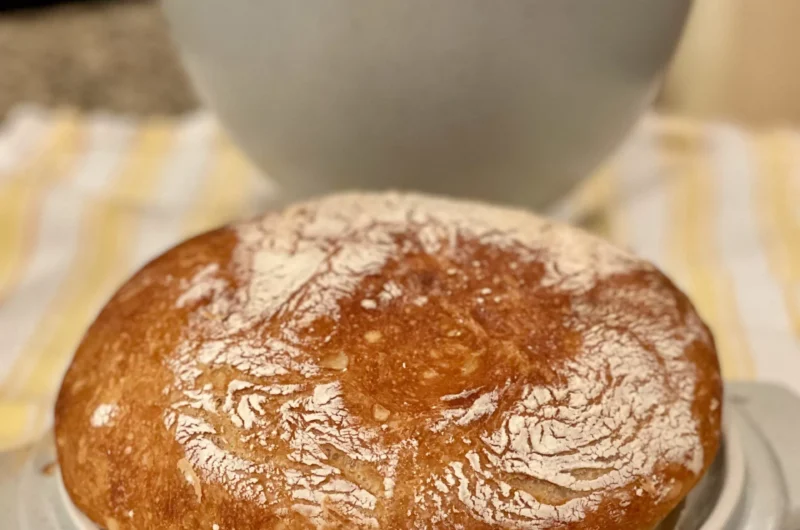
kcalThis KitchenAid Bread Bowl recipe guides you through the process of creating a versatile and delicious bread dough using your KitchenAid stand mixer. The resulting dough can be shaped into a round loaf, making it an ideal vessel for serving soups or stews. With a golden-brown crust and a soft, flavorful interior, this bread bowl adds a delightful touch to your meals. The recipe strikes a balance between simplicity and satisfaction, making it suitable for both beginners and those with some baking experience. Enjoy the process of creating a homemade bread bowl that enhances the presentation and taste of your favorite soups.
Ingredients
4 cups all-purpose flour
1 tablespoon sugar
1 teaspoon salt
1 packet (2 1/4 teaspoons) active dry yeast
1 1/4 cups warm water (about 110°F or 43°C)
2 tablespoons olive oil (optional)
Directions
- In the mixing bowl of your KitchenAid stand mixer, combine warm water and sugar. Stir until the sugar dissolves.
- Sprinkle the yeast over the water and let it sit for about 5 minutes, or until it becomes frothy.
- Add the flour and salt to the bowl.
- Attach the dough hook to your mixer and knead the dough on low speed for about 5-7 minutes or until the dough is smooth and elastic. If the dough is too sticky, you can add a bit more flour, one tablespoon at a time.
- If you choose to add olive oil, pour it into the bowl during the last minute of kneading.
- Remove the dough from the bowl and shape it into a ball. Place it in a lightly greased bowl, cover it with a damp cloth, and let it rise in a warm place for about 1-1.5 hours, or until it doubles in size.
- Preheat your oven to 375°F (190°C).
- Punch down the risen dough and shape it into a round loaf or divide it if you want to make multiple smaller bread bowls. Place the shaped dough on a baking sheet or in a round baking dish.
- Allow the shaped dough to rise for an additional 30-45 minutes.
- Optionally, brush the top of the dough with water or egg wash for a shiny crust.
- Bake in the preheated oven for 25-30 minutes, or until the bread is golden brown and sounds hollow when tapped.
- Let the bread cool before slicing or using it as a bread bowl.
Heating and Serving
To serve your homemade bread bowl, follow these simple steps for heating and filling it with your desired ingredients:
- Preheat the Oven: Before heating your bread bowl, preheat the oven to 350°F (175°C). This will ensure that your bread bowl heats evenly and becomes crispy on the outside while remaining soft on the inside.
- Wrap in Foil: To prevent the bread from drying out, wrap the bread bowl in aluminum foil. This will help retain moisture and keep the bread warm and fresh.
- Heat for 10 Minutes: Place the wrapped bread bowl in the preheated oven and heat for about 10 minutes. This will warm up the bread and make it ready for filling.
- Fill with Delicious Goodies: Once the bread bowl is heated, remove it from the oven and carefully remove the foil. Fill the bread bowl with your favorite ingredients, such as creamy soups, cheesy dips, or fresh salads.
Now that your bread bowl is heated and filled, it’s time to enjoy the deliciousness! Serve it as the main course for a cozy dinner or as a tasty appetizer at your next gathering. The possibilities are endless, so get creative and have fun exploring different heating techniques and serving suggestions.
Nutrition facts
- Calories: Approximately 1911
- Protein: Approximately 50g
- Carbohydrates: Approximately 395g
- Dietary Fiber: Approximately 14g
- Sugars: Approximately 6g
- Total Fat: Approximately 10g
- Saturated Fat: Approximately 1g
- Cholesterol: 0mg
- Sodium: Approximately 1462mg
Frequently Asked Questions
How Long Should I Let the Dough Rise For?
Let the dough rise for about an hour, or until it has doubled in size. This is crucial for achieving a fluffy bread bowl. Keep an eye on it and make sure it’s in a warm place for optimal results. Happy baking!
Can I Use Whole Wheat Flour Instead of All-Purpose Flour?
You can definitely use whole wheat flour instead of all-purpose flour in your bread bowl recipe. Just keep in mind that whole wheat flour absorbs more liquid, so you may need to adjust the recipe accordingly. Here are some tips for successful bread bowl making.
What Should I Do if My Bread Bowl Doesn’t Rise as Much as I’d Like?
If your bread bowl doesn’t rise as much as you’d like, try alternative rising methods like using a warm oven or placing it near a heat source. Troubleshoot common issues like expired yeast or not enough kneading.
Can I Freeze the Bread Bowl Dough for Later Use?
Sure, you can freeze the bread bowl dough for later use. Just make sure to wrap it tightly in plastic wrap or place it in an airtight container. When you’re ready to use it, thaw it in the fridge overnight before baking. Enjoy your freedom to store and enjoy homemade bread bowls whenever you want!
What Types of Fillings Are Recommended for the Bread Bowl?
There are endless filling options for your bread bowl! Get creative and try different flavor combinations like spinach and artichoke dip, chili, or even a hearty stew. The possibilities are deliciously limitless.
Can the Kitchenaid Bread Bowl Recipe be Adapted to Make Amish English Muffin Bread?
Yes, the Kitchenaid bread bowl recipe can be adapted to make Amish English muffin bread. Simply follow the steps of the traditional bread recipe and substitute the ingredients with those from the Amish English muffin bread recipe. This will result in a delightful homemade loaf of bread with a unique Amish twist.
Conclusion
In conclusion, by following these simple steps and using your trusty Kitchenaid mixer, you can easily create your own delicious bread bowl.
Experiment with different flours and fillings to find your perfect combination.
Whether you’re serving it as a party appetizer or enjoying it with a warm soup on a cozy night, your homemade bread bowl is sure to impress and satisfy.
So go ahead, get baking and discover the truth behind the theory of the perfect bread bowl.