If you’re looking to whip up a delightful King Cake, I’ve got just the recipe for you! Start by dissolving yeast in warm milk, then mix in sugar, butter, eggs, and vanilla. Gradually add flour until a soft dough forms. After a rise, shape it into a ring and bake. Once it’s golden, add colorful icing for that festive touch. It’s a wonderful way to celebrate togetherness, and there’s so much more to learn about this delicious tradition!
Contents
History

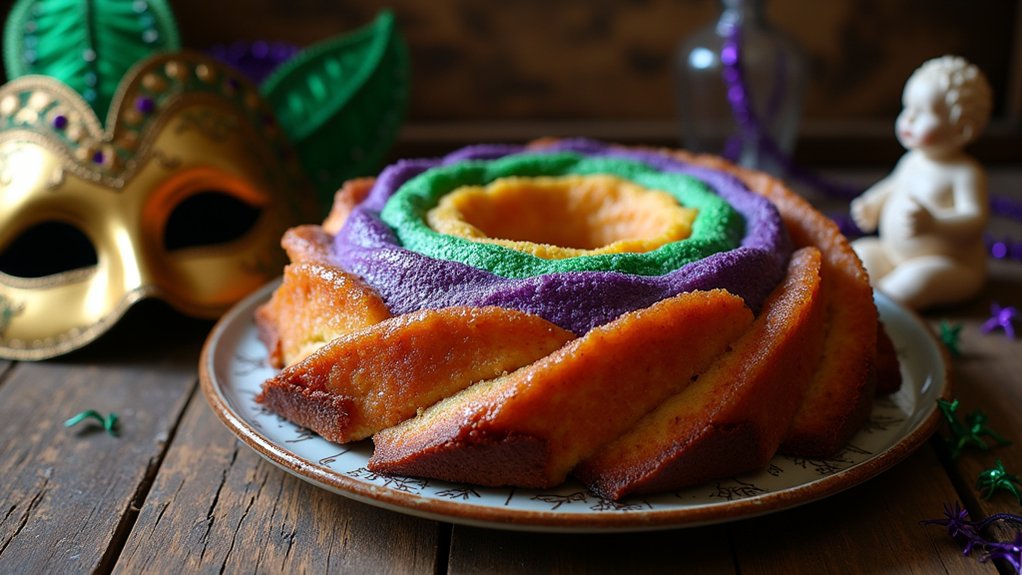
When you think about King Cake, it’s hard not to feel a sense of celebration and tradition. This delightful pastry isn’t just a treat; it carries deep cultural significance, especially during Mardi Gras. I love how it brings people together, fostering festive traditions that span generations. The vibrant colors of purple, green, and gold represent justice, faith, and power, reflecting the spirit of the season. Each bite connects us to the rich history of New Orleans, where King Cake originally took shape. As I bake this cake, I can’t help but feel the excitement building, knowing it’s a centerpiece for gatherings filled with laughter and joy. It’s more than a recipe; it’s a delicious way to celebrate life and community.
Recipe
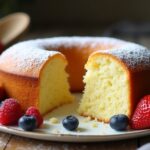
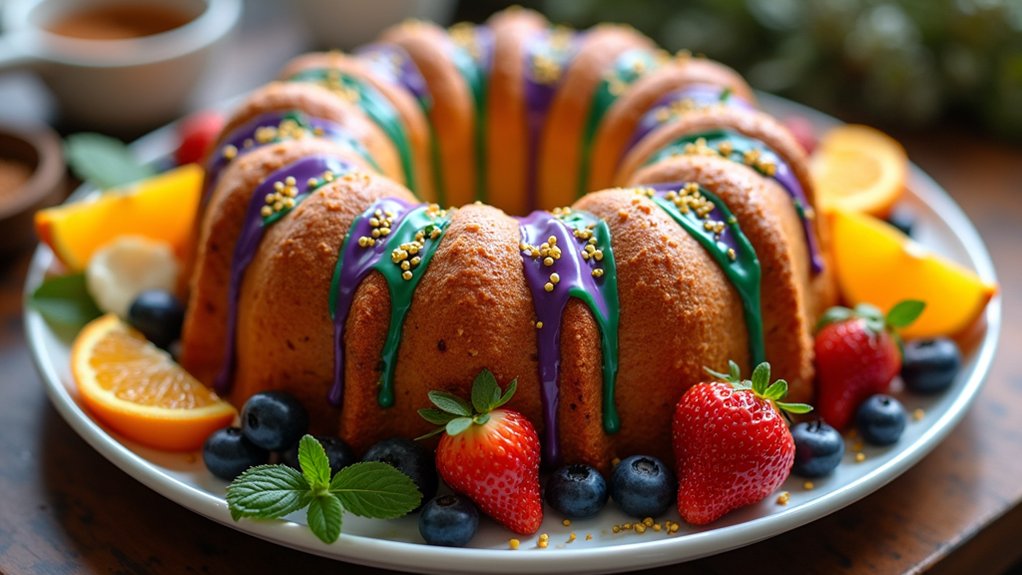
King Cake is a delightful and festive pastry traditionally enjoyed during the Carnival season, particularly in New Orleans leading up to Mardi Gras. Its vibrant colors and sweet flavors make it a centerpiece for celebrations, filled with cream cheese or fruit fillings and often adorned with icing and colorful sprinkles. The cake is known for hiding a small plastic baby, and whoever finds it is tasked with hosting next year’s King Cake party or bringing the next cake, adding an element of fun and tradition to the festivities.
Making your own King Cake at home is a rewarding experience that allows you to customize the flavors and fillings to your liking. The dough is rich and tender, enriched with butter and eggs, while the toppings bring a pop of color and sweetness. This recipe will guide you through the process of creating a delicious King Cake that will impress your friends and family during the Mardi Gras season or any festive occasion.
Creating your own King Cake at home offers a delightful way to personalize flavors and impress loved ones during celebrations.
Ingredients:
- 1 packet of active dry yeast (2 ¼ teaspoons)
- ½ cup warm milk (110°F)
- ⅓ cup granulated sugar
- ½ cup unsalted butter, softened
- 2 large eggs
- 1 teaspoon vanilla extract
- 1 teaspoon salt
- 4 cups all-purpose flour
- 1 cup cream cheese, softened
- 1 cup powdered sugar
- 1 tablespoon lemon juice
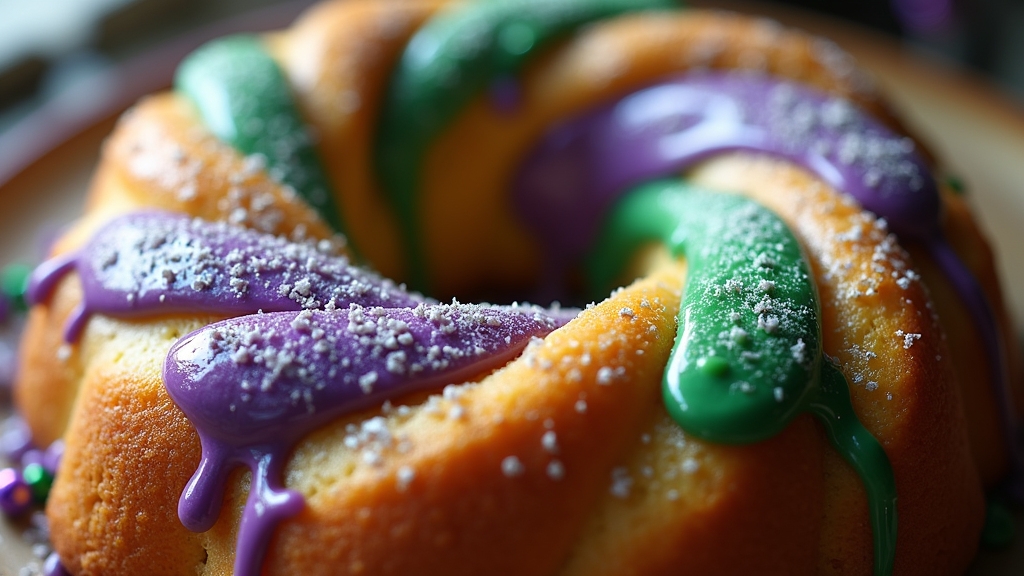
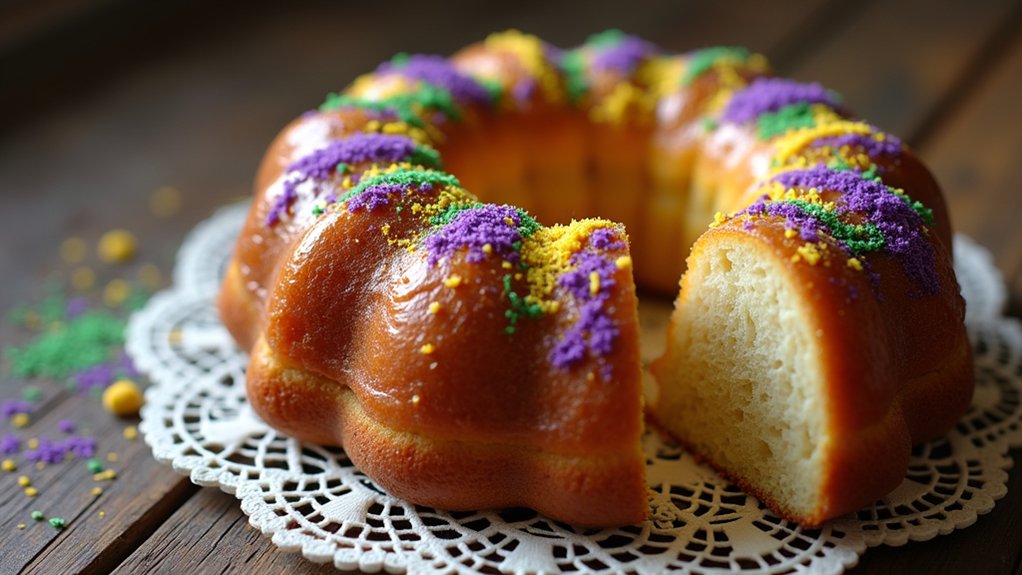
- Colored sugar (purple, green, and gold) for decoration
- Small plastic baby (optional)
Cooking Instructions:
In a large mixing bowl, dissolve the yeast in warm milk and let it sit for about 5 minutes until frothy. Add granulated sugar, softened butter, eggs, vanilla extract, and salt to the bowl, mixing well. Gradually incorporate the flour, one cup at a time, until the dough forms. Knead the dough on a floured surface for about 5-7 minutes until it is smooth and elastic. Place the dough in a greased bowl, cover it with a damp cloth, and let it rise in a warm place until it doubles in size, about 1-2 hours. Once risen, roll the dough into a large rectangle, spread the cream cheese mixture on top, and roll it tightly into a log. Shape the log into a circle and place it on a baking sheet lined with parchment paper. Let it rise again for about 30 minutes before baking in a preheated oven at 350°F for 25-30 minutes until golden brown. Allow the cake to cool before icing and decorating with colored sugars.
Extra Tips:
When making King Cake, be sure to grease your bowl and surface well to prevent the dough from sticking. You can experiment with different fillings, such as fruit preserves or chocolate, to make the cake uniquely yours. If you want a more intense flavor, consider adding spices such as cinnamon or nutmeg to the dough. Finally, remember to hide the plastic baby only after the cake has been baked and cooled; it adds an element of surprise when served! Enjoy your homemade King Cake as part of your celebration!
Cooking Steps

Now that we have our ingredients ready, it’s time to get cooking! First, I’ll preheat the oven to 350°F, which sets the stage for our delicious King Cake. Then, I’ll mix the dry ingredients thoroughly before adding the wet ones gradually, ensuring every bite is packed with flavor.
Step 1. Preheat the Oven to 350°F
Before diving into making the delicious King Cake, let’s get the oven ready by preheating it to 350°F. This step is essential, as it guarantees that our cake bakes evenly and achieves that perfect golden-brown crust. Adjusting the oven settings might seem simple, but it’s a foundational baking tip that can make a huge difference. While the oven heats up, take a moment to gather your ingredients. This will streamline the process and keep you organized. Remember, patience is key; a properly preheated oven helps the cake rise beautifully and develop amazing flavors. So, let’s embrace this exciting journey of baking together, knowing that every step brings us closer to a delightful King Cake to share and enjoy!
Step 2. Mix Dry Ingredients Thoroughly
With the oven all warmed up, it’s time to tackle the dry ingredients. First, I sift together all-purpose flour and bread flour—each brings something unique to the table. The all-purpose flour gives a soft texture, while the bread flour adds that delightful chewiness we crave in a king cake. I toss in a pinch of salt and some sugar for sweetness, then add a sprinkle of cinnamon for a hint of warmth. Using a whisk, I mix these flour types thoroughly, ensuring even distribution of flavors. This step’s essential, as it sets the foundation for our cake’s delightful rise and taste. Trust me, taking your time here pays off when you slice into that beautifully baked king cake!
Step 3. Add Wet Ingredients Gradually
As you gear up to add the wet ingredients to your dry mixture, it’s important to remember that patience is key. Using innovative wet ingredient techniques, I like to pour in my liquids slowly, allowing the dry mix to absorb each addition fully. This gradual addition not only keeps the batter smooth but also enhances the flavors, creating a delightful balance. I usually start with a little of the milk or eggs, stirring gently, then add more as needed. Keep an eye on the texture; it should feel cohesive but not too wet. Trust me, this method guarantees the perfect consistency for your king cake, leading to that scrumptious, tender crumb we all crave! Enjoy the process!
Step 4. Knead Dough Until Smooth
Get ready to roll up your sleeves because kneading the dough is where the magic happens! This step is all about transforming your mixture into a silky, smooth dough texture. Start by dusting your work surface with a little flour, and then turn the dough out. Using your palms, push down and away, then fold it back over itself. Repeat this motion, and soon you’ll find the dough becoming more elastic and cohesive. Don’t be afraid to experiment with different kneading techniques—try a twist or a fold to really get the gluten working. You want the dough to feel soft but not sticky. Once it’s smooth and supple, you’ll know you’re ready to move on to the next exciting step!
Step 5. Shape Dough Into Ring
Now that your dough is smooth and ready, it’s time to shape it into a ring, which is one of the most fun parts of making a King Cake! This step is all about dough shaping and getting that beautiful ring formation just right. Here’s how I do it:
- Gently roll the dough into a long rope, about 24 inches in length.
- Form the rope into a circle, bringing the ends together.
- Pinch the ends firmly to guarantee they’re well connected.
- Transfer the ring to a lined baking sheet, making sure it’s centered.
Feel free to get creative! You can twist the dough or add fun designs. The excitement of sharing this cake with friends and family makes the effort totally worth it!
Nutritional Guide
When you plunge into making a delicious King Cake, it’s important to reflect on its nutritional aspects, especially if you’re planning to share it with friends and family. Understanding the caloric content can help you make informed choices. If you’re looking for innovation, consider ingredient substitutes to lighten it up without sacrificing flavor. Here’s a quick guide to get you started:
| Nutrient | Amount per Slice |
|---|---|
| Calories | 350 |
| Total Fat | 15g |
| Sugar | 20g |
| Protein | 5g |
| Fiber | 1g |
Final Thoughts

As we wrap up our journey into the delightful world of King Cake, I can’t help but feel excited about the memories that this festive treat can create. Whether it’s Mardi Gras or a family gathering, King Cake brings people together, celebrating traditions in every bite. I encourage you to explore flavor variations, making this recipe truly your own. Here are a few ideas to get you started:
- Try adding a creamy filling, like cream cheese or fruit preserves.
- Experiment with different toppings, from chocolate to nuts.
- Incorporate spices, like cinnamon or nutmeg, for a unique twist.
- Personalize the colors of your icing to match your celebration theme.
Let’s keep the spirit of King Cake alive and share these delicious moments!
Frequently Asked Questions
What Is the Significance of the Baby Figurine in King Cake?
The baby figurine symbolizes luck and prosperity in the king cake tradition. When I find it in my slice, I feel a sense of joy and responsibility to host next year’s celebration—it’s a fun, festive ritual!
Can I Make King Cake Ahead of Time?
Absolutely, you can make king cake ahead of time! I suggest using freezing techniques for ideal freshness. Just wrap it tightly and follow my preparation tips to guarantee it stays delicious when you’re ready to enjoy it.
How Should I Store Leftover King Cake?
I usually store leftover king cake in an airtight container at room temperature for a few days. For longer storage, I recommend freezing it using proper methods to maintain freshness. Those storing tips really work wonders!
What Variations of King Cake Exist?
I love exploring king cake variations! You’ve got traditional flavors like cinnamon and cream cheese, but regional styles introduce unique twists—think fruit fillings or even savory options. It’s all about creativity and fun during Mardi Gras!
Is King Cake Gluten-Free or Vegan-Friendly?
No, king cake isn’t naturally gluten-free or vegan-friendly, but I’ve discovered amazing gluten-free options and stellar vegan substitutes! It’s a game-changer, and you’ll be amazed at how delicious these alternatives can be!
Conclusion
Making a king cake is more than just baking; it’s about creating memories with friends and family. I remember the first time I made one for Mardi Gras; the laughter and excitement as we searched for the tiny baby was unforgettable. So, whether you’re celebrating a special occasion or just want to try something new, I encourage you to give this recipe a go. You might just create a delicious tradition of your own! Enjoy every bite!