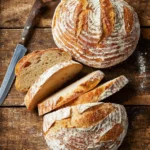
They say that necessity is the mother of invention, and when it comes to gluten-free bread, King Arthur has perfected the recipe. Imagine sinking your teeth into a warm, fluffy loaf, with all the taste and texture you thought you had to give up.
But how do they do it? What’s the secret behind their gluten-free bread that has everyone talking?
Well, my friend, get ready to have your taste buds tantalized and your curiosity piqued because in the next few paragraphs, we will unravel the mysteries of King Arthur’s gluten-free bread recipe and reveal how you can recreate this culinary masterpiece in your own kitchen.
Contents
- 1 Key Takeaways
- 2 Ingredients
- 3 Mixing the Dough
- 4 Proofing the Dough
- 5 Shaping and Baking
- 6 King Arthur Gluten Free Bread Recipe
- 7 Cooling and Storing
- 8 Tips and Variations
- 9 Nutritional facts
- 10 Frequently Asked Questions
- 10.1 Can I Substitute the Gluten-Free Flour With Regular All-Purpose Flour in This Recipe?
- 10.2 How Long Does It Take for the Bread Dough to Proof?
- 10.3 Can I Use a Bread Machine to Mix and Knead the Gluten-Free Bread Dough?
- 10.4 Can I Freeze the Gluten-Free Bread for Later Use?
- 10.5 Can I Add Nuts or Seeds to the Bread Dough for Added Texture and Flavor?
- 11 Conclusion
Key Takeaways
- King Arthur’s Gluten-Free Bread Recipe uses a combination of almond flour, coconut flour, rice flour, oat flour, and tapioca flour to achieve a flavorful and moist texture.
- Xanthan gum is used in the recipe to mimic the elasticity and structure of gluten.
- The dough for King Arthur’s Gluten-Free Bread should be mixed thoroughly and kneaded until smooth and elastic.
- Proper proofing is essential for achieving the desired texture of the bread, with shorter times resulting in a denser texture and longer times creating a fluffy texture.

Ingredients
To make this delicious gluten-free bread, gather all the necessary ingredients in your kitchen. When it comes to gluten-free baking, finding the right alternative flours is key.
The good news is that there are plenty of options available to suit your dietary needs. One popular choice is almond flour, which adds a nutty flavor and a moist texture to your bread. Another great option is coconut flour, which is high in fiber and adds a subtle sweetness to your bread. If you prefer a more neutral taste, you can use rice flour or oat flour. These flours are versatile and work well in a variety of recipes.
Don’t forget about tapioca flour, which helps to bind the ingredients together and gives your bread a nice chewy texture. Lastly, xanthan gum is an essential ingredient when baking gluten-free bread. It helps to mimic the elasticity and structure that gluten provides.
Mixing the Dough
Start by combining all of the dry ingredients in a large mixing bowl. This includes the gluten-free flour blend, xanthan gum, sugar, salt, and yeast. Make sure to whisk them together thoroughly to ensure even distribution.
Next, it’s time to add the wet ingredients to the bowl. This includes warm water, melted butter, and eggs. Gently pour them into the dry ingredients and use a wooden spoon or your hands to mix everything together. The dough should start to come together, but it may be a bit sticky at this point.
Now comes the fun part – the kneading technique. Liberally dust your work surface with gluten-free flour and turn the dough out onto it. Use the heel of your hand to push the dough away from you, then fold it back over itself. Repeat this process for about 5-10 minutes, or until the dough becomes smooth and elastic.
If you find that the dough is too dry, add a tablespoon of warm water at a time until it reaches the desired consistency. On the other hand, if the dough is too wet, add a tablespoon of gluten-free flour at a time until it becomes easier to handle.
Once the dough is properly kneaded, place it back into the mixing bowl and cover it with a clean kitchen towel. Let it rise in a warm place for about 1-2 hours, or until it has doubled in size.
And there you have it – a perfectly mixed dough ready to be transformed into delicious gluten-free bread!
Proofing the Dough
Now it’s time to let your dough rest and rise to perfection.
The proofing stage is crucial for developing the flavors and texture of your gluten-free bread.
Creating the ideal conditions, such as a warm environment free from drafts, will help your dough rise properly.
Be mindful of the length of proofing time, as it can vary depending on the recipe and ambient temperature.

Ideal Proofing Conditions
For optimal results, ensure that you create the perfect environment for proofing the dough. The proofing process is crucial in bread making as it allows the dough to rise and develop its flavor and texture. To achieve the best results, you need to consider two key factors: the optimal temperature and humidity control.
First, let’s talk about temperature. Yeast, the magical ingredient responsible for making the dough rise, thrives in warm conditions. The ideal temperature for proofing bread is around 75-80°F (24-27°C). This warmth encourages the yeast to ferment and produce carbon dioxide, which creates those lovely air pockets in your bread.
Next, humidity control is equally important. Too much humidity can make the dough sticky and difficult to handle, whereas too little can lead to a dry and crusty crust. Aim for a humidity level of around 70-80% to keep the dough moist and pliable.
Length of Proofing Time
To achieve perfectly proofed dough, carefully consider the length of time needed for fermentation. The proofing time plays a crucial role in gluten development and ultimately affects the texture of your bread. Let’s compare the effects of different proofing times on gluten development and the resulting texture of bread.
| Proofing Time | Gluten Development | Texture |
|---|---|---|
| Short | Limited | Dense |
| Medium | Moderate | Soft |
| Long | Extensive | Fluffy |
With shorter proofing times, the gluten development is limited, resulting in a denser texture. On the other hand, longer proofing times allow for more extensive gluten development, giving the bread a fluffy texture. It’s important to find the right balance based on your preferences. Experiment with different proofing times to achieve the perfect texture that suits your taste. Enjoy the freedom of creating gluten-free bread with the ideal proofing time for your desired outcome.
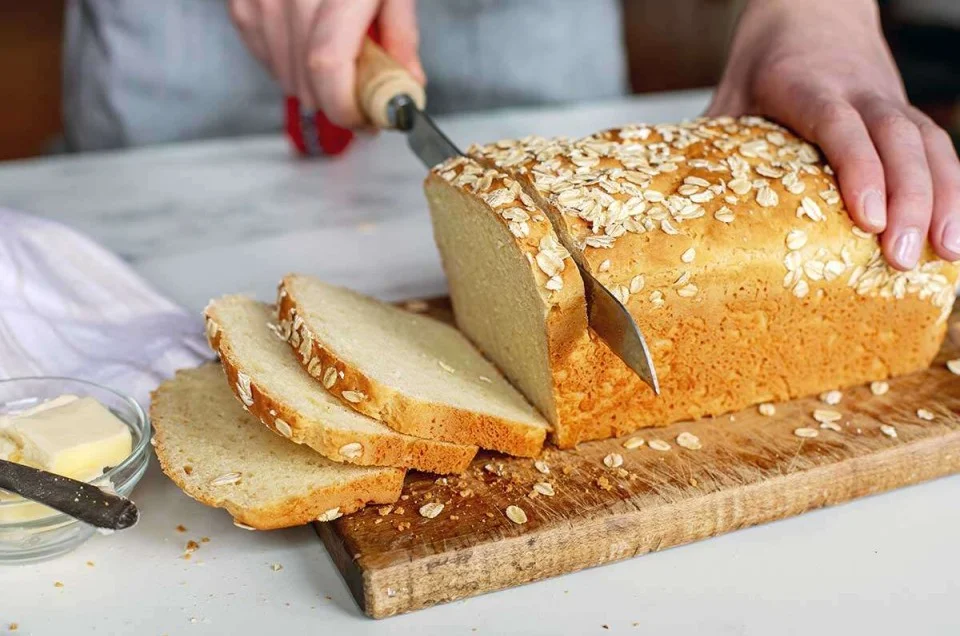
Shaping and Baking
Now that your dough has proofed beautifully, it’s time to move on to shaping and baking. This step is crucial in achieving the perfect texture and appearance for your gluten-free bread.
Firstly, you’ll need to prepare the dough by gently shaping it into the desired shape, whether it’s a loaf, rolls, or even a baguette.
Next, choosing the right pan is essential to ensure even baking and prevent sticking.
Lastly, pay close attention to the baking time and temperature, as gluten-free bread can be more delicate and require slightly different conditions than regular bread.
Preparing the Dough
Once you have finished mixing the ingredients together, it’s time to shape the gluten-free bread dough and get it ready for baking. Working with gluten-free dough can be a bit different than working with traditional dough, but with a few tips and tricks, you’ll have a delicious loaf of bread in no time.
First, make sure your hands are well-floured to prevent sticking. Carefully shape the dough into a smooth ball, gently tucking the edges underneath. Place the shaped dough into a greased bread pan, cover it with a clean towel, and let it rise until doubled in size.
Preheat your oven to the recommended temperature, then bake the bread until golden brown and hollow-sounding when tapped on the bottom.
Troubleshooting common dough problems like dryness or lack of rise can often be solved by adding a tablespoon or two of additional liquid or adjusting the oven temperature. So don’t be afraid to experiment and make this gluten-free bread your own!
Choosing the Right Pan
When shaping and baking your gluten-free bread, it’s important to choose the right pan to ensure the best results.
Here are some tips to help you choose the right pan for your gluten-free bread:
- Size: Choose a pan that’s the appropriate size for your recipe. Using the wrong size pan can result in uneven baking and a bread that doesn’t rise properly.
- Material: Opt for a non-stick pan to prevent the bread from sticking and ensure easy release. Silicone pans are also a great option for gluten-free bread.
- Shape: Consider the shape of the pan you want your bread to have. There are various shapes available, such as loaf pans, round pans, and baguette pans.
- Brand: Look for pans from reputable brands that specialize in gluten-free baking. Some of the best gluten-free bread brands offer their own line of baking pans, specifically designed for gluten-free bread.
Choosing the right pan is crucial in achieving the perfect gluten-free bread. So take your time to consider these factors and enjoy the freedom of delicious gluten-free bread at home.

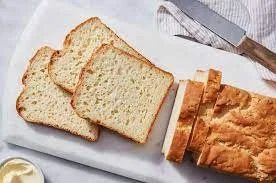
King Arthur Gluten Free Bread Recipe
Course: Main courseCuisine: AmericanDifficulty: Moderate10
servings15
minutes35
minutes180
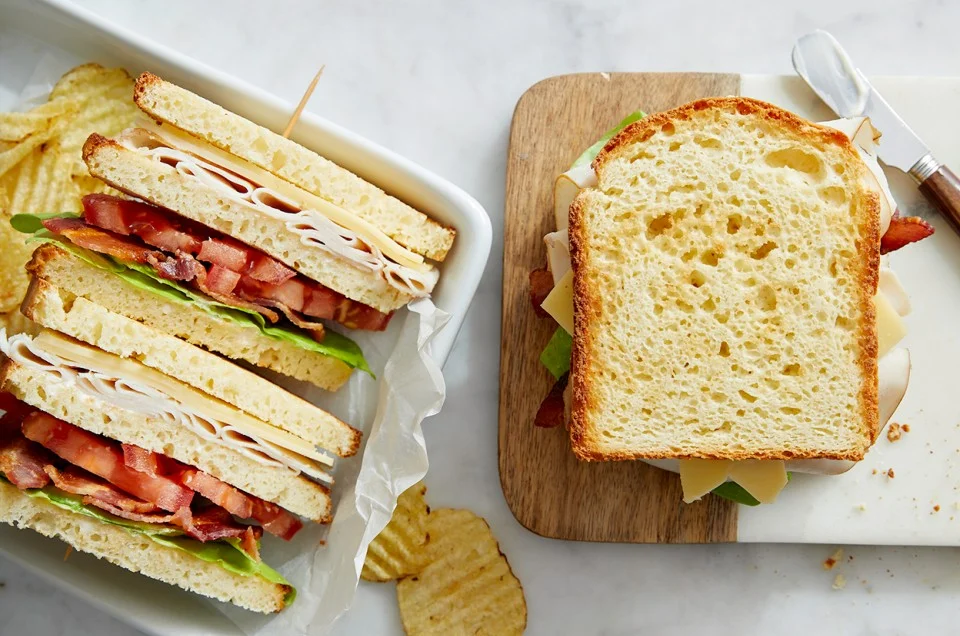
kcalKing Arthur Gluten-Free Bread Recipe is a delicious and easy-to-make bread suitable for those with gluten sensitivities. It yields a soft and fluffy loaf perfect for sandwiches or toast.
Ingredients
King Arthur Gluten-Free All-Purpose Flour
Yeast
Sugar
Salt
Directions
- Activate yeast in warm water with sugar.
- Mix flour and salt, then add yeast mixture.
- Knead dough until smooth, then let it rise.
- Shape dough, place in pan, let rise again, and bake until golden.
Baking Time and Temperature
To ensure your gluten-free bread bakes to perfection, it’s essential to carefully consider the baking time and temperature.
The ideal baking conditions for gluten-free bread are slightly different from those of regular bread. The recommended baking temperature for gluten-free bread is 375°F (190°C). This temperature allows the bread to rise properly and develop a nice golden crust. However, it’s important to note that different ovens may vary in temperature, so it’s always a good idea to use an oven thermometer to ensure accuracy.
As for the baking time, it typically takes about 45-55 minutes for gluten-free bread to bake. To test for doneness, you can insert a toothpick into the center of the loaf. If it comes out clean or with a few crumbs, the bread is ready.
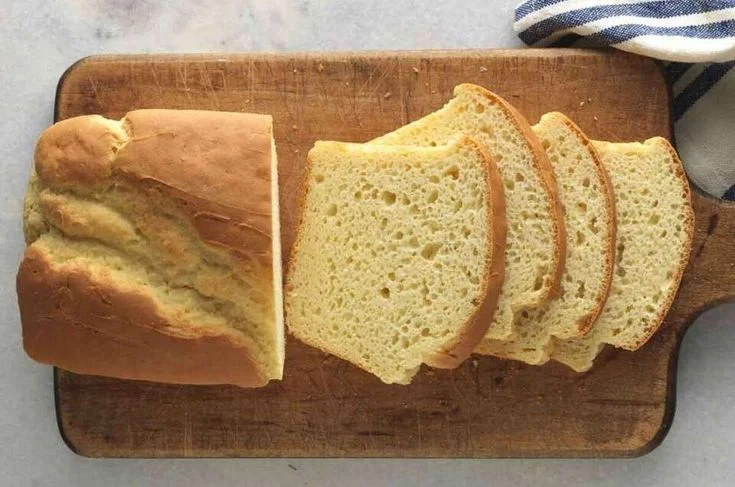
Cooling and Storing
For optimal results, allow your gluten-free bread to cool completely before storing it. This is important because if you store the bread while it’s still warm, the trapped moisture can cause it to become soggy. Nobody wants a soggy bread, right? So, be patient and let it cool down before moving on to the next step.
Once your bread has cooled down, it’s time to store it properly. Here are some tips to help you keep your gluten-free bread fresh and delicious for longer:
- Wrap it tightly: Use plastic wrap or airtight containers to wrap your bread. This will help prevent moisture from getting in and making your bread go stale.
- Store it in a cool, dry place: Avoid storing your gluten-free bread in humid areas, as moisture can cause it to become moldy. Instead, find a cool and dry spot in your kitchen or pantry to keep it fresh.
- Slice and freeze: If you have a large loaf of gluten-free bread and won’t be able to finish it before it goes bad, consider slicing it and freezing individual portions. This way, you can thaw and enjoy your bread whenever you want without worrying about it going stale.
- Use a bread box: If you have one, a bread box can be a great way to store your gluten-free bread. It provides a dark and dry environment that helps keep the bread fresh for longer.
Tips and Variations
Looking to add some variety to your gluten-free bread? Here are some helpful tips and creative variations to take your bread to the next level. Whether you’re looking for gluten-free alternatives or troubleshooting tips, these suggestions will help you create a delicious and satisfying loaf every time.
Tips and Variations
| Gluten-Free Alternatives | Troubleshooting Tips | Creative Variations |
|---|---|---|
| Use almond flour instead of wheat flour for a nutty flavor and moist texture. | If your bread is too dense, try adding a bit more liquid to the dough. | Add dried fruits and nuts to the dough for a delightful twist. |
| Experiment with different gluten-free flours such as rice flour, oat flour, or tapioca flour to find your preferred taste and texture. | If your bread is too crumbly, try adding xanthan gum or ground flaxseed to improve its structure. | Mix in herbs and spices like rosemary, garlic, or cinnamon for a savory or sweet flavor. |
| Incorporate chia seeds or psyllium husk to provide extra moisture and bind the ingredients together. | If your bread is not rising properly, check the freshness of your yeast and ensure proper proofing. | Make a stuffed bread by adding cheese, vegetables, or even chocolate in the middle. |
| Add a touch of sweetness by using honey, maple syrup, or coconut sugar as a substitute for white sugar. | If your bread is too dry, try adjusting the baking time or adding more fat, such as butter or oil. | Create a crusty exterior by brushing the dough with an egg wash and sprinkling it with seeds or coarse salt. |
With these tips and variations, you can enjoy a wide range of flavors and textures in your gluten-free bread. From experimenting with different flours to adding unique ingredients, the possibilities are endless. So go ahead, unleash your creativity, and make every slice of bread a delicious adventure.
Nutritional facts
- Calories: Around 180 calories per serving (slice)
- Total Fat: 3g
- Saturated Fat: 0.5g
- Cholesterol: 0mg
- Sodium: Around 210mg (varies based on salt content)
- Total Carbohydrates: Around 32g
- Dietary Fiber: 2g
- Sugars: 5g
- Protein: 2g
Frequently Asked Questions
Can I Substitute the Gluten-Free Flour With Regular All-Purpose Flour in This Recipe?
Yes, you can substitute the gluten-free flour with regular all-purpose flour in this recipe. Just keep in mind that the texture and taste may be slightly different, but it will still be delicious.
How Long Does It Take for the Bread Dough to Proof?
The proofing time for bread dough can vary depending on the recipe, but it typically takes around 1 to 2 hours. To tell if the dough is properly proofed, you can gently press it with your finger. If it springs back slowly, it’s ready.
Can I Use a Bread Machine to Mix and Knead the Gluten-Free Bread Dough?
Yes, you can use a bread machine to mix and knead the gluten-free bread dough. It offers benefits like convenience and time-saving. However, alternative kneading methods, like hand-kneading or a stand mixer, can also be used.
Can I Freeze the Gluten-Free Bread for Later Use?
Yes, you can freeze gluten-free bread for later use. Freezing homemade bread has many benefits, such as convenience and preserving freshness. It allows you to always have a delicious and gluten-free option on hand whenever you need it.
Can I Add Nuts or Seeds to the Bread Dough for Added Texture and Flavor?
Yes, you can definitely add nuts or seeds to your gluten-free bread dough for added texture and flavor. Different types of nuts or seeds can bring a variety of benefits to your bread, enhancing both its taste and nutritional value.

Conclusion
In conclusion, this gluten-free bread recipe from King Arthur is a game-changer for anyone with dietary restrictions.
With a simple and easy-to-follow process, you can create a loaf of bread that’s soft, delicious, and completely gluten-free.
The bread is so good that it will make your taste buds do a happy dance!
So why wait? Give this recipe a try and experience the joy of homemade gluten-free bread like never before.