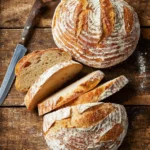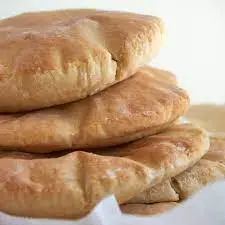
Imagine sitting down at your favorite Mediterranean restaurant, eagerly anticipating the arrival of a plate filled with warm, fluffy pita bread.
As a gluten-free individual, this simple pleasure has been off-limits for far too long. But what if there was a way to enjoy that same delicious pita bread, without the gluten?
In this discussion, we will explore a gluten-free pita bread recipe that will revolutionize your dining experience. Get ready to tantalize your taste buds and discover the secret to creating the perfect gluten-free pita bread at home.


Contents
- 1 Key Takeaways
- 2 Ingredients
- 3 Mixing the Dough
- 4 Letting the Dough Rise
- 5 Shaping the Pita Bread
- 6 Cooking the Pita Bread
- 7 Gluten Free Pita Bread Recipe
- 8 Serving and Storing Suggestions
- 9 Nutrition facts
- 10 Frequently Asked Questions
- 10.1 Can I Substitute Gluten-Free Flour With Regular Flour in This Recipe?
- 10.2 How Long Does It Take for the Dough to Rise?
- 10.3 Can I Freeze the Dough Before Shaping and Cooking the Pita Bread?
- 10.4 Can I Use a Different Type of Gluten-Free Flour in This Recipe?
- 10.5 Can I Use a Regular Oven Instead of a Stovetop Skillet to Cook the Pita Bread?
- 11 Conclusion
Key Takeaways
- Precise measurements and proper mixing techniques are crucial for successful gluten-free pita bread.
- Fresh and active yeast is essential for proper rising, and creating a warm environment can help with yeast activation.
- Shaping the dough evenly and cooking methods like baking, stovetop cooking, or grilling can yield different textures and flavors.
- Storing pita bread properly, freezing for longer shelf life, and exploring alternative fillings can enhance the enjoyment and variety of gluten-free pita bread.
Ingredients
To make gluten-free pita bread, gather the necessary ingredients. When it comes to gluten-free flours, there are several options available. One popular choice is almond flour, which adds a nutty flavor and a moist texture to the bread. Another option is rice flour, which is light and creates a soft and fluffy texture. You can also use a blend of gluten-free flours such as a combination of tapioca flour, sorghum flour, and potato starch. These blends provide a good balance of flavor and texture.
To ensure that your gluten-free bread rises properly, there are a few tips to keep in mind. First, make sure to use a yeast that’s labeled gluten-free, as regular yeast may contain trace amounts of gluten. Second, adding xanthan gum to the dough can help improve the structure and elasticity of the bread. Finally, allow the dough to rise in a warm and draft-free area. This will help activate the yeast and promote proper rising.
Mixing the Dough
To ensure a successful gluten-free pita bread, you need to mix the ingredients thoroughly. This is important to evenly distribute the gluten-free flours and create a cohesive dough.
Additionally, pay attention to the consistency of the dough – it should be slightly sticky but not overly wet. Achieving the right balance will help you achieve the desired texture and taste in your pita bread.
Mixing Ingredients Thoroughly
Thoroughly mix the ingredients together to create a cohesive dough for your gluten free pita bread.
Here are three important points to consider while mixing the ingredients:
- Importance of measuring accurately: When it comes to gluten free baking, precise measurements are crucial. Even a slight variation can affect the texture and taste of the final product. Use measuring cups and spoons specifically designed for dry and wet ingredients to ensure accuracy.
- Alternative ingredients for gluten free baking: Gluten free baking often requires different ingredients to replace wheat flour. Common alternatives include rice flour, almond flour, and tapioca starch. Each alternative has its own unique properties, so it’s important to follow a trusted recipe that balances these ingredients to achieve the desired texture.
- Mixing techniques: To ensure thorough incorporation of ingredients, start by whisking dry ingredients together before adding the wet ones. Use a spoon or spatula to mix the dough until it forms a ball. Knead the dough gently to develop structure and elasticity.
Proper Dough Consistency
How can you achieve the proper consistency for your gluten free pita bread dough? Achieving the right dough consistency is crucial for successful gluten free pita bread. Gluten free alternatives can be more challenging to work with, but with proper techniques, you can create a delicious batch of pita bread. Here are some troubleshooting tips to help you achieve the perfect dough consistency:
| Issue | Cause | Solution |
|---|---|---|
| Dry and crumbly dough | Insufficient moisture | Gradually add more liquid until the dough holds together |
| Sticky and wet dough | Excessive moisture | Slowly add more flour until the dough is manageable |
| Gummy and dense texture | Overmixing or too much liquid | Mix the dough just until combined and adjust liquid accordingly |
| Tough and dry pita bread | Overbaking | Reduce baking time to prevent drying out the bread |
Letting the Dough Rise
Allow the dough to rise for at least one hour until it has doubled in size. This step is crucial for achieving the perfect rise and ensuring that your gluten-free pita bread turns out light, fluffy, and delicious.
Here are some tips to troubleshoot dough that doesn’t rise and help you achieve the best results:
- Check the yeast: Make sure your yeast is fresh and active. If it’s expired or hasn’t been stored properly, it may not be able to produce the necessary carbon dioxide for the dough to rise. Test the yeast by dissolving it in warm water with a pinch of sugar. It should start to foam within a few minutes.
- Create a warm environment: Yeast thrives in warm temperatures, so find a warm spot in your kitchen for the dough to rise. You can place it near a window with sunlight or even use a warm oven (turned off) to create a cozy environment.
- Be patient: Sometimes, dough takes longer to rise, especially if the room is cooler. If your dough hasn’t doubled in size after one hour, give it more time. You can also try placing it in a slightly warmer spot to speed up the process.
Shaping the Pita Bread
To shape the pita bread, gently deflate the risen dough and divide it into equal-sized portions. This step is crucial in achieving the characteristic pocket of a pita bread.
Here are some shaping techniques and troubleshooting tips to help you along the way.
First, lightly flour your work surface and your hands to prevent sticking. Take one portion of the dough and shape it into a ball by tucking the edges underneath. Flatten the ball with your palm to create a disk shape. Repeat this process with the remaining portions.
Next, use a rolling pin to roll out each portion into a circle, about 1/4 inch thick. If the dough starts to shrink back, let it rest for a few minutes before continuing. It’s important to roll the dough evenly to ensure even cooking.
If you notice any tears or holes while rolling out the dough, simply pinch the edges together to seal them. You can also use a little bit of water to help the edges stick together.
Once all the dough portions are shaped, cover them with a clean kitchen towel and let them rest for about 15 minutes. This helps to relax the gluten and makes the dough easier to work with.
With these shaping techniques and troubleshooting tips, you’re well on your way to creating perfect gluten-free pita bread.
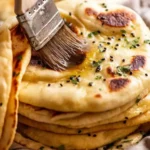
Cooking the Pita Bread
Once the pita bread dough has been shaped, it’s time to move on to the next step: cooking the pita bread. Cooking the pita bread is where the magic happens, transforming the dough into fluffy, golden pockets that are perfect for stuffing or dipping. Here are three cooking techniques and flavor variations that will take your gluten-free pita bread to the next level:
- Baking: Preheat your oven to 450°F (230°C) and place the shaped pita bread on a baking sheet lined with parchment paper. Bake for 6-8 minutes, or until the bread puffs up and turns slightly golden brown. This method ensures a light and airy texture.
- Stovetop: Heat a cast-iron skillet or griddle over medium-high heat. Cook the pita bread for about 2 minutes on each side, or until it puffs up and develops charred spots. This technique adds a smoky flavor and a slightly crisp exterior.
- Grilling: Brush the shaped pita bread with olive oil and grill over medium heat for 1-2 minutes on each side. The grill marks will add a delightful smokiness, and the heat will create a soft and chewy texture.
For flavor variations, you can incorporate herbs like oregano or thyme into the dough for a savory twist. You can also sprinkle sesame seeds or poppy seeds on top of the pita bread before cooking for added crunch and flavor. Get creative and experiment with different spices and seasonings to suit your taste preferences.
Enjoy the freedom of customizing your gluten-free pita bread to your liking!

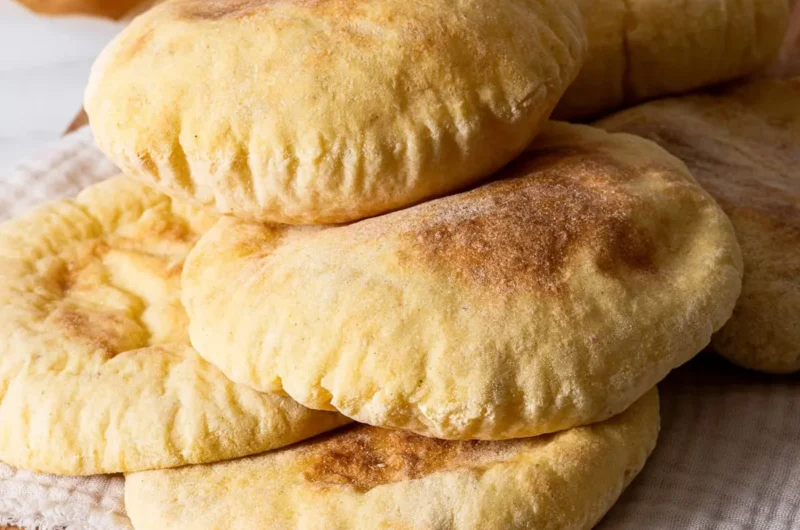
Gluten Free Pita Bread Recipe
Course: breadCuisine: Middle Eastern-inspiredDifficulty: Moderate4
servings30
minutes40
minutes300
kcalThis gluten-free pita bread recipe offers a delightful alternative to traditional wheat-based pitas. The combination of gluten-free flours and carefully chosen ingredients results in a light and flavorful bread perfect for sandwiches, wraps, or as a side for dips. The process involves a simple yeast activation, followed by mixing and kneading to achieve a smooth, elastic dough. Cooking in a skillet allows the pitas to puff up beautifully, creating that characteristic pocket. The result is a versatile gluten-free bread that caters to those with dietary restrictions without compromising on taste or texture. Whether you're following a gluten-free diet or simply looking to try something new, these pitas are a delicious addition to your culinary repertoire.
Ingredients
1 cup gluten-free all-purpose flour (you can use a blend of rice flour, tapioca flour, and potato starch)
1 teaspoon xanthan gum (if your gluten-free flour blend doesn't already contain it)
1 teaspoon baking powder
1/2 teaspoon salt
1/2 cup warm water
1 teaspoon active dry yeast
1 teaspoon sugar
1 tablespoon olive oil
Directions
- In a small bowl, combine warm water, active dry yeast, and sugar. Let it sit for about 5-10 minutes until it becomes frothy.
- In a large mixing bowl, whisk together the gluten-free flour, xanthan gum (if needed), baking powder, and salt.
- Make a well in the center of the dry ingredients and pour in the activated yeast mixture and olive oil. Mix everything together until a dough forms.
- Knead the dough on a lightly floured surface. You can use extra gluten-free flour for dusting. Knead for about 3-5 minutes until the dough is smooth and elastic.
- Divide the dough into 4 equal portions and shape each into a ball.
- Preheat a skillet or non-stick pan over medium-high heat.
- Roll out each ball into a flat, round pita shape. Aim for about 1/4 inch thickness.
- Remove from the skillet and let them cool slightly before serving.
Serving and Storing Suggestions
When it comes to serving the gluten free pita bread, it’s important to consider portion sizes. A recommended serving size is typically one pita bread per person.
If you have leftovers, you can store them in an airtight container or bag to keep them fresh. Additionally, freezing the pita bread is a great option if you want to extend its shelf life. Just make sure to thaw it properly before serving.
Lastly, get creative with how you serve the pita bread. It can be used for sandwiches, wraps, or even as a base for mini pizzas. The possibilities are endless!


Portion Size Recommendations
For optimal portion sizes and storage recommendations, consider following these guidelines when serving and storing your gluten-free pita bread:
- Recommended Serving Size: To maintain a balanced diet, it’s advisable to consume one gluten-free pita bread per serving. This portion size allows you to enjoy the flavors without going overboard on calories or carbohydrates.
- Portion Control Tips: If you’re looking to manage your calorie intake, consider cutting your gluten-free pita bread in half and only consuming one half per serving. This way, you can save the other half for later or share it with a friend.
- Storing Suggestions: To keep your gluten-free pita bread fresh, store it in an airtight container or resealable bag. This will help maintain its texture and prevent it from drying out. For longer shelf life, you can also freeze your pita bread and thaw it when needed.
Freezing and Thawing Tips
To maintain the freshness and quality of your gluten-free pita bread, proper freezing and thawing techniques are essential.
When it comes to freezing techniques, wrap each pita bread individually in plastic wrap or aluminum foil. This will help prevent freezer burn and maintain its texture. Place the wrapped pita bread in a freezer-safe bag or container, ensuring it’s sealed tightly to prevent any air from entering. Label the bag or container with the date of freezing to keep track of its freshness.
When it comes to thawing methods, remove the desired number of pita bread from the freezer and transfer them to the refrigerator. Allow them to thaw overnight or for at least 8 hours. If you’re short on time, you can also thaw them in the microwave on the defrost setting. Just be sure to check them frequently to prevent overheating and drying out.
Once thawed, gluten-free pita bread can be enjoyed as is or lightly toasted for added crispness.
Creative Serving Ideas
Maintaining the freshness and quality of your gluten-free pita bread is important. Now let’s explore some creative serving ideas to enhance your enjoyment of this delicious treat.
Here are three ideas to make your gluten-free pita bread even more enjoyable:
- Alternative Fillings: Instead of the traditional falafel or hummus, try using alternative fillings like roasted vegetables, grilled chicken, or avocado and shrimp. These unique combinations will add a burst of flavor to your pita bread and make it a satisfying meal.
- Unique Presentation: Spice up your serving by cutting the pita bread into smaller triangles or squares. This not only adds visual appeal but also makes it easier to handle and dip into your favorite sauces or spreads. You can also roll the pita bread into mini wraps for a fun and portable option.
- Pita Bread Pizza: Turn your gluten-free pita bread into a delicious pizza by topping it with tomato sauce, cheese, and your favorite toppings. Bake it in the oven until the cheese is melted and bubbly, and you’ll have a quick and tasty meal.
With these alternative fillings and unique presentation ideas, your gluten-free pita bread will become a versatile and flavorful option for any meal. Enjoy exploring different combinations and make it your own!
Nutrition facts
- Calories: 120-150 kcal
- Total Fat: 2-4g
- Saturated Fat: 0-1g
- Trans Fat: 0g
- Cholesterol: 0mg
- Sodium: 250-350mg
- Total Carbohydrates: 24-30g
- Dietary Fiber: 2-4g
- Sugars: 1-2g
- Protein: 2-4g
Frequently Asked Questions
Can I Substitute Gluten-Free Flour With Regular Flour in This Recipe?
Can you substitute regular flour in this recipe? While it may be tempting, using gluten-free flour is recommended for a gluten-free pita bread recipe. The pros include catering to dietary restrictions, but the cons may affect the texture and taste.
How Long Does It Take for the Dough to Rise?
To troubleshoot common issues with dough rising and speed up the process, make sure the yeast is fresh and the water is at the right temperature. Adding a bit of sugar can also help.
Can I Freeze the Dough Before Shaping and Cooking the Pita Bread?
Yes, you can freeze the dough before shaping and cooking the pita bread. Freezing dough is a great way to extend its shelf life and have it ready for future use. Just make sure to properly store it in an airtight container or freezer bag.
Can I Use a Different Type of Gluten-Free Flour in This Recipe?
Can you use a different type of gluten-free flour? Yes, you have options like almond, rice, or tapioca flour. Each has pros and cons—almond flour adds a nutty flavor, rice flour is versatile, and tapioca flour helps with texture.
Can I Use a Regular Oven Instead of a Stovetop Skillet to Cook the Pita Bread?
You can definitely use a regular oven instead of a stovetop skillet to cook the pita bread. Just make sure to preheat the oven and use a baking stone or sheet for even heat distribution.


Conclusion
In just a few easy steps, you can create a delicious batch of gluten-free pita bread that will have your taste buds dancing with delight.
The dough rises to perfection, creating soft and fluffy pockets of goodness.
Once cooked, these pita breads are ready to be filled with your favorite ingredients, making them a versatile and satisfying meal option.
So go ahead and give this recipe a try – your gluten-free cravings will thank you!