Looking for the perfect gluten-free naan bread recipe that will transport you straight to a bustling Indian street market? Well, look no further!
This mouth-watering recipe will make your taste buds dance with delight.
But before we dive into the details, let’s explore the secrets behind creating this delectable gluten-free treat that will leave you wanting more.


Contents
- 1 Key Takeaways
- 2 Ingredients
- 3 Mixing the Dough
- 4 Resting the Dough
- 5 Shaping the Naan Bread
- 6 Cooking the Naan Bread
- 7 Gluten Free Naan Bread Recipe
- 8 Serving and Storing Suggestions
- 9 Nutrition facts
- 10 Frequently Asked Questions
- 10.1 Can I Substitute the Gluten-Free Flour With Regular Flour in This Recipe?
- 10.2 How Long Does the Dough Need to Rest Before Shaping the Naan Bread?
- 10.3 Can I Freeze the Dough to Use Later?
- 10.4 How Do I Know When the Naan Bread Is Fully Cooked?
- 10.5 Can I Store the Naan Bread at Room Temperature or Does It Need to Be Refrigerated?
- 11 Conclusion
Key Takeaways
- Gluten-free naan bread can be made using alternative flours such as rice flour or almond flour.
- The dough for gluten-free naan bread requires a different mixing technique compared to regular dough.
- Kneading the dough helps improve elasticity, texture, flavor development, fermentation, and shape retention.
- Resting the dough allows the gluten-free flours to fully hydrate, enhances flavor, and makes the dough easier to handle and shape.
Ingredients
To make gluten-free naan bread, you’ll need a specific set of ingredients that are free from gluten. The key to achieving a delicious gluten-free naan bread lies in the selection of the right ingredients. When it comes to the flour, opt for a gluten-free alternative such as rice flour, almond flour, or a blend of gluten-free flours. These alternatives not only provide the necessary structure for the bread but also contribute to its unique texture.
In addition to the flour, you’ll need other essential ingredients like yeast, warm water, non-dairy milk, olive oil, and a pinch of salt. Yeast serves as the leavening agent, helping the bread to rise and develop a light, airy texture. Warm water activates the yeast, allowing it to do its job effectively.
Mixing techniques play a crucial role in bringing all the ingredients together. Start by activating the yeast in warm water and allowing it to froth. Then, gradually add the flour mixture and other ingredients, mixing until a smooth dough forms. Resting the dough for a sufficient amount of time allows the gluten-free flours to absorb the liquid, resulting in a more pliable dough that’s easier to work with.
Mixing the Dough
To successfully mix the dough for gluten-free naan bread, you’ll need the right ingredients and follow the appropriate mixing techniques.
The dough should be rested and kneaded to ensure proper texture and rise.
Ingredients for Dough
For the dough, gather the necessary ingredients and prepare to mix them together.
When it comes to gluten-free naan bread, choosing the right ingredients is crucial.
Start by combining gluten-free flour, xanthan gum, baking powder, sugar, and salt in a large mixing bowl.
Use a whisk to thoroughly blend these dry ingredients.
Next, add warm milk, yogurt, melted ghee, and beaten eggs to the dry mixture.
Mix everything together using a wooden spoon or your hands until a sticky dough forms.
It’s important to note that gluten-free dough requires a different mixing technique compared to regular dough.
Be gentle and avoid over-mixing, as it can result in a tough texture.
Once the dough is mixed, allow it to rest for at least 30 minutes.
This resting period is essential for the gluten-free flours to hydrate and for the dough to become easier to handle.
Mixing Techniques
Start by gently combining the dry ingredients in a large mixing bowl, ensuring that the gluten-free flour, xanthan gum, baking powder, sugar, and salt are thoroughly blended together. This step will ensure that the dry ingredients are evenly distributed throughout the dough.
Once the dry ingredients are mixed, create a well in the center of the bowl. In a separate bowl, whisk together the wet ingredients, including the warm water, oil, and yogurt. Pour the wet mixture into the well and use a spatula to fold the ingredients together. This folding technique helps to incorporate the wet and dry ingredients without overmixing the dough.
Once the dough comes together, turn it out onto a lightly floured surface and begin the kneading process. Knead the dough for about 5 minutes until it becomes smooth and elastic.
Resting and Kneading
Rest and knead the dough for a minimum of 30 minutes to allow the gluten-free flour to fully hydrate and the dough to become more elastic. Resting techniques are crucial in gluten-free baking as they allow the flour to absorb moisture, resulting in a softer and more pliable dough.
Kneading, on the other hand, helps to develop the gluten-free dough’s structure, making it less crumbly and more cohesive. Here are the benefits of kneading:
- Enhances dough elasticity: Kneading promotes the formation of gluten-like proteins in gluten-free flours, improving the dough’s ability to stretch and hold together.
- Improves texture: This process redistributes moisture and air bubbles, resulting in a softer and lighter texture.
- Increases flavor development: Kneading helps distribute flavors evenly throughout the dough, enhancing the overall taste.
- Aids in fermentation: Kneading promotes yeast activity by creating a more uniform environment for the yeast to feed on sugars and produce carbon dioxide.
- Enhances dough stability: Kneaded dough is less prone to collapsing or spreading during baking, resulting in better shape retention.
Resting the Dough
Resting the dough is an important step in the gluten-free naan bread recipe. It allows the ingredients to hydrate fully and the gluten-free flours to absorb the moisture, resulting in a better texture and taste.
The recommended resting time for the dough is 30 minutes, which gives it enough time to relax and develop its structure. Resting the dough also helps in creating a more pliable and easier to handle dough that can be rolled out without tearing.
Importance of Resting
Allowing the dough to rest is a crucial step in achieving the perfect texture and flavor for your gluten-free naan bread. Resting the dough allows it to relax and develop, resulting in a light and fluffy final product.
Here are five benefits and techniques for resting the dough:
- Improved texture: Resting the dough allows the gluten-free flours to fully hydrate, creating a smoother and more elastic dough.
- Enhanced flavor: Resting allows the flavors to meld together, resulting in a more flavorful naan bread.
- Easier handling: Resting the dough makes it easier to handle and shape, reducing the risk of tearing or misshaping.
- Increased rise: Resting the dough gives it time to ferment, allowing the yeast to activate and the dough to rise properly.
- Better browning: Resting the dough before cooking helps to develop a beautiful golden brown color on the naan bread.
Resting Time Required
After allowing the dough to rest and develop, the next step in achieving the perfect texture and flavor for your gluten-free naan bread is determining the required resting time. Resting the dough is crucial as it allows the gluten-free flours to fully hydrate, resulting in a more tender and chewy naan bread. The benefits of resting the dough are plenty, including improved texture, enhanced flavor, and easier handling during the shaping process. The importance of resting cannot be overstated, as it allows the ingredients to fully meld together, resulting in a more cohesive and delicious final product. The table below provides an overview of the recommended resting times for gluten-free naan bread, depending on the type of gluten-free flour used:
| Type of Gluten-Free Flour | Resting Time |
|---|---|
| Rice Flour | 1 hour |
| Almond Flour | 2 hours |
| Coconut Flour | 3 hours |
| Sorghum Flour | 4 hours |
| Buckwheat Flour | 5 hours |
Benefits of Resting
To achieve optimal texture and flavor in your gluten-free naan bread, it’s essential to rest the dough and allow the ingredients to fully meld together.
Resting the dough has several benefits that contribute to the overall quality of the bread:
- Improved texture: Resting allows the gluten-free flour blend to absorb moisture and relax, resulting in a softer and more tender naan bread.
- Enhanced flavor development: Resting gives the flavors of the ingredients time to blend, resulting in a more balanced and delicious final product.
- Easier handling: Resting allows the dough to become more elastic, making it easier to shape and handle without tearing.
- Increased rise: Resting gives the yeast time to activate and ferment, resulting in a better rise and lighter texture.
- Improved digestibility: Resting breaks down complex starches, making the bread easier to digest and reducing the risk of digestive discomfort.
The importance of resting can’t be overstated when it comes to gluten-free naan bread. Take the time to let the dough rest, and you’ll be rewarded with a truly exceptional bread that’s both flavorful and enjoyable to eat.
Shaping the Naan Bread
To shape the Naan bread, gently roll the dough into oval shapes using a rolling pin and your hands. This step is crucial in achieving the traditional Naan shape and texture.
Begin by lightly flouring your work surface to prevent the dough from sticking. Take a portion of the dough and use your hands to shape it into a ball. Place it on the floured surface and flatten it slightly with your palm.
Then, using a rolling pin, start from the center and roll the dough outwards, applying even pressure. Rotate the dough frequently to ensure an even oval shape. If the dough begins to stick, lightly dust it with more flour.
The size of the Naan bread can vary depending on your preference, but aim for a thickness of about ¼ inch. Once the dough is rolled out, transfer it to a preheated skillet or griddle and cook it until it puffs up and develops golden brown spots.
This method of shaping the Naan bread will guarantee a delicious and authentic result, perfect for enjoying on its own or with your favorite curry dish.


Cooking the Naan Bread
You can cook the Naan bread by placing it on a preheated skillet or griddle. Here are some techniques to ensure a delicious and perfectly cooked gluten-free Naan bread:
- Preheat the skillet or griddle on medium-high heat to ensure even cooking.
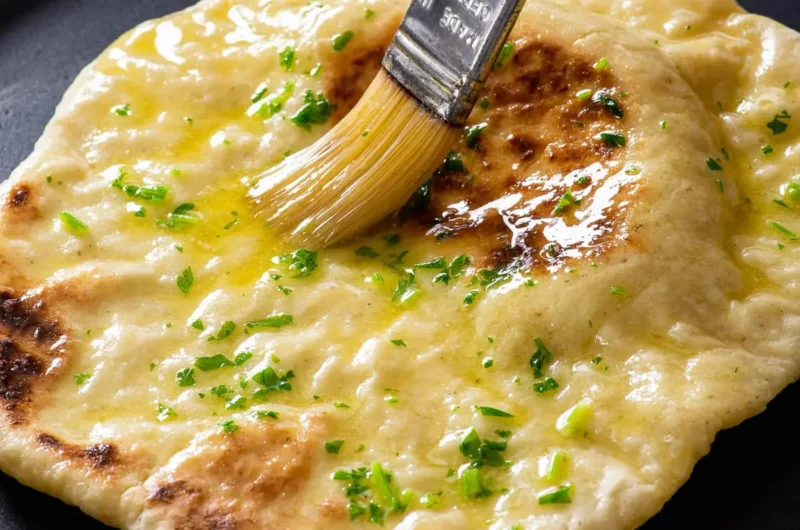
- Brush the Naan bread with a little oil on both sides to prevent sticking and add flavor.
- Place the Naan bread on the hot skillet or griddle and cook for about 2-3 minutes on each side, or until golden brown and slightly charred.
- Use a spatula to gently press down on the Naan bread while cooking to ensure even browning and to create that signature bubbly texture.
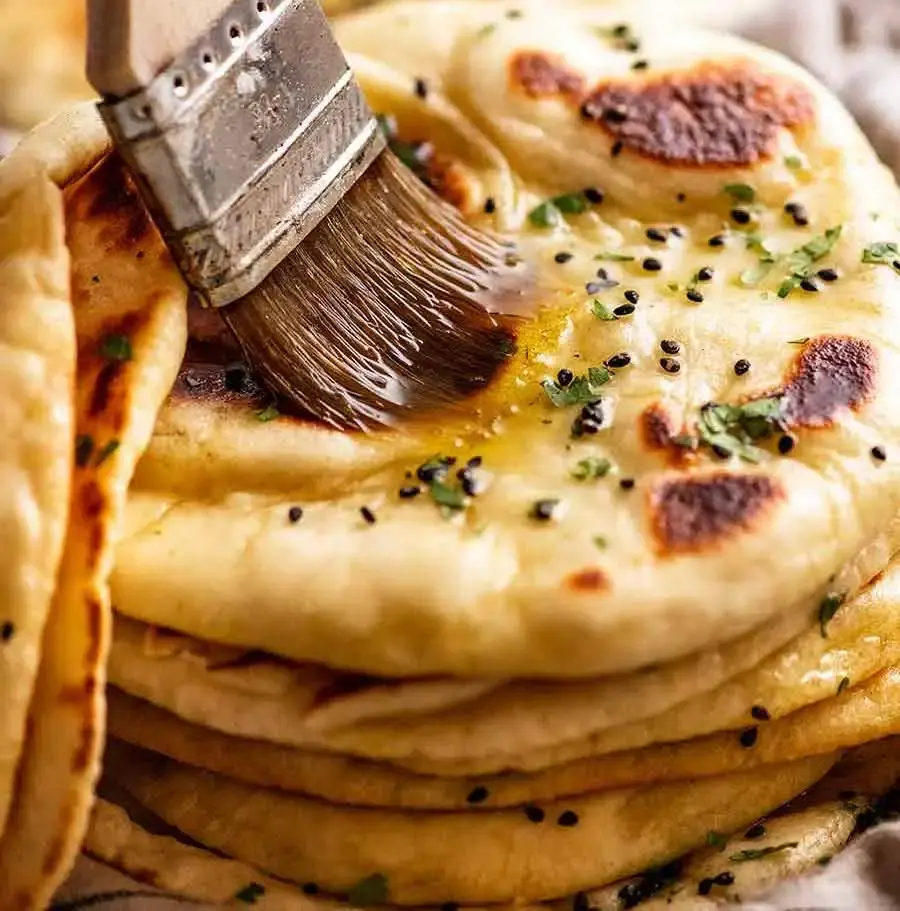
- Remove the cooked Naan bread from the heat and brush it with melted butter or ghee for added richness and flavor.
Resting techniques:
- After shaping the Naan bread, let it rest for about 15-20 minutes. This allows the gluten-free flour to hydrate and results in a softer and more pliable dough.
- Resting the dough also improves the overall texture and makes it easier to roll out and handle.

Gluten Free Naan Bread Recipe
Course: Side DishCuisine: Indian-inspiredDifficulty: Moderate4
servings20
minutes30
minutes200
kcalIndulge in the delight of freshly baked gluten-free naan bread with this easy-to-follow recipe. Perfect for those with gluten sensitivities, the naan is soft, flavorful, and pairs well with a variety of dishes. Whether you're accommodating dietary restrictions or simply craving a delicious flatbread, this recipe delivers a satisfying result that can be enjoyed with your favorite curries, dips, or as a standalone treat.
Ingredients
2 cups gluten-free all-purpose flour
1 teaspoon xanthan gum (if your gluten-free flour blend doesn't already contain it)
1 teaspoon baking powder
1/2 teaspoon baking soda
1/2 teaspoon salt
1 cup plain Greek yogurt (or dairy-free alternative)
1 large egg (or a flax egg for a vegan option)
2 tablespoons olive oil
2 tablespoons warm water
Directions
- In a large mixing bowl, whisk together the gluten-free flour, xanthan gum (if needed), baking powder, baking soda, and salt.
- In a separate bowl, whisk together the Greek yogurt, egg (or flax egg), olive oil, and warm water.
- Add the wet ingredients to the dry ingredients and mix until a dough forms. If the dough is too sticky, you can add a little more flour.
- Divide the dough into 4-6 equal portions, depending on how large you want your naan bread.
- Heat a non-stick skillet or griddle over medium-high heat.
- Take one portion of the dough, and on a lightly floured surface, roll it out into an oval or round shape, about 1/4 inch thick.
- Place the rolled-out dough onto the hot skillet and cook for 2-3 minutes, or until bubbles start to form on the surface. Flip the naan and cook for an additional 1-2 minutes, or until it puffs up and gets golden brown.
- Serve the gluten-free naan warm, brushed with a little olive oil or melted butter, and optionally sprinkled with chopped fresh cilantro or garlic for extra flavor.
Serving and Storing Suggestions
For optimal enjoyment and freshness, consider the following serving and storing suggestions for your gluten-free Naan bread.
When it comes to serving ideas, there are plenty of delicious options to explore. You can serve the Naan bread alongside a warm bowl of curry, using it to scoop up every last bit of sauce. It also makes a fantastic base for homemade pizzas, topped with your favorite ingredients and baked to perfection. For a lighter option, you can cut the Naan bread into triangles and serve it with hummus or a flavorful dip.
Now, let’s talk about freezing options. If you have leftover Naan bread or want to make a larger batch for future use, freezing is a great option. To freeze the bread, make sure it has cooled completely. Then, wrap each piece tightly in plastic wrap, and place them in a freezer-safe bag or container. The bread can be kept in the freezer for up to three months. When you’re ready to enjoy it, simply thaw the bread at room temperature or reheat it in a preheated oven for a few minutes.
Nutrition facts
- Calories: Approximately 280 calories per serving
- Protein: About 8g
- Total Fat: Around 10g
- Saturated Fat: 2g
- Monounsaturated Fat: 6g
- Polyunsaturated Fat: 1.5g
- Cholesterol: About 45mg
- Carbohydrates: Approximately 38g
- Dietary Fiber: 2g
- Sugars: 3g
- Sodium: Around 600mg
Frequently Asked Questions
Can I Substitute the Gluten-Free Flour With Regular Flour in This Recipe?
Yes, you can substitute regular flour for gluten-free flour in this recipe. However, keep in mind that the texture and taste may be different. Consider using alternative flours specifically designed for gluten-free baking for best results.
How Long Does the Dough Need to Rest Before Shaping the Naan Bread?
To make naan bread without resting the dough, it is not possible. Resting the dough allows gluten to relax and results in a softer texture. Tips for shaping naan bread perfectly include using a rolling pin and applying gentle pressure.
Can I Freeze the Dough to Use Later?
Yes, you can freeze the dough to use later. Freezing the dough allows for convenient and flexible meal planning. When you’re ready to use it, simply thaw and shape the dough before cooking. Enjoy the freedom of homemade naan bread whenever you desire.
How Do I Know When the Naan Bread Is Fully Cooked?
To know when your naan bread is fully cooked, look for a golden brown color and a slightly crispy texture on the outside. It should also be soft and fluffy on the inside. Follow these tips for perfect naan bread cooking.
Can I Store the Naan Bread at Room Temperature or Does It Need to Be Refrigerated?
You can store the naan bread at room temperature for a few days, but if you want to keep it fresh for longer, it’s best to refrigerate it. Freezing the dough is also an option for future use.


Conclusion
In conclusion, this gluten-free naan bread recipe provides a delicious alternative for those with dietary restrictions.
By following the simple directions and using the suggested ingredients, you can easily create a soft and flavorful naan bread that’s free from gluten.
This recipe is perfect for anyone looking to enjoy the traditional taste of naan without compromising their dietary needs.
So why wait? Give it a try and indulge in a slice of naan heaven today!