Did you know that bread is one of the most consumed food items in the world? It’s no wonder, considering how versatile and delicious it can be. If you’re looking to elevate your bread game, why not try making your own herbed bread?
With just a few simple ingredients and some basic baking techniques, you can create a loaf that is bursting with flavor and aroma. Whether you’re a seasoned baker or just starting out, this herbed bread recipe is sure to impress.
So, grab your apron and get ready to embark on a culinary adventure that will leave your taste buds begging for more.


Contents
Key Takeaways
- Bread is a versatile and delicious food item that is widely consumed globally.
- Making homemade bread allows for customization and experimentation, including adding herbs for an extra layer of flavor and aroma.
- Choosing the right herbs and experimenting with different combinations is crucial for enhancing the flavor of herbed bread.
- Proper storage techniques and shaping, proofing, and baking methods are important for achieving a light and airy texture in herbed bread.
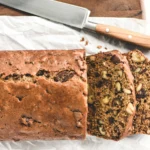
Ingredients for Herbed Bread
To make delicious herbed bread, gather all the necessary ingredients. The key to creating a flavorful loaf lies in choosing the right herbs. There are various types of herbs you can use to elevate your herbed bread to new heights of deliciousness. Basil, rosemary, thyme, and oregano are popular choices that add a burst of aromatic goodness to your bread. Experiment with different combinations to find your perfect blend of flavors.
When it comes to storing herbed bread, there are a few tips to ensure its freshness. Firstly, let the bread cool completely before storing it. This prevents condensation from forming, which can make the bread soggy. Wrap the bread tightly in plastic wrap or store it in an airtight container to keep it fresh for longer.
If you want to keep the crust crisp, store the bread at room temperature. However, if you prefer a softer crust, store it in the refrigerator.
Preparing the Dough
Now that you have gathered all the necessary ingredients for your herbed bread and learned how to store it properly, it’s time to dive into the exciting process of preparing the dough. This is where the magic happens, as the dough comes together to create a fluffy and flavorful bread that will leave your taste buds craving for more. To ensure the perfect consistency and rise, it’s important to master the art of mixing techniques and understand the different types of yeast available.
Here are three key points to keep in mind when preparing your dough:
- Mixing Techniques: When combining the ingredients, you can choose between traditional hand mixing, using a stand mixer, or even opting for a bread machine. Each method will give you slightly different results, so experiment and find the one that suits your style best. Remember to mix until the dough is smooth and elastic, as this will help develop the gluten and give your bread structure.
- Types of Yeast: There are two main types of yeast commonly used in bread making – active dry yeast and instant yeast. Active dry yeast needs to be activated in warm water before using, while instant yeast can be added directly to the dry ingredients. Both types will help your dough rise, but make sure to follow the instructions on the package for the best results.
- Resting and Rising: After mixing the dough, it’s crucial to allow it to rest and rise properly. This will give the yeast time to ferment and release carbon dioxide, which will create air pockets and give your bread its light and airy texture. Be patient during this process, as the rise time can vary depending on factors like room temperature and the type of yeast used.
With these mixing techniques and knowledge of yeast types, you’re now ready to embark on the next step of your herbed bread journey. So roll up your sleeves, get your hands in the dough, and let the aroma of freshly baked bread fill your kitchen. The freedom to create and enjoy your own homemade bread is truly a delight.
Adding the Herbs
Enhance the flavor of your herbed bread by adding a generous amount of aromatic herbs to the dough. Using different types of herbs not only adds a burst of flavor but also brings numerous benefits to your bread. Herbs like rosemary, thyme, basil, and oregano can transform a plain loaf into a savory masterpiece.
Adding herbs to bread not only enhances the taste but also provides a myriad of health benefits. Herbs are packed with antioxidants, vitamins, and minerals that can boost your immune system and improve digestion. They also have anti-inflammatory properties and can aid in reducing cholesterol levels. By incorporating herbs into your bread, you aren’t only adding flavor but also adding a nutritious element to your diet.
When choosing herbs for your bread, opt for fresh ones whenever possible. Their vibrant colors and fragrant aromas will infuse your bread with a delightful taste. If fresh herbs aren’t available, dried herbs can be used as a substitute. However, keep in mind that dried herbs are more concentrated, so adjust the quantity accordingly.
To add the herbs to your bread dough, finely chop them and mix them in with the other ingredients. Knead the dough thoroughly to ensure that the herbs are evenly distributed. Be generous with the amount of herbs you add, but be careful not to overpower the other flavors.
Incorporating herbs into your bread dough is a simple yet effective way to elevate your baking game. The variety of flavors and health benefits they bring will surely make your herbed bread a crowd-pleaser. So go ahead, experiment with different herbs, and enjoy the delicious results!
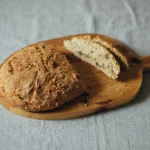
Shaping and Proofing the Bread
For a perfectly shaped and well-proofed loaf of herbed bread, follow these simple steps:
- Shape the dough: After the dough has finished its bulk fermentation, gently deflate it and transfer it to a lightly floured surface. Divide the dough into equal portions, depending on the size of loaf you desire. To shape the dough, pull the edges of each portion towards the center, creating tension on the surface. Flip the dough over and cup your hands around it, gently rotating in a circular motion to create a smooth, round shape.
- Proof the dough: Place the shaped dough onto a baking sheet lined with parchment paper or into a greased loaf pan. Cover it loosely with a clean kitchen towel or plastic wrap sprayed with cooking spray. Let the dough rise in a warm, draft-free area until it has doubled in size. This process, called proofing, allows the dough to relax and develop its flavor.
- Troubleshoot proofing issues: If the dough isn’t rising, check the temperature of the room. Yeast is most active in a warm environment, around 75°F (24°C). If the room is too cold, you can create a warmer environment by placing the dough near a preheated oven or using a proofing box. On the other hand, if the dough is over-proofed and has collapsed, gently reshape it and allow it to proof for a shorter time.
Baking the Herbed Bread
Now that your dough has been shaped and proofed, it’s time to bake your herbed bread to perfection.
The first step is to preheat your oven to the desired temperature and place a baking stone or sheet inside.
Once the oven is hot, carefully transfer your shaped dough onto the preheated surface and let it bake until golden brown and delicious.
Mixing the Ingredients
To create the perfect loaf of herbed bread, you’ll want to start by thoroughly mixing together all of the ingredients. This step is crucial in ensuring that the herbs are evenly distributed throughout the dough, resulting in a flavorful and aromatic bread.
Here are three mixing techniques and kneading methods that will help you achieve the best results:
- Hand mixing: This traditional method involves using your hands to combine the ingredients. It allows you to have better control over the texture and consistency of the dough.
- Stand mixer: Using a stand mixer with a dough hook attachment can save you time and effort. It ensures that all the ingredients are thoroughly mixed, while also providing consistent kneading.
- Bread machine: If you prefer a hands-off approach, a bread machine can do the mixing and kneading for you. Simply add the ingredients, select the appropriate setting, and let the machine work its magic.
Whichever method you choose, make sure to mix the ingredients until they’re well combined and form a smooth, elastic dough.
Shaping the Dough
To achieve a beautifully shaped loaf of herbed bread that will impress your family and friends, follow these simple steps.
After your dough has finished rising, gently punch it down to release any air bubbles. Then, transfer it to a lightly floured surface.
Begin shaping the dough by folding the edges towards the center, creating a tight ball. Use the heel of your hand to seal the seam.
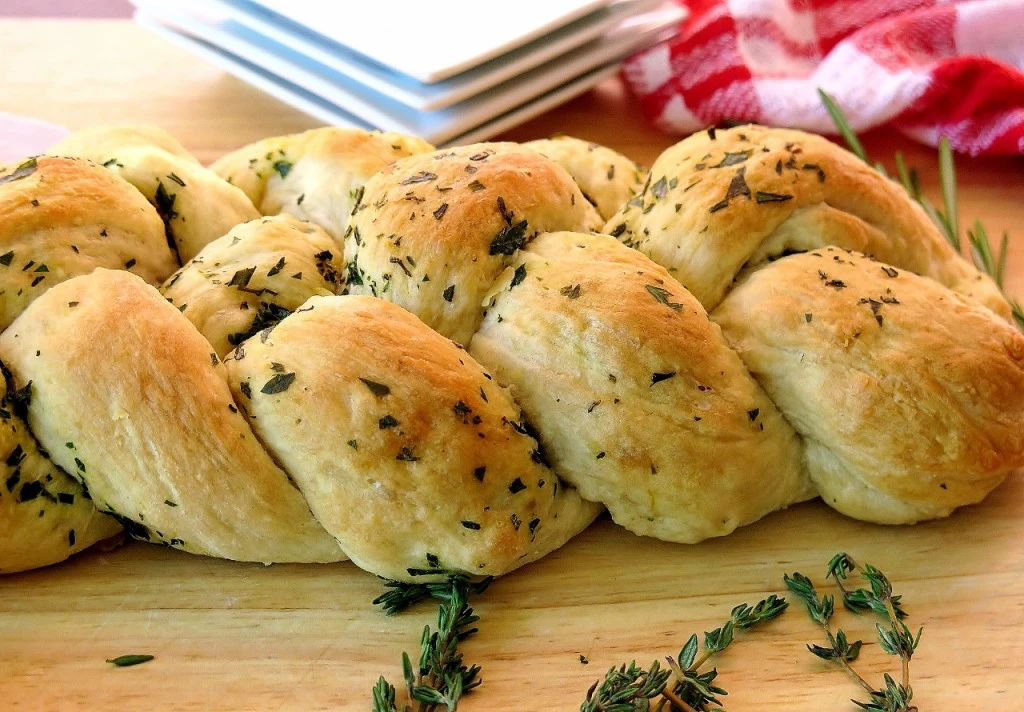
Next, place the dough seam-side down on a parchment-lined baking sheet or in a greased loaf pan. If you want to get creative, try braiding or twisting the dough for an elegant look.
If you encounter any issues with shaping, such as the dough sticking to your hands, try flouring your hands or wetting them slightly.
With these shaping techniques and troubleshooting tips, you’ll have a perfectly shaped loaf of herbed bread in no time.
Enjoy the freedom of baking!

Baking and Cooling
Achieve a perfectly baked loaf of herbed bread that will have your taste buds dancing with delight by following these simple steps.
- Preheat the oven to the recommended temperature for baking bread. This ensures that your bread bakes evenly and develops a beautiful golden crust.
- Place the shaped dough onto a baking sheet or into a greased loaf pan. Make sure to leave enough space for the bread to rise and expand during baking.
- Bake the bread for the recommended time, but keep an eye on it to prevent over-browning. You can cover the loaf with aluminum foil if it starts to darken too quickly.
- Once the bread is baked, remove it from the oven and let it cool on a wire rack. This allows the steam to escape and prevents the bottom from becoming soggy.
Baking techniques and troubleshooting tips can make all the difference in achieving a perfectly baked herbed bread. Just remember to follow these steps, and soon you’ll be enjoying a fragrant and flavorful loaf that will impress everyone at the table.


Herbed Bread Recipe
Course: Side DishCuisine: European and MediterraneanDifficulty: easy12
servings20
minutes20
minutes100
kcalThis herbed bread recipe serves as an excellent side dish or appetizer, complementing a wide range of main courses or standing alone as a tasty starter. The aromatic blend of fresh herbs, combined with the warmth of freshly baked bread, adds a flavorful dimension to any meal.
Ingredients
3 1/2 cups all-purpose flour
1 packet (2 1/4 teaspoons) active dry yeast
1 1/4 cups warm water (about 110°F/43°C)
1 tablespoon sugar
2 tablespoons olive oil
1 teaspoon salt
2 tablespoons fresh herbs (such as rosemary, thyme, or oregano), finely chopped
1 teaspoon garlic powder (optional, for added flavor)
1/2 teaspoon onion powder (optional)
Directions
- In a small bowl, combine the warm water and sugar. Stir until the sugar is dissolved.
- Sprinkle the yeast over the water and let it sit for about 5-10 minutes, or until it becomes foamy.
- In a large mixing bowl, combine the flour, salt, chopped herbs, garlic powder (if using), and onion powder (if using).
- Make a well in the center of the dry ingredients and pour in the activated yeast mixture and olive oil.
- Mix the ingredients until a dough forms.
- Transfer the dough to a floured surface and knead for about 8-10 minutes, or until the dough is smooth and elastic.
- Place the dough in a lightly oiled bowl, cover it with a clean kitchen towel, and let it rise in a warm place for about 1 hour or until it has doubled in size.
- Punch down the risen dough and shape it into a loaf. Place the shaped dough in a greased loaf pan.
- Cover the pan with a towel and let the dough rise for another 30-45 minutes.
- Preheat your oven to 375°F (190°C).
- Bake the bread for 25-30 minutes or until the top is golden brown and the bread sounds hollow when tapped.
- Allow the bread to cool in the pan for a few minutes before transferring it to a wire rack to cool completely.
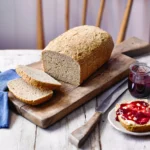
- Slice and serve the herbed bread on its own or with your favorite spreads.
Serving and Enjoying the Freshly Baked Bread
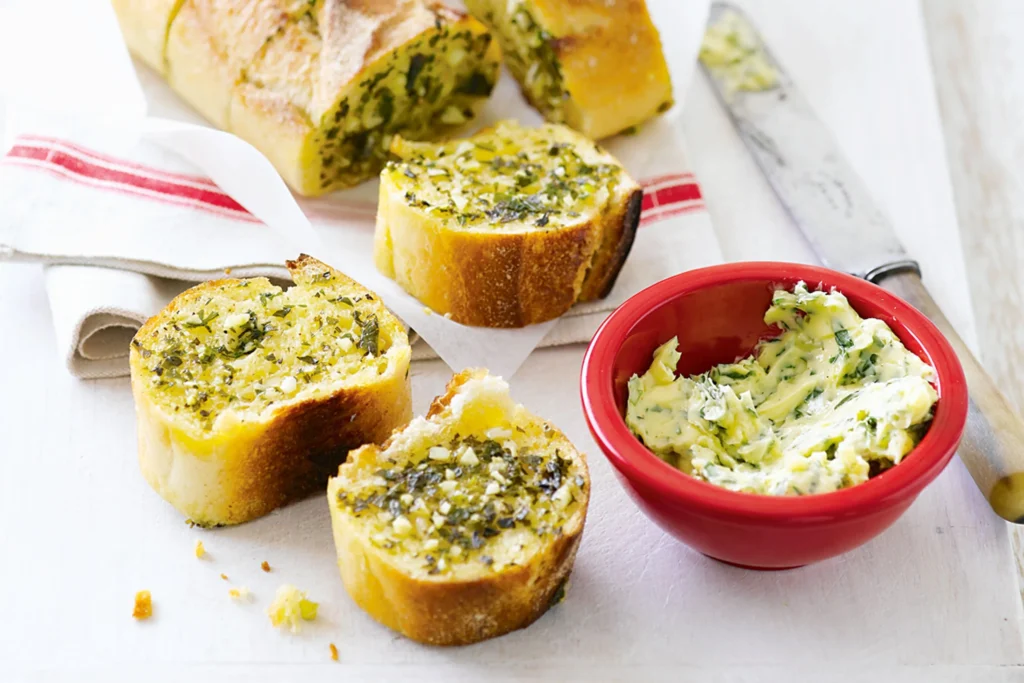
Now that your herbed bread is fresh out of the oven, it’s time to think about the toppings and spreads that will take it to the next level. Whether you prefer a classic butter spread or something more adventurous like a homemade garlic herb butter, the options are endless.
And don’t forget about pairing your bread with meals – it can be the perfect accompaniment to soups, salads, or even a charcuterie board.
Get ready to savor every delicious bite of your homemade herbed bread!
Toppings and Spreads
Enhance the flavors of your freshly baked herbed bread with a variety of delicious toppings and spreads. Here are three mouthwatering options to elevate your bread experience:
- Flavored Butter: Whip up your own flavored butter by combining softened butter with herbs like rosemary, thyme, or basil. Spread it generously on warm slices of bread for a burst of savory goodness.
- Homemade Spreads: Get creative with homemade spreads like garlic aioli, sun-dried tomato pesto, or creamy hummus. These spreads not only add a delightful taste to your bread but also provide an extra layer of texture.
- Sweet Indulgences: Don’t forget about the sweet side! Top your herbed bread with a dollop of honey, a smear of Nutella, or a sprinkle of cinnamon sugar for a decadent treat that will satisfy your sweet tooth.
With these delightful toppings and spreads, you can savor every bite of your freshly baked herbed bread, indulging in a world of flavors and textures.
Enjoy the freedom to customize and experiment, creating the perfect combination that suits your taste buds.
Pairing With Meals
To truly enjoy the full experience of your freshly baked herbed bread, let’s explore the art of pairing it with delicious meals that will complement its flavors and elevate your dining experience. The versatility of herbed bread allows for a wide range of meal ideas and flavor combinations. Whether you prefer savory or sweet, there is a perfect pairing for every taste. Here are some mouthwatering suggestions to inspire your culinary adventures:
| Meal Ideas | Flavor Combinations |
|---|---|
| Caprese Salad | Tomato, mozzarella, basil |
| Roasted Chicken | Rosemary, garlic, lemon |
| Bruschetta | Fresh tomatoes, garlic, basil |
| Smoked Salmon | Dill, cream cheese, lemon |
| Garlic Shrimp Scampi | Parsley, butter, white wine |
| Honey and Brie Tartine | Thyme, honey, brie cheese |
These combinations will enhance the herbaceous flavors of your bread and create a symphony of tastes in every bite. So go ahead, experiment with these meal ideas and discover your own favorite flavor combinations. The possibilities are endless, and the joy of pairing your herbed bread with a delicious meal is an experience worth savoring.
Nutrition facts
- Calories: 70-80 kcal
- Total Fat: 1-2g
- Saturated Fat: 0-0.5g
- Cholesterol: 0mg
- Sodium: 150-200mg
- Total Carbohydrates: 13-15g
- Dietary Fiber: 1-2g
- Sugars: 0-1g
- Protein: 2-3g
Frequently Asked Questions
How Long Does It Take to Proof the Bread Dough?
To speed up proofing time, you can create a warm environment for the dough to rise. Place it near a warm oven or wrap it in a damp cloth. This will help the yeast activate faster, reducing the proofing time.
Can I Use Dried Herbs Instead of Fresh Herbs in This Recipe?
Yes, you can use dried herbs instead of fresh herbs in this recipe. Using dried herbs allows for a longer shelf life and convenience, while still adding flavor to your herbed bread.
Can I Add Other Ingredients, Such as Cheese or Garlic, to the Dough?
Yes, you can definitely add other ingredients like cheese or garlic to the dough! It will add a delicious twist to your herbed bread. Experiment with different variations and don’t be afraid to try alternative herbs. Shape it beautifully and serve it with your favorite spreads or soups. Enjoy the freedom to create!
How Long Does the Bread Need to Cool Before It Can Be Sliced?
After baking the herbed bread, let it cool for at least 30 minutes before slicing. This allows the bread to set and ensures a crispy crust. Once cooled, store it in an airtight container to maintain freshness. Enjoy your delicious creation!
Can I Freeze the Bread for Later Use?
Yes, you can freeze the bread for later use. Freezing bread is a great way to store it long term. Simply wrap it tightly in foil or place it in a freezer bag to prevent freezer burn.


Conclusion
So there you have it, folks! This herbed bread recipe is the ultimate way to impress your friends and family with your baking skills.
The combination of fresh herbs and warm, homemade bread is simply irresistible. Just imagine the look on their faces as they take that first bite and taste the burst of flavors.
It’s like a party in your mouth!
So go ahead, give it a try and become the bread master you were always meant to be. Your taste buds will thank you!