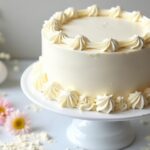
If you’re ready to make a delicious Black Forest cake, I’m excited to guide you! You’ll need rich layers of chocolate sponge, whipped cream, and cherries, plus a splash of Kirsch for that authentic flavor. It’s a stunning dessert that’s perfect for any celebration! Just remember to chill your layers and enjoy the process—it’s all about sharing joy with loved ones. Stick around, and I’ll share the details on the recipe and assembly tips!
Contents
History
When I think about Black Forest Cake, I can’t help but feel a rush of nostalgia. Its German origins are fascinating, as this delightful dessert hails from the Black Forest region, known for its enchanting landscapes and rich traditions. The cake isn’t just a treat; it represents a piece of cultural significance, often enjoyed during celebrations and gatherings. I remember the first time I tasted it, the combination of chocolate, cherries, and whipped cream was simply unforgettable. This cake embodies more than just flavors; it tells a story of heritage and craftsmanship. As we explore its history, I get excited about how these traditions inspire modern twists, inviting us to keep the spirit alive while adding our unique flair to this classic dessert.
Recipe
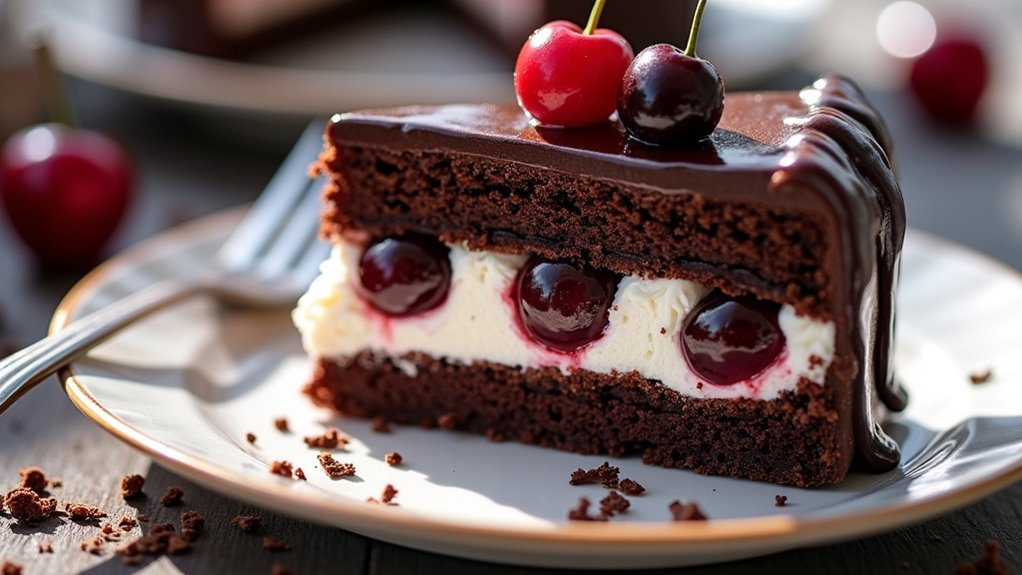
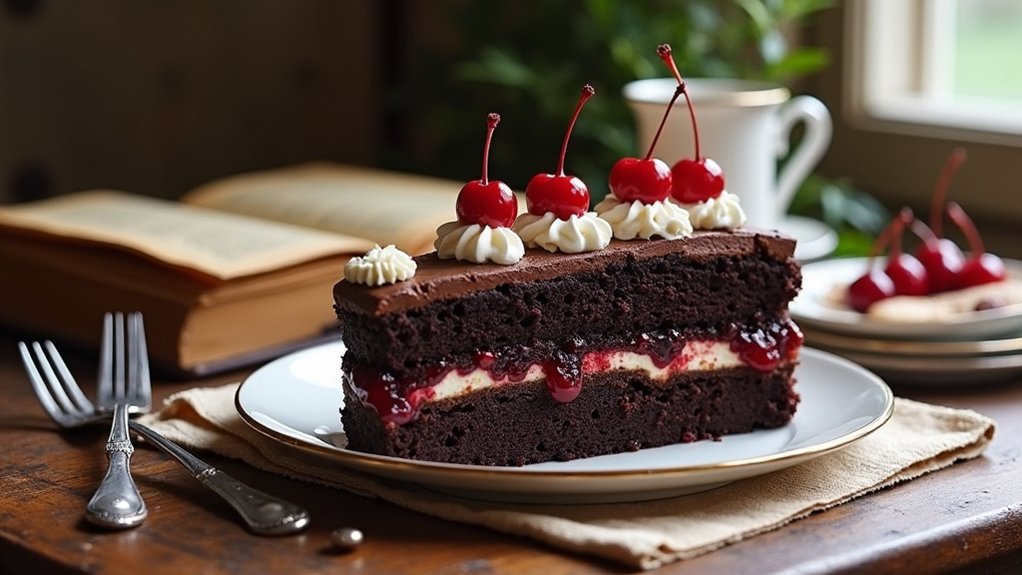
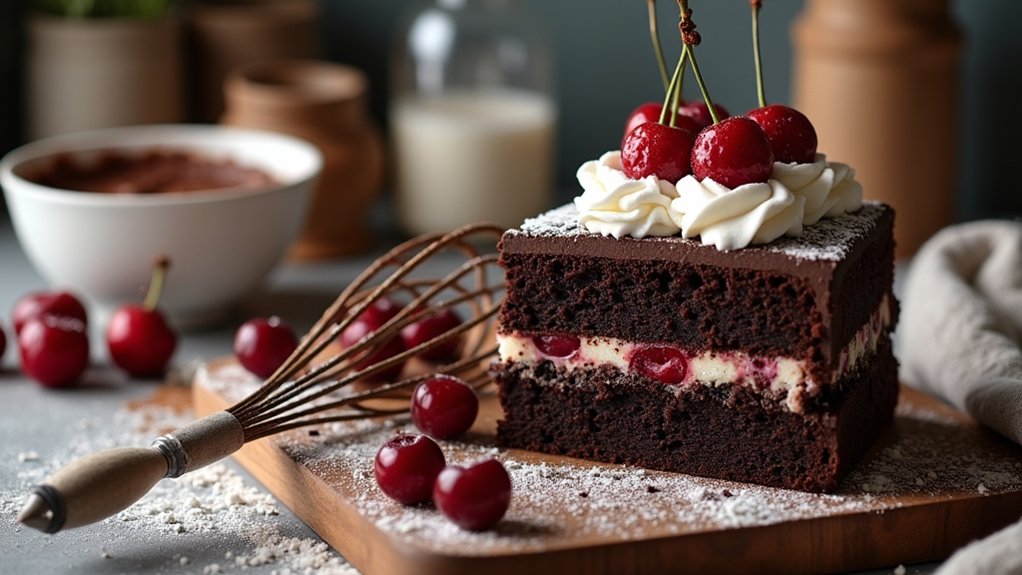
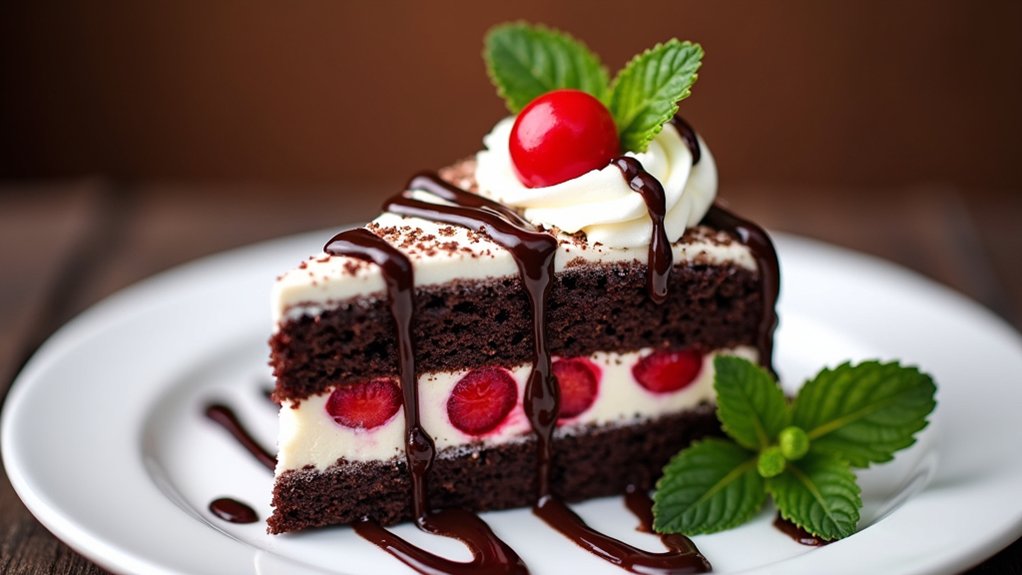
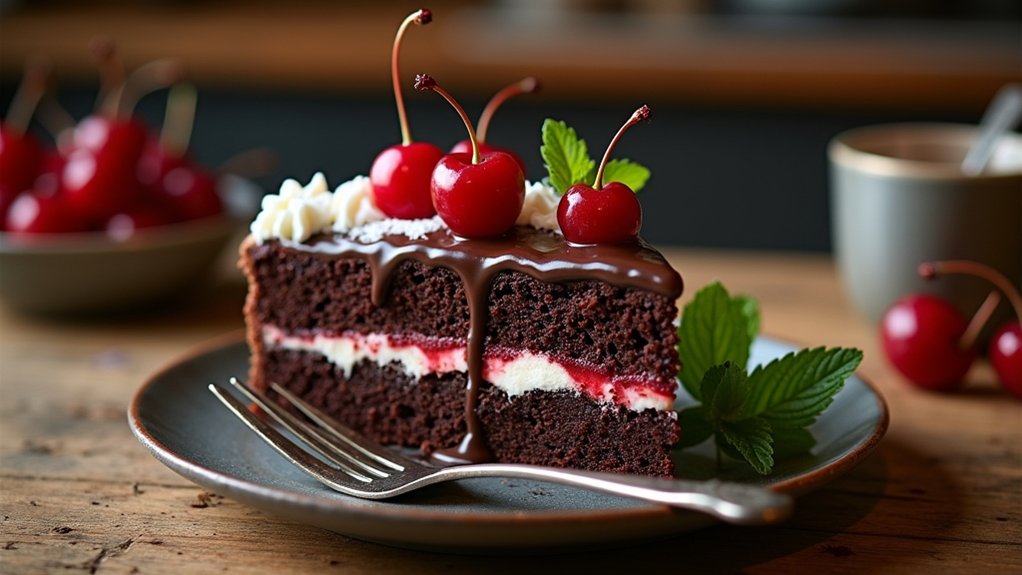
Black Forest Cake is a delightful dessert that hails from Germany, known for its rich layers of chocolate sponge cake, whipped cream, and cherries. The combination of these ingredients creates a decadent treat that is perfect for celebrations, birthdays, or simply indulging your sweet tooth. Traditionally, this cake is made with Kirsch (cherry schnapps), which adds an authentic flavor that complements the chocolate and cherry filling beautifully.
To make a classic Black Forest Cake, you’ll need to prepare a moist chocolate cake base, layer it with luscious whipped cream and tart cherries, and then decorate the top with more whipped cream and chocolate shavings. The process may seem a bit involved, but the end result is a stunning cake that is sure to impress your family and friends. With a few simple ingredients and some careful assembly, you can create this show-stopping dessert in your own kitchen.
Ingredients:
- 1 ¾ cups all-purpose flour
- 1 ¾ cups granulated sugar
- ¾ cup unsweetened cocoa powder
- 1 ½ teaspoons baking powder
- 1 ½ teaspoons baking soda
- 1 teaspoon salt
- 2 large eggs
- 1 cup whole milk
- ½ cup vegetable oil
- 2 teaspoons vanilla extract
- 1 cup boiling water
- 1 jar (24 oz) Morello cherries, drained and juice reserved
- 2 cups heavy whipping cream
- ¼ cup powdered sugar
- 1 teaspoon vanilla extract (for the whipped cream)
- Chocolate shavings (for garnish)
To prepare the Black Forest Cake, preheat your oven to 350°F (175°C) and grease and flour two 9-inch round cake pans. In a large mixing bowl, combine the flour, granulated sugar, cocoa powder, baking powder, baking soda, and salt. Mix in the eggs, milk, vegetable oil, and vanilla extract until well combined. Gradually stir in the boiling water until the batter is smooth. Divide the batter evenly between the prepared pans and bake for 30-35 minutes, or until a toothpick inserted into the center comes out clean. Allow the cakes to cool in the pans for 10 minutes before transferring them to a wire rack to cool completely. Once cooled, slice each cake in half horizontally to create four layers.
For assembly, place one layer of cake on a serving plate and soak it with some reserved cherry juice. Spread a layer of whipped cream (made by whipping the heavy cream, powdered sugar, and vanilla extract until soft peaks form) over the cake and add a layer of cherries. Repeat this process with the remaining cake layers. Once assembled, spread whipped cream over the entire cake and garnish with chocolate shavings and additional cherries on top.
Extra Tips:
When making Black Forest Cake, it’s important to use high-quality cocoa powder for a richer chocolate flavor. If you want to enhance the cherry flavor, feel free to add a splash of Kirsch to the whipped cream or to the cherry layer. Make sure your whipped cream is chilled, as this will help achieve stiff peaks. Also, to prevent the cake layers from becoming too soggy, be careful not to oversoak them with cherry juice. Finally, for a more decorative touch, you can pipe the whipped cream on the top and sides of the cake for a more polished finish. Enjoy your baking!
Cooking Steps
Now that we’ve gathered our ingredients and tools, it’s time to get cooking! I’ll guide you through each step, from mixing the flour and cocoa to folding in whipped cream and adding those delicious cherries. Trust me, once you get started, you’ll be amazed at how quickly this mouthwatering Black Forest Cake comes together!
Step 1. Gather Ingredients and Tools
Gathering the right ingredients and tools is essential for making a delicious Black Forest Cake, and it’s easier than you might think. When it comes to ingredient selection, the quality of your components can really elevate your cake. So, let’s make sure we have everything ready before we plunge in. Here’s what you’ll need:
- Ingredients: Fresh cherries, high-quality cocoa powder, and whipped cream.
- Baking tools: A sturdy mixing bowl, a hand mixer or stand mixer, and a round cake pan.
- Decorating essentials: A spatula, a piping bag, and a cake stand.
With these essential tools and ingredients at your side, you’re all set to create a masterpiece that’ll impress everyone. Let’s get started!
Step 2. Mix Flour and Cocoa
Let’s dive right into mixing the flour and cocoa, which is an essential step that sets the foundation for our delicious Black Forest Cake. I prefer using a blend of all-purpose flour and cake flour types to achieve that perfect lightness. Grab a bowl and sift together about one cup of flour with a quarter cup of your favorite cocoa variety—Dutch-processed cocoa works wonders for richness. As you mix, feel free to add a pinch of salt and a teaspoon of baking powder to boost the flavors. This combination not only enhances the texture but also deepens the chocolatey goodness. Trust me, this step is vital for creating that indulgent cake everyone will love. Let’s get this cake rising!
Step 3. Fold in Whipped Cream
Time to bring in that luscious whipped cream! This step is essential for achieving that dreamy cake texture we all crave. Using some innovative whipped cream techniques, I gently fold the cream into my chocolate mixture, ensuring it stays light and airy. Here’s how I do it:
- Scoop: Start by taking a generous dollop of whipped cream and placing it on top of the batter.
- Fold: Use a spatula to fold the cream, gently turning it over to combine without deflating the air.
- Repeat: Keep adding and folding until the mixture is smooth, but don’t overdo it—maintaining that fluffiness is key!
This blend creates a rich, velvety texture that’ll elevate your Black Forest Cake to the next level!
Step 4. Add Cherries and Kirsch
As I plunge into adding the cherries and Kirsch, I can’t help but feel a wave of excitement—after all, these ingredients are what truly transform a standard cake into a delightful Black Forest masterpiece. First, I select my cherry varieties; whether I go with tart Morello cherries or sweeter Bing cherries, they both add so much character. I gently fold in these luscious fruits, letting their juices mingle with the whipped cream and chocolate layers. Then comes the Kirsch, a cherry brandy that elevates the flavors even more. If you’re looking for kirsch alternatives, consider cherry liqueurs or even a splash of cherry juice for a non-alcoholic twist. This step is where the magic happens, creating a luscious filling that’s simply irresistible!
Step 5. Bake at 350°F
Once you’ve prepared your cake layers, it’s time to pop them into the oven at 350°F. This baking temperature is essential for achieving that perfect cake texture—moist yet fluffy. As I slide the pans in, I can almost smell the sweet anticipation of what’s to come.
Here are a few tips to keep in mind:
- Rotate your pans halfway through to guarantee even baking.
- Check for doneness with a toothpick; it should come out clean when your cake is ready.
- Let the layers cool in the pan for about 10 minutes before transferring them to a wire rack.
Trust me, following these steps will make your Black Forest cake a delightful masterpiece!
Nutritional Guide
When it comes to enjoying a slice of Black Forest cake, understanding its nutritional aspects can really enhance the experience. This cake’s caloric content is something I always consider, especially when sharing it with friends. The delightful combination of ingredients not only tantalizes the taste buds but also offers some unique benefits.
Here’s a quick look at the nutritional breakdown:
| Ingredient | Calories per Slice | Benefits |
|---|---|---|
| Chocolate Cake | 250 | Antioxidants, mood booster |
| Whipped Cream | 100 | Source of calcium, comfort food |
| Cherries | 50 | Rich in vitamins, anti-inflammatory |
Final Thoughts
Even though making a Black Forest cake might seem intimidating, I promise it’s a delightful journey worth taking. This cake is not just a treat; it’s a celebration of flavors and memories. Here are some cooking tips and serving suggestions to elevate your experience:
Making a Black Forest cake may seem daunting, but it’s a rewarding adventure that brings joy and cherished memories.
- Chill your layers: Refrigerate the cake layers before assembling; it makes them easier to handle.
- Innovative toppings: Experiment with chocolate shavings or fresh fruit for a unique twist.
- Serve with flair: Present slices with a dollop of whipped cream and a cherry on top for a classic touch.
I hope you feel inspired to immerse yourself in this recipe. Trust me, sharing this cake with loved ones will create delicious moments and unforgettable memories!
Frequently Asked Questions
Can I Use a Gluten-Free Flour Substitute for This Recipe?
Absolutely, I’ve had great success using gluten-free options in my baking. I recommend trying almond flour or a gluten-free flour blend as substitutes. They can create an innovative twist while maintaining delicious flavor and texture!
How Should I Store Leftover Black Forest Cake?
I store leftover cake in an airtight container, keeping it in the fridge for ideal freshness. This way, I maintain its moistness and flavor, ensuring every bite delights my taste buds for days!
Can I Make This Cake in Advance?
Absolutely, I can prepare this cake in advance! For baking tips, I suggest making the layers ahead, then assembling them just before serving. This way, the flavors meld beautifully while keeping everything fresh and delightful.
What Type of Cherries Are Best for This Recipe?
I love using fresh cherries for their vibrant flavor, but maraschino cherries add that classic touch. Combining both brings a delightful twist, enhancing the cake’s taste while keeping it innovative and enjoyable for everyone.
Is It Possible to Freeze Black Forest Cake?
Absolutely, I’ve frozen Black Forest cake successfully! Using proper freezing techniques, I’ve noticed that the cake texture holds up well. Just make sure to wrap it tightly to prevent freezer burn. Enjoy your innovative baking!
Conclusion
As we wrap up this delicious journey into the world of Black Forest cake, I hope you feel inspired to create this classic dessert at home. Did you know that this cake originated in Germany, and its name comes from the Black Forest region, known for its rich cherries? Baking isn’t just about the end result; it’s about the joy of making something special to share with loved ones. So grab your ingredients, and let’s bake some memories together!