Imagine walking into a quaint Portuguese bakery, the aroma of freshly baked bread filling the air. The warm, crusty loaves on display, inviting you to take a bite and experience a world of flavors.
Now, what if I told you that you could recreate that same experience in your very own kitchen? In this discussion, we will unravel the secrets behind the art of Portuguese bread-making.
From the perfect combination of ingredients to the intricate process of shaping and scoring the dough, I will guide you step by step towards achieving that authentic Portuguese bread.
So, are you ready to embark on a culinary adventure that will transport your taste buds to the streets of Portugal?


Contents
- 1 Key Takeaways
- 2 Ingredients
- 3 Mixing the Dough
- 4 Fermentation Process
- 5 Shaping and Scoring the Bread
- 6 Baking the Bread
- 7 Enjoying Your Homemade Portuguese Bread
- 8 Portuguese Bread Recipe
- 9 Nutrition facts
- 10 Frequently Asked Questions
- 10.1 Can I Use All-Purpose Flour Instead of Bread Flour in This Portuguese Bread Recipe?
- 10.2 How Long Should I Let the Dough Ferment Before Shaping It?
- 10.3 Can I Substitute Instant Yeast for Active Dry Yeast in This Recipe?
- 10.4 How Do I Know if the Bread Is Fully Baked and Ready to Be Taken Out of the Oven?
- 10.5 Can I Freeze the Bread to Enjoy It Later?
- 11 Can I Use Carrabba’s Bread Dip with Portuguese Bread?
- 12 Conclusion
Key Takeaways
- Portuguese bread comes in different types, such as pão de milho, pão de água, pão de leite, and pão com chouriço.
- The mixing and fermentation process involves gently mixing the ingredients, activating the yeast, incorporating the flour, kneading the dough, and allowing it to rise until doubled in size.
- Fermentation enhances the texture, taste, and nutritional value of Portuguese bread, with options for natural fermentation using wild yeast or commercial yeast fermentation.
- Shaping and scoring the bread contribute to its visual appeal, with various patterns and techniques to create a visually appealing loaf.
Ingredients
To make delicious Portuguese bread, you’ll need a carefully selected list of ingredients. Traditional Portuguese bread recipes offer a variety of options, each with its own unique flavor and texture.
One popular type is pão de milho, or cornbread, which incorporates cornmeal into the dough, giving it a slightly sweet and hearty taste.
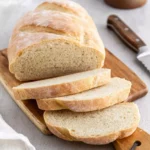
Another classic is pão de água, a crusty and chewy bread made with just flour, water, yeast, and salt.
For those who prefer a softer texture, pão de leite, or milk bread, is a great choice. It’s made with milk, butter, flour, sugar, and yeast, resulting in a tender and slightly sweet loaf.
To add some extra flavor, you can try pão com chouriço, which is bread stuffed with smoked Portuguese sausage. The combination of the savory sausage and the soft bread is simply irresistible.
Whatever type of Portuguese bread you choose to make, be sure to use high-quality ingredients and follow the recipe closely. The end result will be a delicious loaf that transports you to the streets of Portugal with its authentic taste and aroma.
Mixing the Dough
Now that you have carefully selected your ingredients for making delicious Portuguese bread, it’s time to dive into the process of mixing the dough. This step is crucial in achieving that perfect texture and taste. To guide you through this process, here is a simple yet effective kneading technique that will activate the yeast and ensure a fluffy and flavorful bread.
| Kneading Technique | Yeast Activation |
|---|---|
| Use your hands to gently mix the ingredients together until they form a shaggy dough. | Dissolve the yeast in warm water with a pinch of sugar, and let it sit for about 5 minutes until it becomes frothy. This indicates that the yeast is active and ready to work its magic. |
To start, place the measured flour, salt, and sugar in a large mixing bowl. Create a well in the center and pour in the frothy yeast mixture. Slowly incorporate the flour into the liquid, using your hands to combine everything until a dough forms. Be sure to work the dough until it becomes smooth and elastic, about 10-15 minutes of kneading.
Remember, kneading is all about applying pressure and stretching the dough to develop the gluten, which gives the bread its structure. As you knead, the dough will become more cohesive, springy, and less sticky.
Once you’ve achieved the desired consistency, shape the dough into a ball and place it back in the mixing bowl. Cover it with a clean kitchen towel and let it rise in a warm, draft-free area for about 1 to 1.5 hours or until it doubles in size.
Now that you have mastered the art of mixing the dough, you are one step closer to enjoying the delightful taste of homemade Portuguese bread.
Fermentation Process
During the fermentation process, the dough undergoes a magical transformation, as the yeast works its wonders to create a light and airy texture in the Portuguese bread. This process is crucial in bread-making, as it not only imparts flavor but also enhances the nutritional value of the bread.
One of the benefits of fermented bread is improved digestibility. The fermentation process breaks down complex carbohydrates, making them easier to digest. Additionally, fermented bread has a lower glycemic index, which means it causes a slower and more gradual rise in blood sugar levels compared to non-fermented bread.
There are different types of fermentation techniques used in bread-making. The most common one is known as natural fermentation or sourdough fermentation. In this technique, wild yeast and bacteria naturally present in the environment are used to ferment the dough. This results in a distinct tangy flavor and a chewy texture.
Another technique is known as commercial yeast fermentation. Here, commercial yeast is added to the dough, which speeds up the fermentation process and produces a milder flavor. This technique is commonly used in commercial bakeries due to its convenience and consistency.
Whether you prefer the tangy flavor of sourdough or the mildness of commercial yeast, the fermentation process plays a crucial role in creating delicious and nutritious Portuguese bread. So, embrace the magic of fermentation and enjoy the wonderful taste and texture of this traditional bread.
Shaping and Scoring the Bread
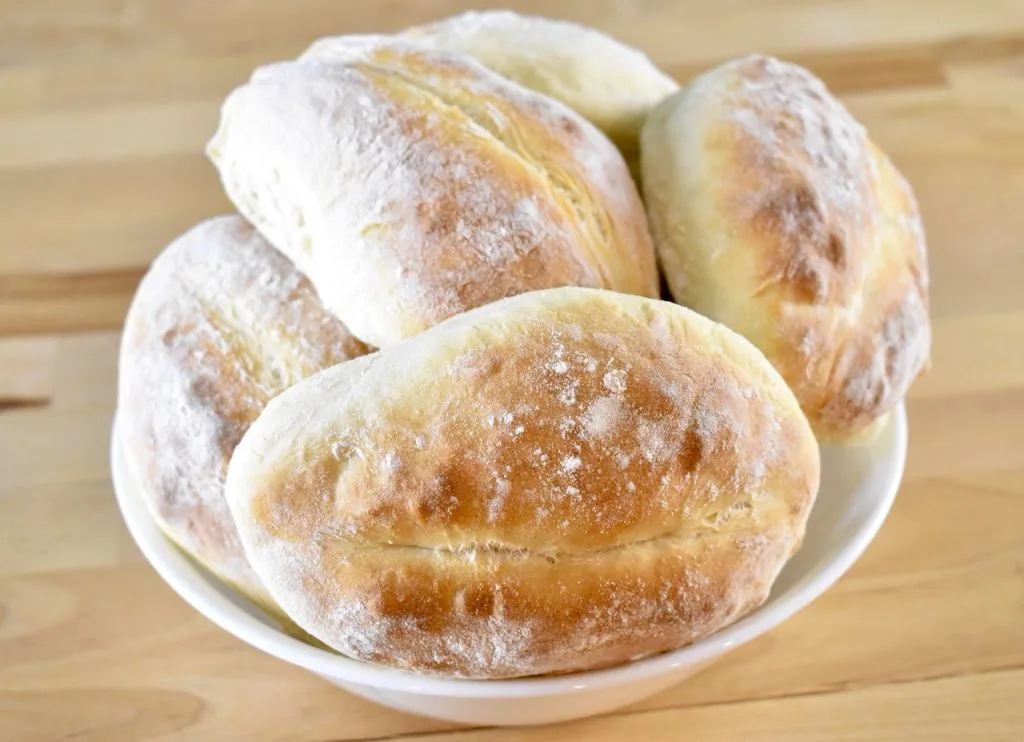
Achieve the perfect shape and texture for your Portuguese bread by skillfully shaping and scoring the dough. Shaping techniques play a crucial role in creating a visually appealing loaf with an even crumb structure. When shaping the dough, start by gently patting it into a rectangle and then folding it into thirds, like a letter. Continue this process until the dough forms a tight ball. This method helps to create tension on the surface of the bread, resulting in a well-risen loaf with a beautiful shape.
Scoring the bread is another important step in the baking process. It involves making shallow cuts on the surface of the dough before placing it in the oven. Not only does scoring enhance the visual appeal of the bread, but it also helps control the expansion of the dough during baking. The patterns you choose for scoring can vary, depending on your preference and the type of bread you’re making. Common scoring patterns include straight slashes, diagonal cuts, or even intricate designs. Experiment with different patterns to find the one that suits your artistic vision.

Baking the Bread
Now that you’ve shaped and scored the bread, it’s time to move on to the next crucial step: baking.
This is where the magic happens! First, you’ll carefully place the dough in a preheated oven, allowing it to rise and develop a beautiful golden crust.
As it bakes, the aroma of freshly baked bread will fill your kitchen, building anticipation for the final result.
Mixing the Ingredients
To begin baking the bread, start by thoroughly mixing all the ingredients together. In a large mixing bowl, combine the flour, yeast, salt, and sugar. Use a wooden spoon or your hands to ensure that all the ingredients are evenly distributed. Once the dry ingredients are mixed, add in the water and olive oil. Continue to mix until a shaggy dough forms.
Next, it’s time to knead the dough. Transfer the dough onto a clean, floured surface and start kneading. Use the palm of your hand to push the dough away from you, then fold it back towards you and repeat. This process helps to develop the gluten and give the bread its structure. Knead for about 10 minutes until the dough becomes smooth and elastic.
Once the kneading process is complete, shape the dough into a ball and place it back into the mixing bowl. Cover the bowl with a clean kitchen towel and let the dough rise in a warm place for about 1 to 2 hours, or until it has doubled in size.
Fermenting the Dough
After allowing the dough to rise and double in size, it’s time to move on to the next step in the bread-making process: fermenting the dough to bring out its full flavor and texture.
Fermentation is a crucial stage that activates the yeast and develops the dough’s complex flavors.
To begin, gently punch down the risen dough to release any trapped air. This will ensure an even fermentation process.
Next, shape the dough into a ball and place it in a clean, lightly oiled bowl. Cover the bowl with a damp cloth and let the dough rest in a warm, draft-free area.
During this time, the yeast will continue to work its magic, causing the dough to rise further and develop its unique taste and texture.
Allow the dough to ferment for at least one hour, or until it has doubled in size.
This slow fermentation process is what gives Portuguese bread its distinct flavor and airy crumb.
Baking and Cooling
Begin the baking process by preheating your oven to the recommended temperature for Portuguese bread. This step is crucial to ensure that your bread bakes evenly and achieves the perfect crust. Once your oven is preheated, place the dough in the center of the oven and set a timer according to the baking time specified in the recipe.
While your bread is baking, you can use this time to prepare for the next step: cooling.
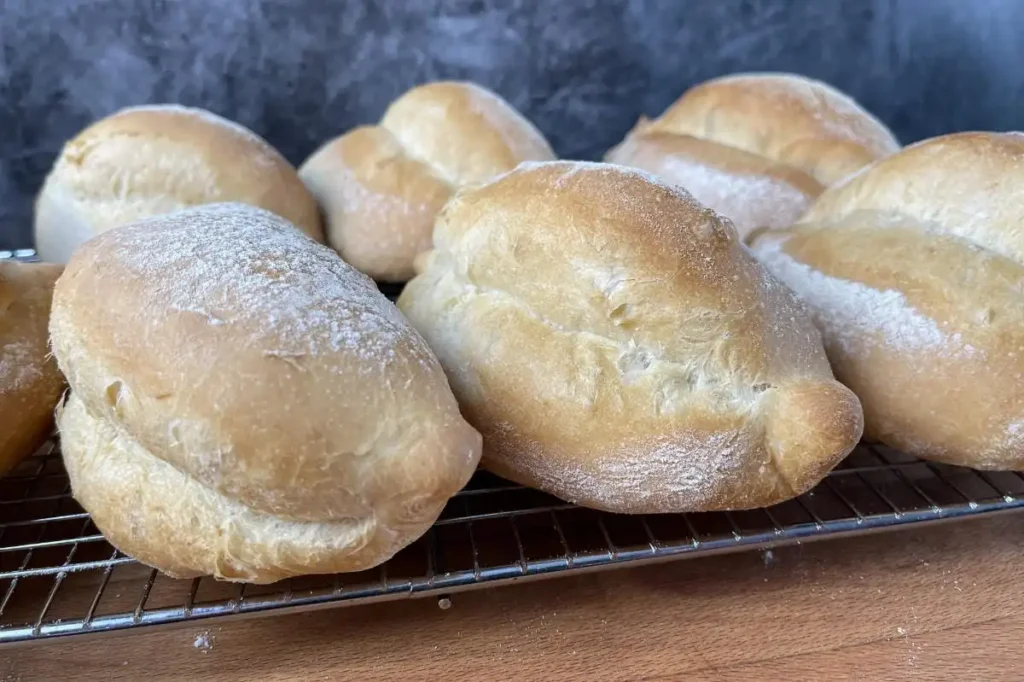
After the baking time is up, remove the bread from the oven and carefully transfer it to a wire rack to cool. Cooling your bread properly is essential to prevent it from becoming soggy or losing its shape. Here are some cooling techniques to ensure the best results:
- Allow the bread to cool completely before slicing or storing.
- Place the bread on a wire rack to promote air circulation and prevent moisture buildup.
- Avoid placing the bread in an airtight container while it’s still warm, as this can cause condensation and make the crust soggy.
By following these cooling techniques, you can enjoy a perfectly baked Portuguese bread.
However, if you encounter any issues during the baking or cooling process, here are some troubleshooting tips:
- If your bread comes out underbaked, increase the baking time by a few minutes and check for doneness using a thermometer.
- If your bread has a dense texture, it may be due to overmixing the dough. Next time, try to mix the dough until just combined.
- If your bread has a burnt crust, reduce the oven temperature and cover the loaf with aluminum foil halfway through baking to prevent further browning.
With these tips and techniques, you can confidently bake and cool your Portuguese bread to perfection, ensuring a delightful and satisfying result.
Enjoying Your Homemade Portuguese Bread
Now that you have successfully baked your homemade Portuguese bread, it’s time to enjoy the fruits of your labor.
The crust of this bread is delightfully crusty, with a golden brown color that adds to its appeal.
As you take a bite, you’ll be greeted with a light and airy texture that’s perfect for savoring on its own or pairing with your favorite spreads and toppings.
Don’t forget to store any leftovers properly to ensure they stay fresh and delicious for longer.
Crust and Texture
To fully appreciate the crust and texture of your homemade Portuguese bread, take a moment to savor its golden-brown exterior and delightfully chewy interior. The crust of Portuguese bread can vary, offering different types to suit your preference. Some loaves have a thin and crispy crust that provides a satisfying crunch with each bite. Others have a thicker, crustier exterior that adds a robust flavor and a hearty texture. When it comes to achieving a fluffy texture, the secret lies in the kneading process. By gently kneading the dough and allowing it to rise properly, you create air pockets that result in a light and airy texture. Here’s a simple table showcasing the different types of crust and achieving a fluffy texture to help you understand the nuances of Portuguese bread:
| Types of Crust | Achieving a Fluffy Texture |
|---|---|
| Thin and crispy | Gently knead the dough |
| Thick and crusty | Allow the dough to rise properly |


Portuguese Bread Recipe
Course: DessertCuisine: PortugueseDifficulty: Intermediate12
servings45
minutes45
minutes80
kcalThis recipe begins with the activation of yeast, a crucial step that sets the stage for the dough's rise. The rhythmic kneading transforms a simple mixture into a smooth, elastic dough, promising a satisfying bite in the finished bread. The first rise allows the dough to develop its character, while the second rise on the baking sheet ensures the loaf takes on its final shape.
Ingredients
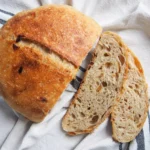
3 cups rye flour
1 1/2 cups all-purpose flour
2 1/4 teaspoons active dry yeast
1 1/2 teaspoons salt
1 1/4 cups warm water (around 110°F or 43°C)
2 tablespoons olive oil
Directions
- In a small bowl, combine the warm water and sugar. Stir until the sugar is dissolved.
- Sprinkle the active dry yeast over the water and let it sit for about 5-10 minutes until it becomes foamy.
- In a large mixing bowl, combine the rye flour, all-purpose flour, and salt.
- Make a well in the center of the dry ingredients and pour in the activated yeast mixture.
- Add the olive oil.
- Gradually incorporate the dry ingredients into the wet ingredients, mixing well until a dough forms.
- Turn the dough out onto a floured surface and knead for about 8-10 minutes, or until the dough becomes smooth and elastic.
- Place the dough in a lightly oiled bowl, cover it with a clean kitchen towel, and let it rise in a warm place for 1-2 hours, or until it has doubled in size.
- Punch down the risen dough and shape it into a round or oval loaf.
- Place the shaped dough on a baking sheet lined with parchment paper, cover it again, and let it rise for another 30-45 minutes.
- Preheat your oven to 375°F (190°C).
- Bake the bread for 30-35 minutes or until it has a golden-brown crust and sounds hollow when tapped on the bottom.
- Allow the bread to cool on a wire rack before slicing.
Serving Suggestions
For a delightful experience with your homemade Portuguese bread, explore a variety of serving suggestions that will enhance its delicious flavors and unique texture. Here are some ideas to get you started:
- Toppings:
- Olive oil and sea salt: Drizzle your warm bread with high-quality olive oil and sprinkle with a pinch of sea salt for a simple yet satisfying topping.
- Garlic butter: Spread a generous layer of homemade garlic butter on your bread for a rich and savory flavor.
- Bread accompaniments:
- Cheese platter: Serve your Portuguese bread alongside a selection of cheeses such as Manchego, Gouda, or Brie for a perfect pairing of flavors and textures.
- Soup: Use your bread to soak up the delicious broth of a hearty soup like Portuguese caldo verde or tomato basil soup.
With these serving suggestions, you can enjoy your homemade Portuguese bread in various ways, making every bite a delightful experience.
Storing and Freezing
As you continue to savor the delightful flavors and unique texture of your homemade Portuguese bread, it’s important to know how to properly store and freeze it to maintain its freshness and enjoy it for longer. Here are some storing techniques and freezing tips to help you make the most of your bread:
| Storing Techniques | Freezing Tips |
|---|---|
| Store in a paper bag or bread box to allow air circulation and prevent moisture buildup. | Slice your bread before freezing to make it easier to thaw individual portions. |
| Avoid storing in plastic bags or containers, as they can trap moisture and make the bread soggy. | Place the sliced bread in a freezer-safe bag or wrap tightly in plastic wrap before freezing. |
| Keep the bread at room temperature for up to 3 days, then transfer to the refrigerator to prolong its freshness. | To thaw, simply remove the desired number of slices from the freezer and let them thaw at room temperature for a few minutes or toast them for a warm and crispy texture. |
Nutrition facts
- Calories: Approximately 120-150 kcal
- Total Fat: 3-5g
- Saturated Fat: 0.5-1g
- Monounsaturated Fat: 2-3g
- Polyunsaturated Fat: 0.5-1g
- Cholesterol: 0mg
- Sodium: 200-300mg
- Total Carbohydrates: 22-25g
- Dietary Fiber: 3-4g
- Sugars: 0-1g
- Protein: 3-5g
Frequently Asked Questions
Can I Use All-Purpose Flour Instead of Bread Flour in This Portuguese Bread Recipe?
You can use all-purpose flour instead of bread flour for this Portuguese bread recipe. However, keep in mind that the texture and crust may be slightly different. To achieve a crusty texture, consider using a Dutch oven or baking stone.
How Long Should I Let the Dough Ferment Before Shaping It?
To achieve the perfect texture and flavor, the fermenting time of the dough before shaping can vary. It’s essential to follow the recipe’s instructions and experiment with different techniques to find the one that suits your taste and desired outcome.
Can I Substitute Instant Yeast for Active Dry Yeast in This Recipe?
Yes, you can substitute instant yeast for active dry yeast in this recipe. Just use the same amount of instant yeast as the recipe calls for active dry yeast. This will help you achieve successful bread baking.
How Do I Know if the Bread Is Fully Baked and Ready to Be Taken Out of the Oven?
To know if your bread is fully baked, look for a golden brown crust and tap the bottom for a hollow sound. For perfect crust on Portuguese bread, brush with egg wash and bake on a preheated baking stone.
Can I Freeze the Bread to Enjoy It Later?
Yes, you can freeze the bread to enjoy it later. Freezing bread is a great way to store it for future use. Just make sure to wrap it tightly in plastic wrap or place it in airtight containers to prevent freezer burn.

Can I Use Carrabba’s Bread Dip with Portuguese Bread?
Yes, you can use Carrabba’s bread dip recipe with Portuguese bread. The blend of herbs and spices in Carrabba’s bread dip pairs perfectly with the soft and chewy texture of Portuguese bread, creating a delightful combination of flavors. Enjoy dipping and savoring this delicious appetizer.
Conclusion
In conclusion, with just a few simple ingredients and a little bit of time, you can create your own delicious Portuguese bread.
The process of mixing the dough, allowing it to ferment, shaping and scoring, and finally baking it, is a rewarding and satisfying experience.
So why not give it a try and enjoy the warm, crusty goodness of homemade Portuguese bread?
It’s like a slice of heaven straight from your own kitchen!