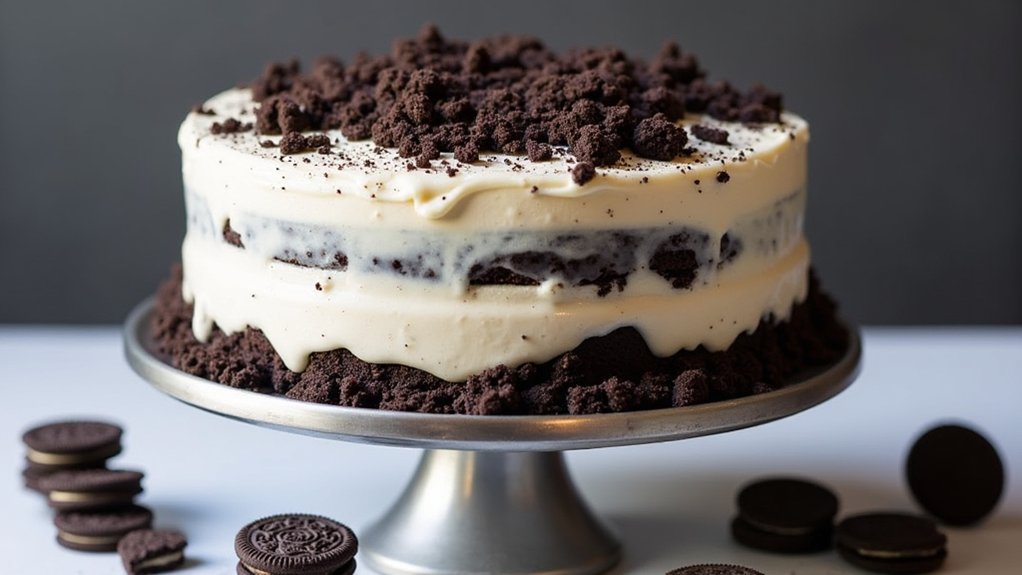
If you’re craving something sweet, you’ve got to try making an Oreo cake! It’s super easy and combines the classic flavors of Oreos with a rich chocolate cake. You just mix a box of chocolate cake mix with some eggs, water, and crushed Oreos, bake it, and top it with creamy frosting and more Oreos. This cake isn’t just delicious; it’s also perfect for gatherings. Stick around to learn some fun enhancements and serving tips!
Contents
History

When you bite into a slice of Oreo cake, you might not realize the rich history behind those beloved cookies. The story of Oreos began in 1912, when they first emerged as a simple chocolate wafer with a sweet cream filling. Over the years, the Oreo evolved into the iconic treat we adore today, with countless variations and flavors that ignite our imaginations. From the original black-and-white design to the colorful, stuffed versions, each iteration reflects our desire for innovation in the cookie world. It’s fascinating how a humble cookie can spark creativity in the kitchen, inspiring bakers like us to experiment and share delightful recipes that celebrate Oreo’s origins. So, let’s embrace this delicious legacy together!
Recipe
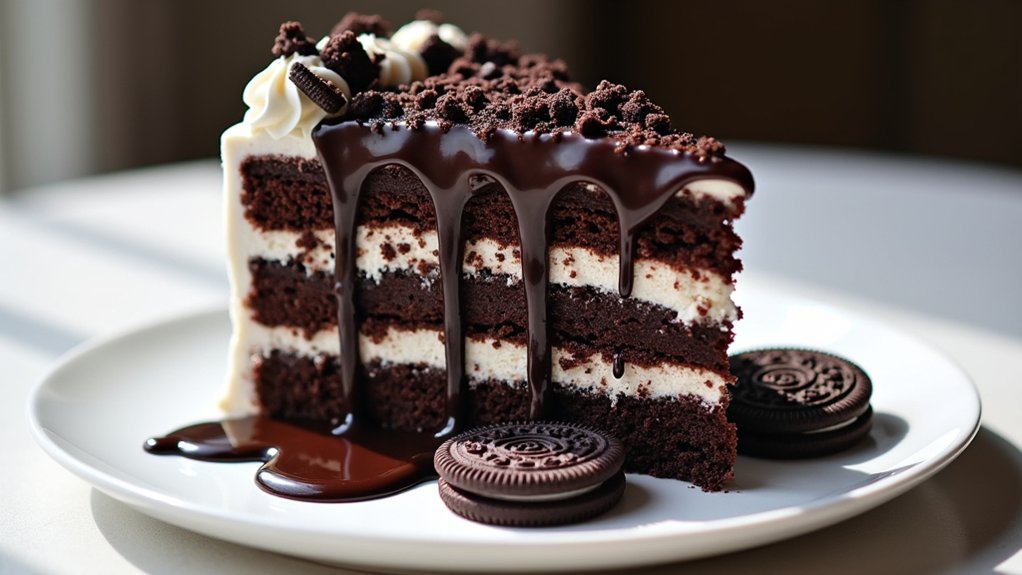
If you’re a fan of the classic Oreo cookie, then you’ll love this delicious Oreo Cake recipe! This decadent dessert combines the rich chocolate flavor of the Oreo cookies with a moist and fluffy cake, making it perfect for any occasion. Whether you’re celebrating a birthday, hosting a party, or just satisfying your sweet tooth, this cake is sure to impress your family and friends.
The beauty of this Oreo Cake lies not only in its taste but also in its simplicity. With just a handful of ingredients and minimal prep time, you can whip up this delightful treat in no time. The combination of crushed Oreos and creamy frosting creates a flavor explosion that is both nostalgic and satisfying. Get ready to indulge in a slice of heaven that will have everyone coming back for seconds!
The Oreo Cake’s delightful simplicity and rich flavors will leave everyone craving more!
Ingredients:
- 1 box of chocolate cake mix
- 3 large eggs
- 1 cup of water
- 1/2 cup of vegetable oil
- 1 cup of crushed Oreo cookies
- 1 cup of heavy whipping cream
- 1 cup of powdered sugar
- 1 teaspoon of vanilla extract
- Additional Oreo cookies for decoration
To make the Oreo Cake, preheat your oven to 350°F (175°C) and grease two 9-inch round cake pans. In a large mixing bowl, combine the chocolate cake mix, eggs, water, and vegetable oil. Mix until well combined and then gently fold in the crushed Oreo cookies. Divide the batter evenly between the prepared cake pans and bake for 25-30 minutes or until a toothpick inserted in the center comes out clean. Allow the cakes to cool in the pans for about 10 minutes before transferring them to wire racks to cool completely. In the meantime, whip the heavy cream until it begins to thicken, then gradually add the powdered sugar and vanilla extract, continuing to whip until stiff peaks form. Once the cakes are completely cool, spread a layer of whipped cream between the two layers, and then frost the top and sides of the cake with the remaining whipped cream. Finish with additional crushed Oreos on top for garnish.
When making your Oreo Cake, consider chilling your mixing bowl and beaters before whipping the cream. This helps achieve a better texture and stability for the frosting. For an extra special touch, try adding a layer of crushed Oreos between the cake layers or even incorporating them into the frosting. If you have leftovers, store the cake in the refrigerator to keep it fresh, as the whipped cream can spoil if left out at room temperature for too long. Enjoy your delicious creation!
Cooking Steps
Now that we’ve got our ingredients ready, let’s jump into the cooking steps! First, we’ll preheat the oven to 350°F, so it’s nice and warm when our cake is ready to go in. After that, it’s time to crush those Oreo cookies finely and mix everything together—trust me, this is where the magic starts to happen!
Step 1. Preheat Oven to 350°F
Before diving into mixing ingredients, it’s vital to preheat your oven to 350°F, as this step guarantees that your Oreo cake bakes evenly and rises perfectly. Trust me, starting off with the right oven temperature is essential for achieving that delightful texture we all crave. Here are some baking tips to keep in mind:
- Check your oven: Make certain it’s calibrated correctly; an inaccurate temperature can lead to baking disasters.
- Give it time: Allow the oven to preheat fully before placing your cake inside; this guarantees consistent baking.
- Use an oven thermometer: This handy tool can help you verify your oven’s actual temperature, preventing surprises.
With these tips, you’re set up for Oreo cake success!
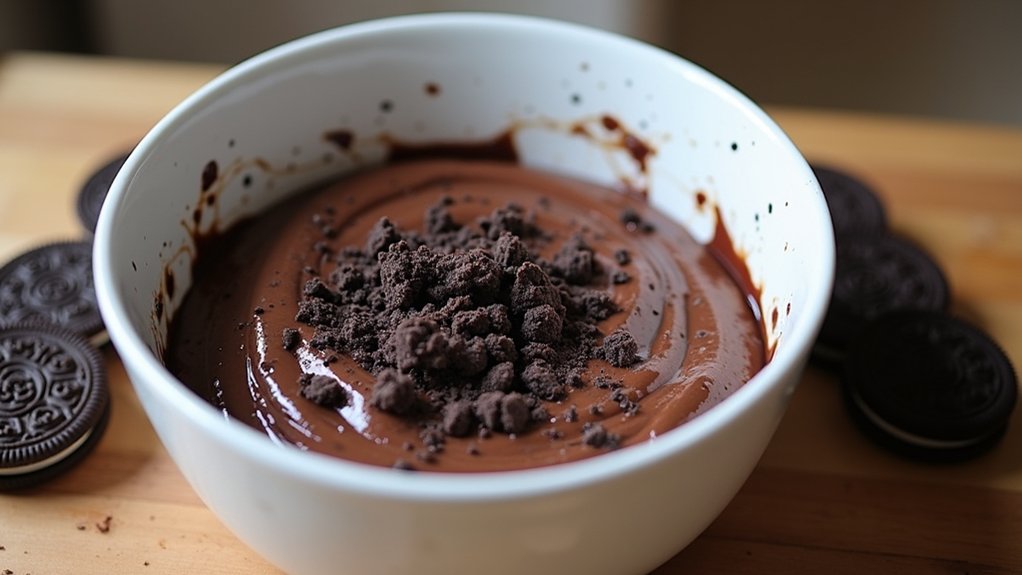
Step 2. Crush Oreo Cookies Finely
Crushing Oreo cookies finely is one of the most satisfying parts of making this cake. I love experimenting with different Oreo varieties, like the classic, mint, or even peanut butter, to see how they change the flavor and cookie textures. To start, I grab a zip-top bag and toss in the cookies, sealing it tightly. Then, I use a rolling pin to crush them into a fine powder, ensuring there are no chunky bits left behind. This step not only releases that nostalgic Oreo aroma but also makes the cake’s base incredibly rich and delicious. The finer the crumbs, the better they blend into the batter later on, creating that perfect Oreo experience we all crave. Enjoy this fun process!
Step 3. Mix Ingredients Thoroughly
Let’s plunge into mixing the ingredients thoroughly, as this step is essential for achieving that delightful Oreo cake texture. I find that using the right mixing techniques makes all the difference. Here’s how to get it just right:
- Start with the crushed Oreos and combine them with the wet ingredients, ensuring even distribution.
- Gradually add the dry ingredients, paying attention to the ingredient ratios for perfect consistency.
- Mix until smooth, but don’t overdo it—just enough to blend everything into a luscious batter.
This method not only enhances flavor but also creates that moist, velvety cake we all love. So, grab your mixing spoon and let your creativity shine as you whip up this delicious treat!
Step 4. Bake for 30 Minutes
Baking the cake is where the magic truly happens, and you’ll want to set your timer for 30 minutes. As the oven works its charm, I can already envision the delightful aroma wafting through my kitchen. This step is essential, as the right baking techniques will transform your batter into a fluffy masterpiece with the perfect cake textures. Keep an eye on those edges; they should start to pull away from the pan slightly. It’s like watching a flower bloom! When the timer goes off, I recommend doing the toothpick test. Insert it in the center, and if it comes out clean, you’ve nailed it! Now, let your cake cool a bit before moving on to the next delicious stage.
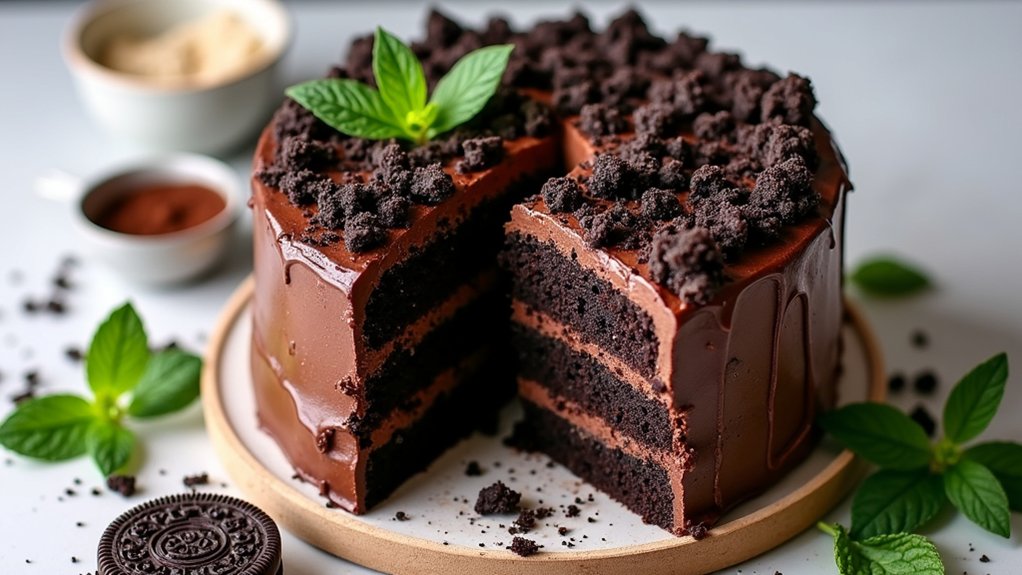
Step 5. Frost With Oreo Cream
Once your cake has cooled to the perfect temperature, it’s time to bring on the star of the show: the Oreo cream frosting. This isn’t just any frosting; it’s a game-changer! Let’s elevate our cake with some innovative icing techniques and delicious Oreo variations. Here’s how I do it:
- Mix the Frosting: Combine softened cream cheese, butter, and crushed Oreos until smooth and fluffy.
- Spread It On: Use an offset spatula to gently frost the top, working your way down the sides for a clean finish.
- Add a Twist: Sprinkle extra crushed Oreos on top for added texture and visual appeal!
Trust me, this Oreo cream frosting will take your cake to a whole new level of yum!
Nutritional Guide
When it comes to indulging in a slice of Oreo cake, understanding its nutritional content can help you make informed choices. This cake, while a delightful treat, has its caloric content worth noting. Each slice typically carries around 350 calories, depending on portion size and toppings. However, the ingredient benefits, like the calcium from the cream and the antioxidants in cocoa, can make your dessert experience a little more rewarding.
Here’s a quick nutritional snapshot:
| Nutrient | Amount per Slice |
|---|---|
| Calories | 350 |
| Protein | 4g |
| Sugar | 25g |
Final Thoughts
As you reflect on baking this delicious Oreo cake, I hope you feel inspired to share a slice with family and friends, creating sweet memories around the table. This cake is versatile, and you can easily explore different cake variations to keep things exciting. Here are a few ideas to elevate your experience:
Reflect on the joy of baking an Oreo cake and share it with loved ones to create unforgettable memories.
- Add a layer of peanut butter frosting for a delightful twist.
- Incorporate fresh berries between the layers for a rejuvenating contrast.
- Serve with vanilla ice cream to create a delicious dessert pairing that everyone will love.
Frequently Asked Questions
Can I Use Gluten-Free Oreos for This Recipe?
Absolutely, I’ve used gluten-free Oreos in my recipes! They provide great cookie texture, and I love experimenting with gluten-free alternatives. You’ll be pleasantly surprised by how delicious your creation turns out. Give it a try!
How Should I Store Leftover Oreo Cake?
To store leftover cake properly, I recommend refrigerating it in an airtight container. It keeps the cake moist while enhancing flavors. Plus, using innovative refrigeration tips can elevate your dessert experience beyond the ordinary.
Can I Make This Cake Ahead of Time?
Absolutely, I can make this cake ahead of time! I recommend freezing it for freshness. Just wrap it tightly and follow my preparation tips for the best results when you’re ready to enjoy it.
What Are Good Frosting Alternatives for Oreo Cake?
I love experimenting with frosting types! Cream cheese frosting adds tang, while whipped ganache offers richness. For flavor combinations, try peppermint or caramel. These alternatives elevate your cake and surprise your taste buds deliciously!
Can I Add Other Flavors to the Oreo Cake?
I love experimenting with flavor variations. You can incorporate ingredient substitutions like mint, peanut butter, or espresso for a unique twist. It’s all about creativity and finding combinations that excite your taste buds!
Conclusion
As you savor each bite of your Oreo cake, think of it as a delightful reminder of cherished moments shared with family and friends. Just like the layers of this cake, our lives are built on sweet experiences and memories. Baking isn’t just about the ingredients; it’s about creating joy and connection. So, gather your loved ones, whip up this recipe, and celebrate the little things that make life delicious. Happy baking!