Did you know that in America, the average person consumes around 53 pounds of bread per year? That’s a lot of bread!
If you’re someone who enjoys the comforting aroma and taste of freshly baked bread, then you’ll definitely want to continue reading. Today, we’re going to discuss a tried and true recipe for King Arthur white bread that will have you enjoying the soft, pillowy goodness of homemade bread in no time.
So, grab your apron and get ready to embark on a delicious baking adventure.

Contents
Key Takeaways
- The choice of flour, specifically the protein content, greatly influences the texture and structure of bread.
- Fresh and active yeast is essential for proper rising, and using the right amount is crucial for optimal results.
- Thoroughly mixing and kneading the dough creates a cohesive texture and develops gluten for structure and elasticity.
- Properly allowing the dough to rise in a warm and covered environment, and testing its readiness, are key for successful bread baking.
Ingredients
To make King Arthur White Bread, you’ll need a precise combination of ingredients that work together to create a perfectly fluffy and delicious loaf.
One of the key factors in achieving a light and airy texture is the type of flour you use. There are several different types of flour that are commonly used in bread making, each with its own unique characteristics.
All-purpose flour is a popular choice for white bread, as it has a moderate protein content that helps to create a tender crumb. Bread flour, on the other hand, has a higher protein content, which gives the bread structure and a chewy texture. For a lighter loaf, you can also use cake flour, which has a lower protein content and produces a softer, more delicate crumb.
Another tip for achieving a fluffy texture is to make sure your yeast is fresh and active. Yeast is responsible for the leavening process, so using fresh yeast will ensure that your bread rises properly. Additionally, using the right amount of yeast is crucial. Too much yeast can result in a dense loaf, while too little yeast can result in a flat, under-risen bread.
Mixing the Dough
To achieve a successful loaf of white bread, it’s crucial to mix the ingredients thoroughly. This ensures that all the components are evenly distributed and contributes to a consistent texture and flavor.
Once mixed, kneading the dough properly is essential for developing gluten, which gives the bread its structure and elasticity.
Mixing Ingredients Thoroughly
For optimal results, thoroughly mix all of the ingredients together to create a cohesive dough. Mixing the dough is a crucial step in bread-making, as it determines the texture and structure of the final product. To achieve the right consistency, follow these three mixing techniques:
- Combine dry ingredients: Start by sifting the flour, salt, and yeast into a large mixing bowl. This helps to evenly distribute the ingredients and remove any lumps.
- Add wet ingredients: Gradually pour in the warm water and melted butter, while continuously stirring the mixture. This ensures that all the ingredients are well incorporated and the dough is moistened evenly.
- Knead the dough: Transfer the mixture onto a lightly floured surface and knead for about 10 minutes. Use your hands to push and fold the dough, until it becomes smooth and elastic.
Kneading the Dough
After thoroughly mixing the ingredients to create a cohesive dough, the next step in the bread-making process is kneading the dough to develop its texture and structure. Kneading is a crucial step that helps activate the gluten in the flour, giving the bread its desired elasticity and chewiness.
To knead the dough, begin by lightly flouring your work surface. Place the dough on the surface and firmly press it down with the heel of your hand, then fold it in half. Rotate the dough a quarter turn and repeat the process, adding more flour if necessary to prevent sticking. Continue kneading for about 10 minutes until the dough becomes smooth and springs back when pressed with a finger.
Don’t be afraid to use some force, but be careful not to over-knead, as this can result in a dense, tough bread.
With these kneading techniques and tips in mind, you’ll be able to master the art of kneading and create delicious, homemade bread with confidence.
Allowing Dough to Rise
When allowing dough to rise, it’s important to create the optimal conditions for yeast activation and fermentation. Here are some tips for achieving a high rise and troubleshooting common rising issues:
- Temperature control: Yeast thrives in warm environments, so make sure the dough is placed in a warm area, around 75-85°F (24-29°C). Avoid placing it in a drafty or cold spot, which can hinder the rising process.
- Time management: Give the dough enough time to rise. It usually takes around 1-2 hours, but this can vary depending on the recipe and room temperature. Be patient and let the yeast work its magic.
- Proper covering: Cover the dough with a clean kitchen towel or plastic wrap to prevent it from drying out. This will help create a moist environment, which is essential for a good rise.
If you encounter any issues with rising, such as the dough not doubling in size or taking too long to rise, consider checking the yeast’s freshness or adjusting the temperature and time accordingly. Remember, the key to a successful rise is creating the perfect environment for the yeast to do its job.
Kneading the Dough
To properly develop the gluten in the dough and create a light and fluffy texture, it’s essential to knead the King Arthur White Bread dough thoroughly. Kneading is a crucial step in bread making that involves working the dough to strengthen the gluten and create structure. The gluten is a protein network that gives bread its elasticity and helps it rise. By kneading the dough, you’re allowing the gluten strands to align and form a cohesive structure, resulting in a light and airy bread.
When kneading the dough, there are a few techniques you can use. The most common technique is the push and fold method. Start by pushing the dough away from you with the heel of your hand, then fold it back towards you. Rotate the dough a quarter turn and repeat the process. Another technique is the stretch and fold method, where you stretch the dough out and fold it over itself. This helps to develop the gluten evenly throughout the dough.
The importance of kneading can’t be overstated. It not only strengthens the gluten but also helps distribute the yeast and other ingredients evenly. Kneading also helps to remove any air bubbles that may have formed during the rising process. Without proper kneading, the dough won’t rise properly and the resulting bread will be dense and heavy.
Rising and Shaping the Loaf
To achieve a perfectly risen and shaped loaf of bread, there are three important points to consider.
First, you need to proof the dough, allowing it to rise until it has doubled in size. This can take anywhere from 1 to 2 hours, depending on the temperature of your kitchen.
Once the dough has proofed, you’ll need to shape it into the desired loaf shape, whether it be a traditional round or a rectangular sandwich loaf.
Proofing the Dough
To ensure your King Arthur White Bread rises properly and achieves the perfect shape, it’s essential to give the dough enough time to proof and carefully shape it before baking. Here are some proofing techniques and tips to troubleshoot any proofing issues:
- Choose a warm, draft-free area for proofing: Find a cozy spot in your kitchen where the dough can rise undisturbed. Avoid placing it near open windows or vents that may cause temperature fluctuations.
- Allow ample time for proofing: Depending on the recipe and ambient temperature, proofing times may vary. Follow the recipe instructions and keep an eye on the dough’s size – it should double in volume.
- Test the dough for readiness: Gently poke the dough with your finger. If it springs back slowly, it’s ready for shaping. If it springs back quickly, give it more time to proof.


Shaping the Loaf
After allowing the dough to proof and ensuring it has doubled in size, it is time to shape the loaf for rising and baking. Shaping the loaf is an important step in bread-making as it helps create a well-formed structure and allows for even baking. There are various shaping techniques you can use, depending on the desired outcome. One method is to gently flatten the dough into a rectangle, then tightly roll it up, tucking the ends underneath to create a smooth surface. Another technique involves folding the dough in thirds, like a letter, and then rolling it into a cylinder. These shaping techniques not only help create a visually appealing loaf but also ensure that the bread bakes evenly and has a good texture. For those who desire freedom in their baking, experimenting with different shaping techniques can also allow for the creation of decorative patterns on the loaf, adding a touch of creativity to the final product.
| Shaping Technique | Method | Result |
|---|---|---|
| Rectangle | Flatten the dough into a rectangle and roll it up tightly, tucking the ends underneath. | Creates a smooth surface and even baking. |
| Letter Fold | Fold the dough in thirds, like a letter, and then roll it into a cylinder. | Provides a visually appealing loaf with good texture. |
| Decorative | Experiment with different shaping techniques to create decorative patterns on the loaf. | Adds creativity and visual interest to the final product. |
Final Rise Before Baking
Have you ever wondered how to achieve the perfect final rise before baking your loaf of bread? The final rise, also known as the final proofing, is a crucial step in bread-making that allows the dough to fully develop its flavor, texture, and structure.
Here are three essential tips to help you achieve the best final rise:
- Give it time: The proofing time for your bread dough can vary depending on factors like temperature and humidity. Allow the dough to rise until it has doubled in size. This typically takes around 1 to 2 hours, but it’s important to keep an eye on it and not rush the process.
- Create the perfect environment: To promote a successful final rise, make sure to place the dough in a warm, draft-free area. You can cover it with a clean kitchen towel or plastic wrap to maintain the desired temperature and prevent the dough from drying out.
- Test for readiness: To check if your dough is ready for baking, gently press your finger into the dough. If it springs back slowly, it’s fully proofed and ready to go in the oven. If it springs back quickly, it needs more time to rise.

King Arthur White Bread Recipe
Course: bakingCuisine: AmericanDifficulty: Intermediate4
servings30
minutes40
minutes300
kcalEmbark on a delightful baking adventure with the King Arthur White Bread Recipe, a classic in American households. This soft and fluffy bread, made with high-quality King Arthur Unbleached All-Purpose Flour, is a testament to the art of home baking.
The journey begins by combining the flour, sugar, salt, instant yeast, softened butter, and lukewarm milk, resulting in a dough that promises a perfect balance of texture and flavor. A session of kneading transforms the ingredients into a smooth and elastic dough that undergoes a gentle rise, doubling in size to achieve that coveted lightness.
Ingredients
4 cups King Arthur Unbleached All-Purpose Flour
2 teaspoons sugar
1 1/2 teaspoons salt
1 tablespoon instant yeast
2 tablespoons unsalted butter, softened
1 1/4 cups lukewarm milk
Directions
- In a large mixing bowl, combine the flour, sugar, salt, and instant yeast. Add the softened butter and lukewarm milk. Mix until the dough comes together.
- Turn the dough out onto a floured surface and knead for about 8-10 minutes, or until it becomes smooth and elastic. If the dough is too sticky, you can add a bit more flour.
- Place the kneaded dough in a lightly oiled bowl, cover it with a damp cloth, and let it rise in a warm place for about 1-2 hours or until it has doubled in size.
- Gently deflate the risen dough and shape it into a loaf. Place the shaped dough in a greased 9x5-inch loaf pan.
- Cover the loaf with a damp cloth and let it rise for an additional 30-60 minutes, or until it has risen just above the rim of the pan.
- Preheat your oven to 350°F (180°C).
- Allow the bread to cool in the pan for 5-10 minutes, then transfer it to a wire rack to cool completely before slicing.
Baking the Bread
When baking the King Arthur White Bread, you can achieve a deliciously golden crust and soft, fluffy interior by following these precise and detailed steps. After the final rise, it’s time to shape the dough and get it ready for baking. First, gently deflate the dough by pressing it with your fingertips. Then, using your preferred shaping technique, form the dough into a smooth, round loaf. You can use the traditional method of rolling and tucking the dough or try a more intricate braiding technique for added visual appeal. Once the loaf is shaped, place it onto a parchment-lined baking sheet or into a greased loaf pan. Now, it’s time to let the dough proof for the final time before baking. Cover the loaf loosely with a clean kitchen towel and let it rise until it has doubled in size, which usually takes about 45 minutes to an hour. While the loaf is proofing, preheat your oven to 375°F (190°C) to ensure it’s nice and hot when it’s time to bake.
| Step | Technique | Time |
|---|---|---|
| 1 | Deflate | N/A |
| 2 | Shape | Varies |
| 3 | Proof | 45 mins – 1 hour |
Once the dough has completed its final proof, it’s time to bake the bread. Gently remove the towel covering the loaf and place the baking sheet or loaf pan into the preheated oven. Bake for approximately 30-35 minutes, or until the crust is a deep golden brown and the bread sounds hollow when tapped on the bottom. If you’re using a loaf pan, you may need to add a few extra minutes to the baking time. When the bread is done, carefully remove it from the oven and transfer it to a wire rack to cool completely before slicing. Enjoy the satisfaction of baking your own delicious, homemade King Arthur White Bread.
Enjoying Your Homemade White Bread
As you savor the delightful aroma and admire the beautifully golden crust of your freshly baked King Arthur White Bread, it’s time to explore the many ways you can enjoy this homemade masterpiece. Here are some tips and creative ideas to make the most of your homemade white bread:
Tips for storing homemade white bread:
- Keep your bread fresh by storing it in a paper bag or bread box at room temperature.
- If you want to extend its shelf life, wrap the bread tightly in plastic wrap and store it in the refrigerator.
- You can also freeze your bread by slicing it and placing each slice in a freezer bag. This way, you can thaw and enjoy a slice whenever you want.
Creative ways to use leftover homemade white bread:
- Turn your leftover bread into breadcrumbs by toasting it in the oven until crispy, then pulsing it in a food processor. Use these breadcrumbs for breading fish or chicken, or sprinkle them over casseroles and salads.
- Make delicious French toast by dipping slices of your homemade bread in a mixture of beaten eggs, milk, and a touch of cinnamon. Cook them on a buttered skillet until golden brown.
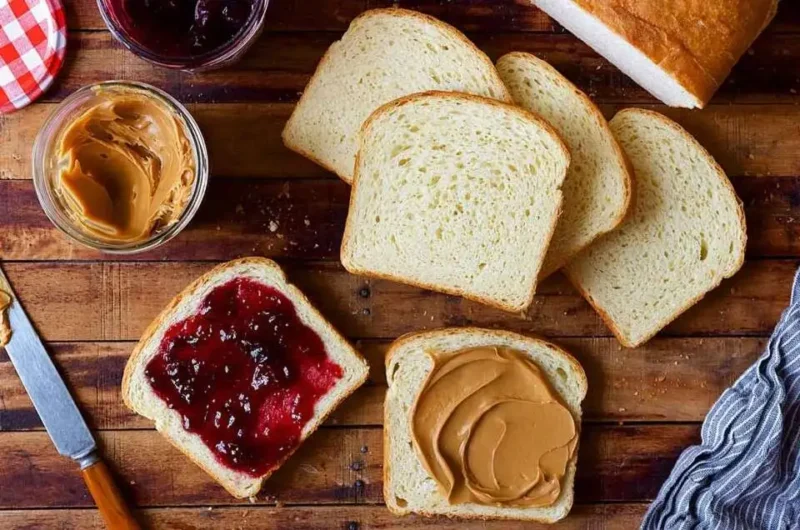
- Use your bread to make mouthwatering sandwiches filled with your favorite ingredients, such as deli meats, cheese, and fresh veggies.
With these tips and ideas, you can fully enjoy the fruits of your labor and relish every bite of your homemade white bread.
Nutrition facts
- Calories: Around 140 calories
- Total Fat: 2.5g
- Saturated Fat: 1.5g
- Monounsaturated Fat: 0.5g
- Polyunsaturated Fat: 0.5g
- Cholesterol: 5mg
- Sodium: 230mg
- Total Carbohydrates: 25g
- Dietary Fiber: 1g
- Sugars: 1g
- Protein: 3g
Frequently Asked Questions
How Long Does It Take for the Dough to Rise?
To speed up dough rising, troubleshoot common issues by ensuring your yeast is fresh, using warm water (around 100°F), and allowing enough time for fermentation. Patience is key, as rising times vary depending on the recipe and conditions.
Can I Use Whole Wheat Flour Instead of White Flour?
You can absolutely use whole wheat flour instead of white flour in the recipe. Whole wheat flour has more fiber and nutrients, making it a healthier option. Plus, it adds a nutty, rich flavor to your bread. Enjoy the freedom to choose!
Can I Add Additional Ingredients Like Raisins or Nuts to the Bread?
Sure, you can definitely add raisins or nuts to the bread. It can enhance the flavor and add a nice texture. However, be mindful of the proportions to maintain the balance of ingredients.
How Long Does the Bread Need to Cool Before Slicing?
How long do you have to resist the temptation before slicing into that freshly baked bread? Remember, it’s crucial to let it cool completely to avoid squishing it. Here are some tips on proper storage and slicing techniques.
Can I Freeze the Bread for Later Use?
Yes, you can freeze the bread for later use. Freezing bread is a great way to extend its shelf life. Just make sure to wrap it tightly in plastic wrap or a freezer bag before freezing.

Conclusion
In conclusion, making your own King Arthur white bread is a rewarding and delicious experience. With simple ingredients and easy-to-follow steps, you can create a loaf of bread that’s soft, fluffy, and perfect for any occasion.
So why settle for store-bought bread when you can enjoy the satisfaction of homemade goodness? Take the leap and indulge in the art of bread-making, where every slice tells a story of love and craftsmanship.