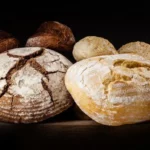
As you step into the world of Vienna bread, you embark on a journey filled with the aroma of warm, freshly baked goodness. This delicate bread, symbolic of Vienna’s rich culinary heritage, holds a promise of delight with each bite.
But how can you recreate this masterpiece in your own kitchen? Fear not, for within these lines lies a recipe that will guide you through the art of crafting Vienna bread from scratch.
So, gather your ingredients, roll up your sleeves, and let’s uncover the secrets behind this delectable creation.


Contents
- 1 Key Takeaways
- 2 Ingredients
- 3 Mixing the Dough
- 4 Proofing the Dough
- 5 Shaping the Loaf
- 6 Baking the Bread
- 7 Vienna Bread Recipe
- 8 Enjoying Your Homemade Vienna Bread
- 9 Nutrition facts
- 10 Frequently Asked Questions
- 10.1 What Is the History Behind Vienna Bread and How Did It Originate?
- 10.2 Can I Use All-Purpose Flour Instead of Bread Flour for This Recipe?
- 10.3 Can I Add Different Types of Seeds or Grains to the Dough for Added Flavor and Texture?
- 10.4 How Long Does the Dough Need to Proof and What Are Some Signs That It’s Ready?
- 10.5 Can I Freeze the Dough or the Baked Bread for Later Use? if Yes, What Is the Recommended Method for Freezing and Thawing?
- 11 Conclusion
Key Takeaways
- Strong bread flour, water, milk, fresh yeast, salt, and sugar are key ingredients for a crusty crust in Vienna bread.
- Proper mixing and proofing techniques are important for achieving the right texture and rise in the dough.
- Baking on a preheated baking stone or pizza stone, as well as creating steam in the oven, helps to create a crispy exterior.
- Vienna bread can be enjoyed with a variety of toppings and pairings, such as butter, olive oil, avocado, hummus, or jam.
Ingredients
To create a delicious Vienna Bread, gather the following high-quality ingredients.
- Start with strong bread flour, which will give your bread structure and a chewy texture.
- Use a combination of water and milk to add moisture and richness to the dough.
- Fresh yeast will provide the necessary rise and a distinct flavor.
- A pinch of salt enhances the overall taste, while sugar adds a touch of sweetness.
For a crusty crust, try these tips:
- Brush the top of the loaf with an egg wash before baking.
- Bake the bread on a preheated baking stone or pizza stone, as this helps create a crispy exterior.
- You can also mist the oven with water to create steam, which contributes to a crusty crust.
Mixing the Dough
Start by combining the strong bread flour, water, milk, fresh yeast, pinch of salt, and sugar in a large mixing bowl. As you pour the flour, watch as it creates a soft cloud, gently settling into the bowl. The water and milk mingle together, forming a creamy liquid that envelops the flour. The fresh yeast, with its delicate aroma, adds a touch of life to the mixture. Sprinkle in a pinch of salt, enhancing the flavors, and a hint of sugar to bring sweetness to the bread.
Now, it’s time to knead the dough. Sink your hands into the mixture, feeling the softness and elasticity beneath your fingertips. Push, fold, and turn, using your energy to transform the ingredients into a cohesive mass. Feel the dough come alive as it becomes more supple and pliable with each motion.
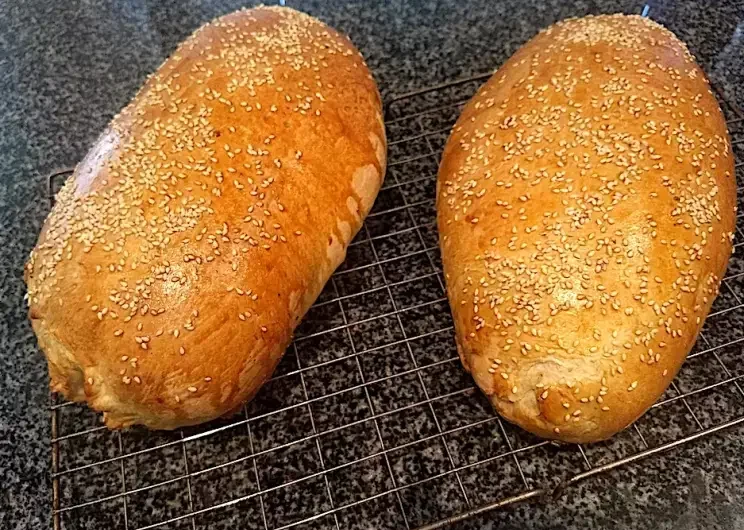
As the dough becomes smooth and elastic, you can incorporate additional ingredients to elevate the flavor and texture. Add a handful of sesame seeds, creating a delightful crunch with every bite. Or perhaps, sprinkle in some raisins to infuse the bread with bursts of sweetness. You have the freedom to experiment and create a bread that suits your taste.
Proofing the Dough
Now that you’ve mixed the dough, it’s time to let it proof. The temperature and time are crucial to ensure that the yeast activates properly, giving the bread its desired rise and texture.
You’ll want to create the perfect environment for fermentation, allowing the dough to double in size. It’s important to also pay attention to the dough’s consistency during proofing, ensuring it’s soft and elastic, ready to be shaped and baked into delicious Vienna bread.
Temperature and Time
For optimal results in proofing the Vienna bread dough, ensure that the temperature and time are carefully managed.
To create a crust color that’s rich and golden, maintain a warm and cozy environment for the dough to rise. Imagine the dough, covered in a clean cloth, basking in the gentle warmth of a sunlit kitchen.
Picture the aroma of freshly baked bread filling the air, enticing you to take a bite. Visualize the dough, slowly expanding and developing a soft and airy texture, ready to be transformed into a delectable loaf.
Yeast Activation Process
As the Vienna bread dough luxuriates in the cozy warmth of your sunlit kitchen, its next transformation begins with the crucial step of activating the yeast, infusing the dough with life and flavor. Proper yeast activation is essential to ensure a light, tender, and flavorful bread. However, yeast activation can sometimes present challenges.
If your dough fails to rise, you might be facing yeast activation troubleshooting. One common issue is using water that’s too hot, which can kill the yeast. To avoid this, use warm water between 100-110°F.
Another alternative yeast activation method is using milk instead of water. The lactose in milk provides additional food for the yeast, resulting in a richer flavor.
Whichever method you choose, remember the key is to create an environment that wakes up the yeast and allows it to thrive, turning your Vienna bread dough into a masterpiece.
Enjoy the freedom to experiment and find the perfect yeast activation process for your baking endeavors.
Proper Dough Consistency
To achieve the perfect Vienna bread, it’s crucial to master the art of proper dough consistency during the proofing process. This step is vital in creating a light, airy texture that will make your bread truly exceptional.
Here are three key tips to help you achieve the desired elasticity and avoid stickiness in your dough:
- Use the right amount of flour: Start with a slightly sticky dough and gradually add flour as needed. This will ensure that the dough isn’t too dry, which can result in a dense loaf.
- Knead with purpose: Take the time to knead the dough properly, using a technique that involves stretching and folding. This will develop the gluten and create the desired elasticity.
- Keep it covered: During proofing, cover the dough with a damp cloth or plastic wrap to prevent it from drying out. This will help maintain the right moisture level and prevent the dough from becoming sticky.
Shaping the Loaf
Now that your dough has proofed, it’s time to shape it into a beautiful loaf.
Begin by gently rolling the dough into a rectangular shape, making sure to maintain an even thickness throughout.
Once you have achieved the desired shape, carefully tie the loaf using kitchen twine, creating a secure and neat package.
Rolling the Dough
Gently shape the Vienna bread dough into a smooth, round loaf, creating a beautiful and inviting shape for your homemade bread.
As you begin the rolling technique, feel the dough’s elasticity under your hands, yielding and responsive.
Picture the dough transforming into a work of art, a masterpiece of culinary freedom.
Imagine the soft warmth of the dough as it molds and conforms to your touch, taking on the desired shape effortlessly.
See the loaf, perfectly formed, with a golden crust and a tender crumb, ready to be shared and savored.
This rolling process allows you the freedom to create bread that not only nourishes the body but also feeds the soul, bringing joy and satisfaction to both the baker and the lucky recipients of this delightful creation.
Tying the Loaf
Feel the transformation of the dough as you deftly shape it into a beautifully tied loaf, an exquisite creation ready to be baked and enjoyed.
Shaping techniques play a crucial role in creating different loaf shapes, allowing you to unleash your creativity and bring a touch of artistry to your Vienna bread. Whether you prefer the classic round shape or want to experiment with braids or rolls, the possibilities are endless.
With a light touch, gently stretch and fold the dough, creating tension that will give the loaf structure and a desirable crumb.
Embrace the freedom to shape your loaf however you desire, knowing that each bread you create is a unique expression of your culinary prowess.

Baking the Bread
To achieve the perfect golden crust and soft, tender crumb of Vienna bread, follow these precise steps for baking:
- Preheat your oven to 425°F (220°C) and place a baking stone or an inverted baking sheet on the middle rack. This will ensure that the bread bakes evenly and develops that desired crispy crust.
- Before placing the loaves in the oven, create steam by pouring a cup of hot water into a preheated pan at the bottom of the oven. The steam will help the bread rise and develop a beautiful, shiny crust.
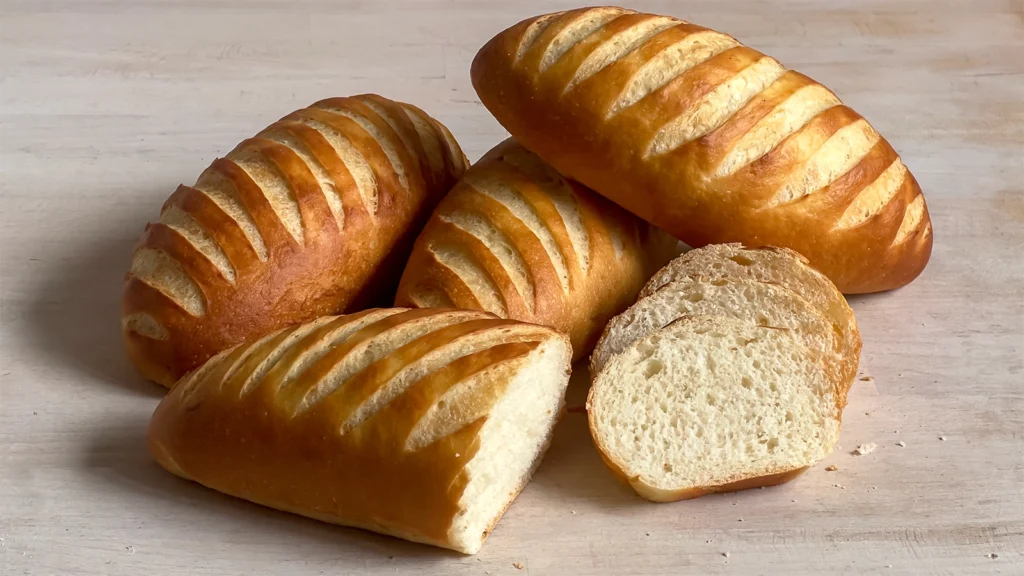
- Carefully transfer the risen loaves onto the hot baking stone or sheet. Use a sharp knife to make diagonal slashes across the top of each loaf. This will allow the bread to expand without cracking during baking.
As the bread bakes, the aroma of freshly baked bread will fill your kitchen, creating a sense of warmth and comfort. The crust will turn a deep golden brown, crackling under your touch. Inside, the crumb will be light, airy, and moist, ready to be enjoyed with a slather of butter or used as a vessel for your favorite sandwich fillings.
Baking Vienna bread requires patience and attention to detail, but the reward is a loaf that embodies the essence of freedom and indulgence. So go ahead, embrace your inner baker and create a masterpiece that will delight your senses and satisfy your cravings.

Vienna Bread Recipe
Course: BreadCuisine: EuropeanDifficulty: Intermediate16
servings25
minutes25
minutes400
kcalVienna bread, a classic European staple, is renowned for its soft texture and subtle sweetness. This recipe guides you through the process of creating this delightful loaf at home. The combination of all-purpose flour, sugar, yeast, and butter results in a bread with a tender crumb and a slightly sweet flavor. Perfect for sandwiches or enjoying with your favorite spreads, Vienna bread is a versatile and satisfying addition to your baking repertoire.
Ingredients
4 cups all-purpose flour
1 tablespoon sugar
1 teaspoon salt
1 tablespoon active dry yeast
1 1/4 cups warm water (110°F/43°C)
1/4 cup unsalted butter, softened
1 tablespoon milk (for brushing)
Directions
- In a small bowl, combine the warm water and sugar. Stir until the sugar dissolves, then sprinkle the yeast over the water. Let it sit for about 5-10 minutes until the mixture becomes frothy.
- In a large mixing bowl, combine the flour and salt. Make a well in the center and add the activated yeast mixture. Add the softened butter as well.
- Mix the ingredients until a dough forms. Transfer the dough to a floured surface and knead for about 8-10 minutes, or until the dough becomes smooth and elastic.
- Place the dough in a greased bowl, cover it with a damp cloth, and let it rise in a warm place for about 1-2 hours, or until it doubles in size.
- Punch down the risen dough and transfer it to a floured surface. Shape it into a loaf and place it in a greased loaf pan.
- Cover the loaf with a damp cloth and let it rise for an additional 30-45 minutes, or until it doubles in size.
- Preheat your oven to 375°F (190°C).
- Brush the top of the loaf with milk to give it a golden finish.
- Bake in the preheated oven for 25-30 minutes, or until the bread is golden brown and sounds hollow when tapped on the bottom.
- Allow the Vienna bread to cool in the pan for a few minutes before transferring it to a wire rack to cool completely.
Enjoying Your Homemade Vienna Bread
How can you fully savor the delectable flavors and textures of your homemade Vienna bread? After all the effort put into making this delightful loaf, it’s time to enjoy it to the fullest. Whether you prefer it plain or want to experiment with different variations and toppings, Vienna bread offers endless possibilities.
To help you make the most of your homemade Vienna bread, here are some ideas for toppings and pairings:
| Variations | Toppings |
|---|---|
| Classic | Butter |
| Garlic | Olive oil |
| Cheese | Avocado |
| Herb | Hummus |
| Seed | Jam |
The classic option with a simple spread of butter is always a crowd-pleaser. For a more savory twist, try drizzling some olive oil on top. If you’re a cheese lover, sprinkle grated cheese and melt it under the broiler for a gooey treat. Adding herbs like rosemary or thyme can elevate the flavors, while seeds like sesame or poppy can add a delightful crunch.
Pairing Vienna bread with different spreads and dips can take your enjoyment to the next level. Creamy avocado, tangy hummus, or sweet jam can all complement the bread’s texture and taste. The choice is yours, and the possibilities are endless.
Nutrition facts
- Calories: ~2084
- Protein: ~46g
- Fat: ~22g
- Saturated Fat: ~12g
- Monounsaturated Fat: ~5g
- Polyunsaturated Fat: ~1g
- Cholesterol: ~49mg
- Carbohydrates: ~413g
- Dietary Fiber: ~16g
- Sugar: ~15g
- Sodium: ~2337mg
Frequently Asked Questions
What Is the History Behind Vienna Bread and How Did It Originate?
Vienna Bread Origins and the Evolution of Vienna Bread have a rich history. Discover how this delicious bread originated and evolved over time, exploring its cultural significance and the freedom it brings to your taste buds.
Can I Use All-Purpose Flour Instead of Bread Flour for This Recipe?
You can definitely use all-purpose flour as an alternative to bread flour in this recipe. While bread flour has a higher protein content, all-purpose flour will still yield a tasty loaf of Vienna bread. Enjoy the freedom to experiment with different types of flours!
Can I Add Different Types of Seeds or Grains to the Dough for Added Flavor and Texture?
Yes, you can definitely add different types of seeds or grains to the dough for added flavor and texture. This not only enhances the taste but also provides nutritional benefits to your bread.
How Long Does the Dough Need to Proof and What Are Some Signs That It’s Ready?
You want your Vienna bread to have a light and fluffy texture. To achieve this, proof the dough for about 1-2 hours, until it doubles in size. Look for signs like a puffy appearance and a slight jiggle when tapped.
Can I Freeze the Dough or the Baked Bread for Later Use? if Yes, What Is the Recommended Method for Freezing and Thawing?
Yes, you can freeze the dough or the baked bread for later use. To freeze the dough, wrap it tightly in plastic wrap and place it in a freezer bag. To thaw the baked bread, leave it at room temperature for a few hours.


Conclusion
In conclusion, Vienna bread is a delightful homemade bread that can be easily made with just a few simple ingredients and steps. By following the directions provided, you can create a loaf of Vienna bread that’s soft, fluffy, and full of flavor.
The theory of homemade bread being superior to store-bought bread is indeed true, as the process of making it from scratch allows for a level of freshness and quality that can’t be matched.
So go ahead and enjoy the deliciousness of your own homemade Vienna bread!