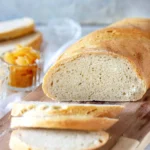
Imagine the warm aroma of freshly baked bread wafting through your kitchen, filling the air with comfort and anticipation. Now, imagine achieving that perfect loaf of honey wheat bread with the help of your trusty bread machine.
In this discussion, we will guide you through a step-by-step journey, revealing the secrets to creating a delectable honey wheat bread that will tantalize your taste buds and leave you craving for more.
So, grab a cup of coffee, sit back, and prepare to embark on a delightful baking adventure that will elevate your culinary skills to new heights.
Contents
- 1 Key Takeaways
- 2 Ingredients Needed for Honey Wheat Bread Machine Recipe
- 3 Step-By-Step Instructions for Preparing the Bread Dough
- 4 Setting up and Programming Your Bread Machine
- 5 Baking and Cooling the Honey Wheat Bread
- 6 Honey Wheat Bread Machine Recipe
- 7 Tips and Variations for Customizing Your Bread Recipe
- 8 Nutritional facts
- 9 Frequently Asked Questions
- 9.1 Can I Use All-Purpose Flour Instead of Whole Wheat Flour in This Recipe?
- 9.2 How Long Does the Bread Stay Fresh After Baking?
- 9.3 Can I Add Nuts or Seeds to the Bread Dough?
- 9.4 What Is the Recommended Size of the Bread Loaf Pan for This Recipe?
- 9.5 Can I Use Honey Substitute or Maple Syrup Instead of Honey in This Recipe?
- 10 Conclusion
Key Takeaways
- Honey can be used as a natural sweetener in bread, replacing traditional sugars.
- Using honey in bread helps to retain moisture, resulting in a softer and more delicious loaf.
- Bread machines can be used to easily prepare the dough for honey wheat bread.
- Customization options for honey wheat bread include experimenting with different sweeteners, adding seeds and grains, and incorporating whole grains for added nutrition.

Ingredients Needed for Honey Wheat Bread Machine Recipe
To make the perfect honey wheat bread in your bread machine, you’ll need a carefully selected combination of ingredients.
When it comes to the flour for your honey wheat bread, there are some alternatives that you can consider. While all-purpose flour is the most commonly used, you can also use whole wheat flour or a combination of whole wheat and all-purpose flour for a healthier option.
Whole wheat flour is rich in fiber and nutrients, making it a better choice for those who are conscious of their health. It adds a nutty flavor and a denser texture to the bread, giving it a more rustic feel.
Using honey as a sweetener in your bread not only adds a touch of natural sweetness but also brings some health benefits. Honey is known for its antioxidant properties and can help boost your immune system. It also provides a natural source of energy, making it a great alternative to refined sugar.
Additionally, honey helps to retain moisture in the bread, resulting in a softer and more tender loaf.
Step-By-Step Instructions for Preparing the Bread Dough
To prepare the bread dough for your honey wheat bread, follow these step-by-step instructions.
First, gather your ingredients:
- 1 cup of warm water
- 2 tablespoons of honey
- 1 1/2 cups of bread flour
- 1 1/2 cups of whole wheat flour
- 2 tablespoons of olive oil
- 1 1/2 teaspoons of salt
- 2 1/4 teaspoons of active dry yeast.
Next, add the warm water and honey to the bread machine pan. Then, add the bread flour, whole wheat flour, olive oil, and salt. Make sure to layer the ingredients in the order listed.
Now, it’s time to add the yeast. Create a small well in the center of the flour mixture and pour the yeast into the well. This will help ensure proper activation of the yeast.
Place the pan into the bread machine and select the dough setting. Press start and let the machine do its magic.
While the dough is mixing, pay attention to the consistency. If the dough seems too dry, add a tablespoon of water at a time until it reaches the desired consistency. If the dough seems too wet, add a tablespoon of flour at a time until it becomes smooth and elastic.
If you encounter any issues during the process, there are a few common troubleshooting tips. If the dough isn’t rising properly, check the expiration date of your yeast and make sure the water temperature is correct. If the dough sticks to the pan, try greasing the pan lightly before adding the ingredients.
Once the dough cycle is complete, remove the dough from the pan and place it on a lightly floured surface. Knead the dough a few times to release any air bubbles.
Congratulations! You have successfully prepared the bread dough for your honey wheat bread. Now it’s time to shape the dough and let it rise before baking.

Setting up and Programming Your Bread Machine
Now that you have successfully prepared the bread dough for your honey wheat bread, let’s move on to setting up and programming your bread machine for the next step.
Using a bread machine has many benefits, such as making the bread-making process quick and easy, and allowing you to enjoy freshly baked bread without much effort.
To begin, place the bread pan into the machine and securely close the lid. Make sure the kneading blade is properly inserted into the pan.
Next, plug in the machine and select the desired settings. Most bread machines have a variety of settings such as crust color, loaf size, and different types of bread. Consult your bread machine’s manual to choose the appropriate settings for your honey wheat bread.
If you encounter any issues during the process, refer to the troubleshooting section of the manual or search online for bread machine troubleshooting tips.
Once you have selected the settings, press the start button to begin the baking process. Now all you have to do is wait for your bread machine to work its magic!
Baking and Cooling the Honey Wheat Bread
Once your bread machine has finished baking the honey wheat bread, it’s important to properly cool it before slicing and enjoying.
The baking time for the honey wheat bread may vary depending on your specific bread machine model and settings. Typically, it takes around 2-3 hours for the bread to bake completely. During this time, it’s crucial to resist the temptation to open the bread machine’s lid to check on the progress. Opening the lid can cause a sudden drop in temperature and disrupt the baking process.
After the baking time is complete, the bread machine will automatically switch to the ‘keep warm’ setting for about 15 to 30 minutes. This allows the bread to cool down gradually and evenly. Once this time has elapsed, carefully remove the bread pan from the machine. Use oven mitts or a kitchen towel to handle the hot pan.
Place the honey wheat bread on a wire rack to cool completely. This will prevent the bottom of the bread from becoming soggy due to trapped moisture. Avoid slicing the bread while it’s still warm, as it can lead to uneven slices and a less enjoyable texture.
If you encounter any issues with the baking process, such as the bread not rising properly or the crust being too dark, refer to your bread machine’s instruction manual for troubleshooting tips. Common issues can often be resolved by adjusting the yeast quantity, flour-to-liquid ratio, or selecting a different crust color setting.
Now that you know how to bake and cool the honey wheat bread, get ready to savor the delicious aroma and taste of your homemade creation. Enjoy!

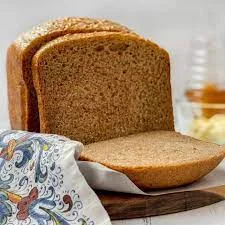
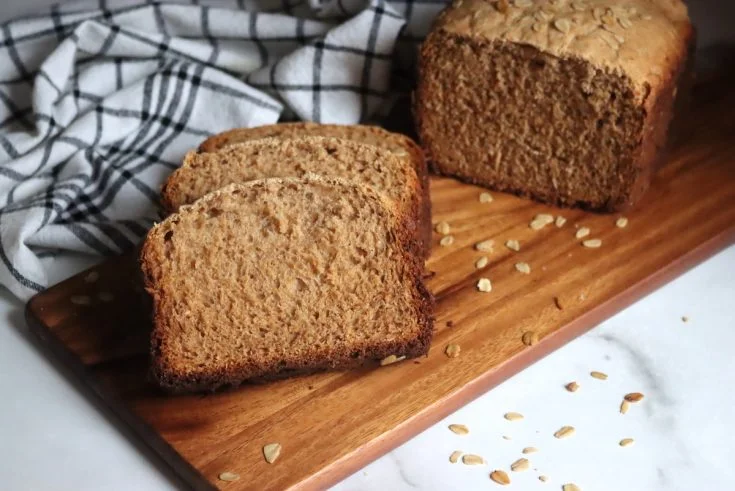
Honey Wheat Bread Machine Recipe
Course: Baking/BreadCuisine: InternationalDifficulty: Easy12
servings10
minutes2
hours130
kcalThis recipe yields a delicious, wholesome loaf of honey wheat bread made conveniently in a bread machine, perfect for sandwiches or to enjoy with your favorite spreads.
Ingredients
Whole wheat flour
Bread flour
Honey
Active dry yeast
Directions
- Combine all ingredients in the bread machine pan according to the manufacturer's instructions.
- Select the "Whole Wheat" or "Basic" setting on the bread machine.
- Start the machine and let it knead, rise, and bake the bread.
- Once done, remove the bread from the machine, let it cool slightly, slice, and serve.
Tips and Variations for Customizing Your Bread Recipe
Enhance your honey wheat bread recipe with these helpful tips and creative variations. When it comes to sweeteners, there are a variety of options you can experiment with in your homemade bread. Instead of using traditional honey, try using maple syrup or agave nectar for a different flavor profile. You can also use brown sugar or molasses to add a rich, caramel-like sweetness to your bread. Don’t be afraid to get creative and mix different sweeteners together to find the perfect combination for your taste buds.
To add extra texture and flavor to your bread, consider adding seeds and grains. Chia seeds, flax seeds, and sunflower seeds are all great options to incorporate into your recipe. Not only do they add a crunchy texture, but they also provide additional nutritional benefits.
For a heartier bread, try adding whole grains like oats or quinoa. These grains will give your bread a nutty flavor and a chewy texture that’s sure to impress.
Nutritional facts
- Calories: Around 130 calories per slice (serving size: 1 slice)
- Total Fat: Around 1g
- Saturated Fat: Around 0g
- Cholesterol: 0mg
- Sodium: Varies depending on salt content (if used)
- Total Carbohydrates: Around 25g
- Dietary Fiber: Around 2g
- Sugars: Around 5g (from honey)
- Protein: Around 4g
Frequently Asked Questions
Can I Use All-Purpose Flour Instead of Whole Wheat Flour in This Recipe?
Yes, you can use all-purpose flour instead of whole wheat flour in this recipe. However, keep in mind that there will be nutritional differences. Whole wheat flour is higher in fiber and nutrients compared to all-purpose flour.
How Long Does the Bread Stay Fresh After Baking?
Store your homemade bread for maximum freshness by wrapping it tightly in plastic or airtight container. Keep it at room temperature for up to 3 days or freeze it for longer preservation. Enjoy the delicious flavor and texture for days to come!
Can I Add Nuts or Seeds to the Bread Dough?
You can definitely add nuts or seeds to your bread dough! It’s a great way to enhance the flavor and texture of your bread. Get creative and experiment with different combinations for a unique twist.
What Is the Recommended Size of the Bread Loaf Pan for This Recipe?
To make the perfect loaf, you’ll want to use a bread loaf pan that’s recommended for this recipe. It’s important to follow the instructions closely, especially when it comes to the size of the pan. And if you’re looking to substitute all-purpose flour, be sure to do your research and find a suitable alternative. Happy baking!
Can I Use Honey Substitute or Maple Syrup Instead of Honey in This Recipe?
Using a honey substitute or maple syrup in the recipe will have a significant impact on the taste and texture of the bread. It will add a different sweetness and flavor profile, so feel free to experiment and enjoy!

Conclusion
So there you have it, folks! With just a few simple ingredients and the help of a trusty bread machine, you can whip up a delicious loaf of honey wheat bread in no time.
The aroma of freshly baked bread wafting through your home is sure to bring back warm, nostalgic memories.
So go ahead, give this recipe a try and indulge in a slice of homemade goodness. Your taste buds will thank you, and so will your family.
Bon appétit!