You’ve probably tried many different bread recipes, but have you ever tasted the unique flavors of Guyanese bread? The combination of rich spices and tropical ingredients creates a truly unforgettable experience for your taste buds.
From the moment you take your first bite, you’ll be transported to the vibrant streets of Guyana, where this bread is a beloved staple.
But how exactly do you recreate this culinary delight in your own kitchen? Well, get ready to uncover the secrets of the Guyanese bread recipe that will leave you craving for more.

Contents
- 1 Key Takeaways
- 2 Ingredients
- 3 Mixing the Dough
- 4 Fermentation and Proofing
- 5 Shaping the Bread
- 6 Baking the Bread
- 7 Guyanese Bread Recipe
- 8 Serving and Enjoying
- 9 Nutrition facts
- 10 Frequently Asked Questions
- 10.1 How Long Does It Take for the Bread Dough to Rise During the Fermentation and Proofing Process?
- 10.2 Can I Use a Bread Machine to Mix and Knead the Dough for This Guyanese Bread Recipe?
- 10.3 Can I Substitute Any of the Ingredients in This Recipe, Such as Using Whole Wheat Flour Instead of All-Purpose Flour?
- 10.4 What Type of Oven Temperature Should I Set to Bake the Guyanese Bread?
- 10.5 How Long Should I Let the Bread Cool Before Slicing and Serving It?
- 11 Conclusion
Key Takeaways
- The dough for Guyanese bread is made with flour, yeast, sugar, salt, and water.
- Kneading the dough is important to develop gluten and create a smooth and elastic texture.
- Fermentation and proofing allow the dough to develop flavors and create air pockets for a light and airy texture.
- Shaping the bread is crucial for achieving the desired texture and appearance, and different techniques can be used.
Ingredients
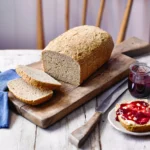
To create the perfect Guyanese bread, gather all the essential ingredients that will bring out the flavors and textures that make this bread so delightful. In Guyana, there are different types of bread made, each with its own unique variations. The ingredients used in Guyanese bread are simple yet crucial to achieving that authentic taste.
One of the key ingredients is flour. Guyanese bread can be made using all-purpose flour, which gives it a light and fluffy texture. Some variations may use a combination of all-purpose flour and whole wheat flour for a heartier taste.
Another important ingredient is yeast. This is what gives the bread its rise and airy texture. Active dry yeast is commonly used in Guyanese bread recipes, but instant yeast can also be used for quicker results.
To enhance the flavor of the bread, sugar is added. The amount of sugar may vary depending on the desired sweetness, but it’s an essential element in Guyanese bread.
Salt is also included to balance out the sweetness and add depth of flavor. It helps to bring out the other ingredients and make the bread taste more savory.
Mixing the Dough
Start by combining the flour, yeast, sugar, salt, and water in a large mixing bowl. This is the first step towards creating the perfect Guyanese bread. As you pour the ingredients into the bowl, take a moment to appreciate the simplicity of their union. The flour, yeast, sugar, and salt will come together to form the base of your dough, while the water will activate the yeast and help create that beautiful rise.
Once all the ingredients are in the bowl, it’s time to mix them together. Use your hands or a wooden spoon to gently combine everything. The dough should start to come together, forming a slightly sticky mass. If it feels too dry, add a little more water. If it feels too wet, add a bit more flour. The key is to find the perfect balance.
Now comes the fun part – kneading the dough. Turn it out onto a lightly floured surface and begin to knead. Use the heel of your hand to push the dough away from you, then fold it back in on itself. Repeat this motion, adding more flour as needed, until the dough becomes smooth and elastic.
Kneading helps develop the gluten in the dough, giving it structure and strength. It also helps distribute the yeast evenly, ensuring a consistent rise. If your dough is sticky and difficult to work with, resist the temptation to add more flour. Instead, lightly oil your hands and the work surface to prevent sticking.
As you knead, pay attention to the texture of the dough. It should feel soft and supple, but not overly sticky. If it feels too dry, you can lightly moisten your hands with water and continue kneading. Remember, practice makes perfect when it comes to kneading – don’t be discouraged if it takes a few tries to get it just right.
If you encounter any issues while kneading, don’t fret. Troubleshooting is part of the learning process. If the dough feels too dense and heavy, it may need more kneading to develop the gluten further. On the other hand, if the dough feels too slack and lacks structure, you may need to add a little more flour and continue kneading until it firms up.
Once your dough has been kneaded to perfection, shape it into a smooth ball and place it back in the mixing bowl. Cover the bowl with a clean kitchen towel or plastic wrap and let the dough rise until it has doubled in size. This process can take anywhere from 1 to 2 hours, depending on the temperature of your kitchen.
Congratulations! You have successfully mixed the dough for your Guyanese bread. Now, it’s time to move on to the next step – shaping and baking. But before you do, take a moment to appreciate the transformative power of your hands. Through mixing and kneading, you have turned a simple combination of ingredients into a beautiful, living dough. Enjoy the freedom of creation as you continue on your bread-making journey.
Fermentation and Proofing
As the dough rests and ferments, it undergoes a magical transformation, developing complex flavors and becoming airy and light through the process of proofing. Fermentation is a crucial step in bread-making that involves the breakdown of carbohydrates by yeast, resulting in the release of carbon dioxide. This gas is what creates those beautiful air pockets in your bread, making it light and fluffy. Different fermentation techniques can be used to achieve different flavors and textures in your bread. For example, a longer fermentation period at a lower temperature can develop a more pronounced flavor, while a shorter fermentation period at a higher temperature can yield a milder taste.
Proofing, on the other hand, is the final rise of the dough before baking. It allows the dough to further develop and strengthen, providing structure to the bread. During proofing, the yeast continues to feed on the remaining sugars in the dough and produces more carbon dioxide, further expanding the air pockets. This step is crucial in achieving a light and airy texture in your bread.
Here is a table summarizing the fermentation and proofing techniques you can use in your bread-making process:
| Technique | Description | Result |
|---|---|---|
| Cold Fermentation | Fermenting dough in the refrigerator for a longer period of time, usually overnight | Intense flavor, stronger gluten development |
| Room Temperature Fermentation | Fermenting dough at room temperature for a shorter period of time, usually a few hours | Milder flavor, softer texture |
| Bulk Fermentation | Fermenting the dough in a large mass before dividing and shaping | More even distribution of flavor and texture throughout the loaf |
| Final Proof | The last rise of the shaped dough before baking | Light and airy texture, increased volume |
Understanding and mastering fermentation and proofing techniques are essential for achieving the perfect loaf of bread. So, be patient and let the magic happen as your dough transforms into a delicious and satisfying homemade bread.
Shaping the Bread
Now that your dough has fermented and proofed, it’s time to shape it into beautiful loaves.
There are a few different techniques you can use to shape your Guyanese bread.
One option is to roll and fold the dough, creating layers and a tight shape.
Another technique is twisting and braiding, which adds an attractive visual element to your bread.
Lastly, you can tuck and pinch the dough, creating a round shape that’s perfect for sandwiches.
Rolling and Folding
To shape the Guyanese bread, gently roll and fold the dough into a smooth, pliable ball. This step is crucial in achieving the desired texture and flakiness of the bread. Here’s a helpful table outlining the rolling techniques:
| Rolling Technique | Description |
|---|---|
| Rolling Pin | Use a rolling pin to flatten the dough into a thin, even sheet. Apply gentle pressure and roll from the center outwards. |
| Folding | Fold the dough in half, bringing one edge to meet the other. Press down lightly to seal the fold. Repeat this process several times to create layers and enhance the bread’s flakiness. |
| Rotating | Rotate the dough periodically while rolling and folding to ensure even thickness and distribution of the layers. |


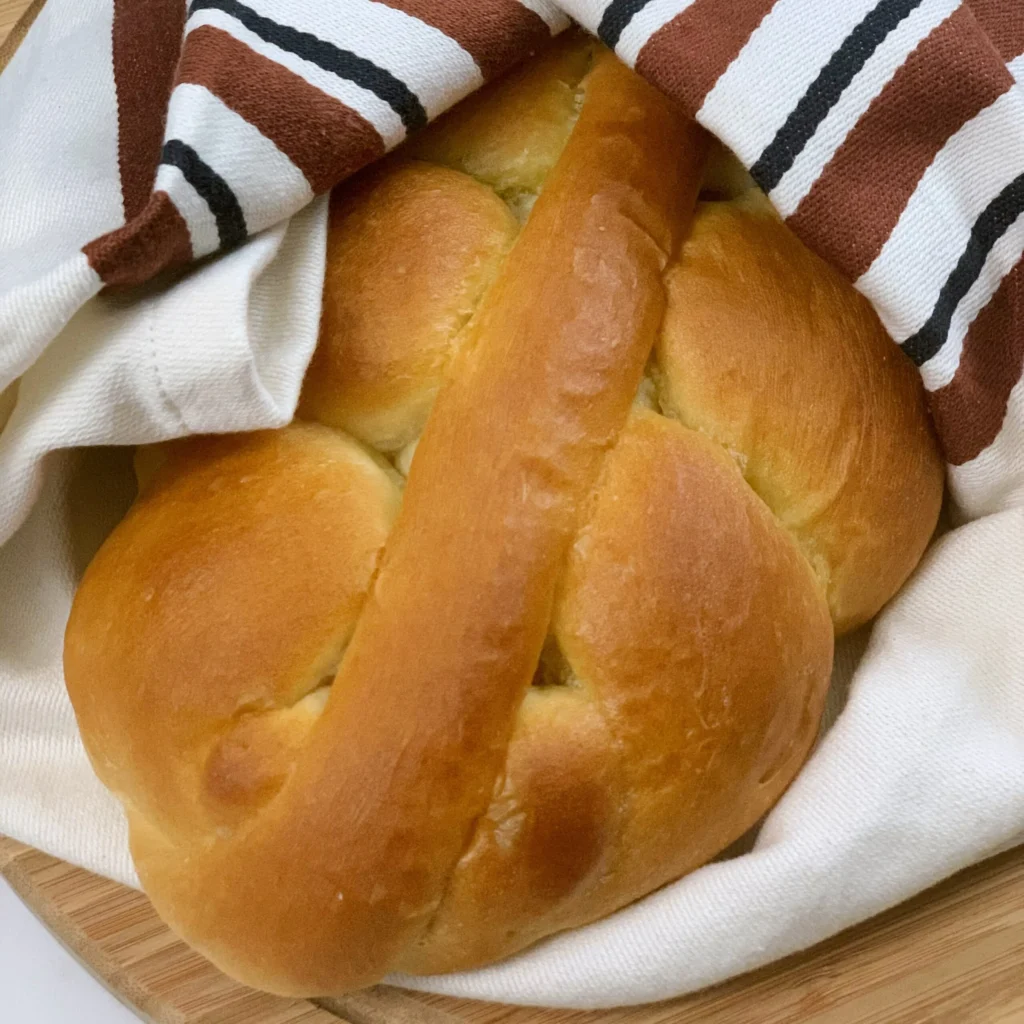
Twisting and Braiding
Shape your Guyanese bread by twisting and braiding the dough into a visually appealing and delicious final product.
Twisting techniques can add an element of surprise to your bread, creating a beautiful swirl pattern that will wow your family and friends. To achieve this, simply take a portion of dough, gently roll it into a long rope, and then twist it into a spiral shape.
You can experiment with different sizes and shapes to create a variety of twisted breads.
For creative braiding ideas, divide your dough into three equal portions and braid them together. This classic braided look adds an elegant touch to your bread and enhances its texture.
Remember, the key to successful twisting and braiding is to handle the dough gently, allowing it to rise and develop its unique flavors.
Tucking and Pinching
As you continue your journey of creating the perfect Guyanese bread, let’s now explore the art of tucking and pinching, a crucial step in shaping your bread into a delightful and irresistible form. Here are some tucking techniques and pinching variations to help you master this step:
- The Classic Tuck: After rolling out your dough into a rectangle, gently fold the top third down and tuck it under the bottom third. Repeat this process from left to right, creating layers of dough that will give your bread a beautiful texture.
- The Pinch and Seal: To ensure your bread stays intact while baking, use your fingers to pinch the edges of the dough together. This will create a tight seal, keeping all the delicious flavors and moisture locked inside.
- The Creative Pinch: Don’t be afraid to get creative with your pinching. Experiment with different designs like braids, twists, or even intricate patterns. Let your imagination run wild and make your bread a work of art.
- The Final Pinch: Once your bread is shaped and ready for the oven, give it one final pinch to secure any loose ends. This will ensure a uniform shape and a professional finish.
Baking the Bread
Now that you’ve shaped the dough into beautiful loaves, it’s time to bake them to perfection.
Preheat your oven to the recommended temperature and place the loaves on a baking sheet lined with parchment paper.
Slide the sheet into the oven and let the bread bake for the specified time, until they turn golden brown and have a hollow sound when tapped.
Once baked, remove the bread from the oven and let them cool on a wire rack before slicing and enjoying the delicious homemade Guyanese bread.
Preparing the Dough
To begin the process of preparing the dough for your delicious Guyanese bread, gather all the necessary ingredients and equipment. Here’s what you’ll need:
- Ingredients: Gather your flour, yeast, sugar, salt, and water. These are the basic ingredients for making the dough.
- Mixing the Dough: In a large mixing bowl, combine the flour, yeast, sugar, and salt. Gradually add water and mix until a sticky dough forms.
- Kneading Techniques: Transfer the dough onto a lightly floured surface. Use your hands to knead the dough, pushing it away from you with the heel of your hand and then folding it back in. Repeat this motion for about 10-15 minutes until the dough becomes smooth and elastic.
- Dough Consistency: The dough should be soft and slightly sticky, but not too wet. If it feels too dry, add a little more water. If it’s too sticky, sprinkle some flour and continue kneading until it reaches the desired consistency.
With these simple steps, you’re now ready to move on to the next stage – letting the dough rise.
Baking and Cooling
For a perfectly golden crust and a soft, fluffy interior, follow these steps to bake and cool your Guyanese bread. Once your dough has risen, gently punch it down and divide it into two equal portions. Shape each portion into a loaf and place them onto a greased baking sheet. Preheat your oven to 375°F (190°C) and let the loaves rise for another 30 minutes. Before baking, you can make a few decorative slashes on the top of each loaf with a sharp knife to give it an artisanal touch. Place the loaves in the oven and bake for about 30-35 minutes, or until they turn golden brown. To ensure even baking, rotate the baking sheet halfway through the baking time. Once the bread is baked, transfer it to a wire rack to cool completely before slicing. This will prevent the bread from becoming soggy. Here are some baking techniques and cooling methods you can use to achieve the best results:
| Baking Techniques | Cooling Methods |
|---|---|
| Preheat the oven to the correct temperature | Place the bread on a wire rack to cool |
| Divide the dough and shape it into loaves | Allow the bread to cool completely before slicing |
| Make decorative slashes on the top of the loaves | Store the cooled bread in an airtight container |
Using these techniques and methods, you will be able to bake and cool your Guyanese bread to perfection. Enjoy the delicious results of your baking endeavors!

Guyanese Bread Recipe
Course: BreadCuisine: GuyaneseDifficulty: Moderate4
servings30
minutes40
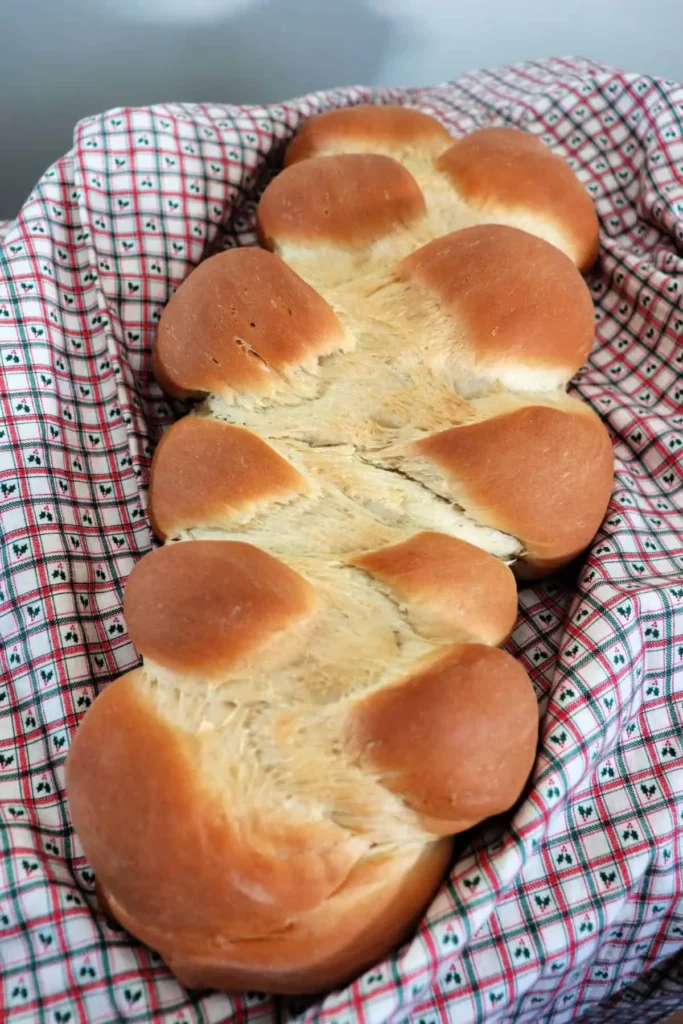
minutes300
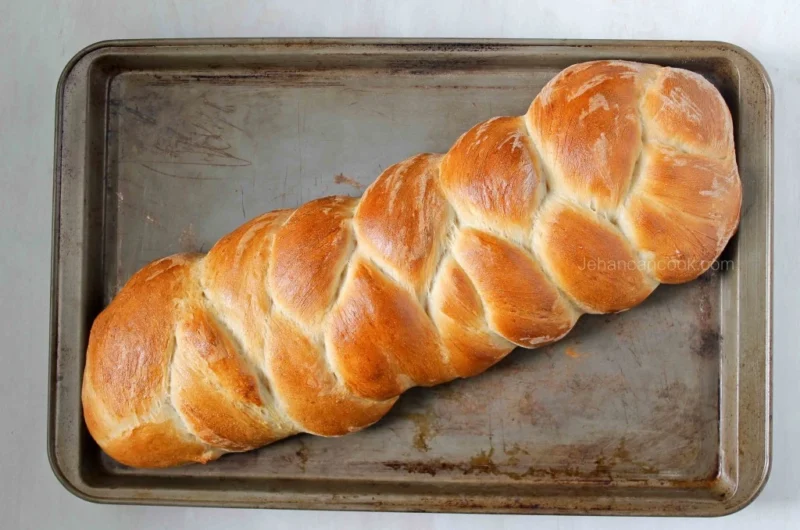
kcalGuyanese bread, often referred to as plait bread or plait roti, is a traditional bread enjoyed in Guyana. This recipe yields a delicious and slightly sweet loaf with a soft interior and a golden-brown crust. The bread is commonly served as a staple for various meals or enjoyed on its own with butter or other spreads.
Ingredients
4 cups all-purpose flour
2 tablespoons sugar
1 teaspoon salt
2 tablespoons unsalted butter, melted
1 packet (2 1/4 teaspoons) active dry yeast
1 1/4 cups warm water (about 110°F or 43°C)
1 egg, beaten (for egg wash)
Directions
- In a small bowl, combine the warm water and sugar. Stir until the sugar is dissolved. Sprinkle the yeast over the water and let it sit for about 5 minutes, or until it becomes frothy.
- In a large mixing bowl, combine the flour and salt. Make a well in the center and pour in the melted butter and the yeast mixture.
- Mix the ingredients together until a dough forms. Turn the dough out onto a floured surface and knead for about 8-10 minutes until it becomes smooth and elastic.
- Place the dough in a greased bowl, cover it with a clean kitchen towel or plastic wrap, and let it rise in a warm place for about 1 to 1.5 hours, or until it doubles in size.
- Preheat your oven to 375°F (190°C).
- Punch down the risen dough and divide it into two equal portions.
- Roll each portion into a long rope, about 2 feet in length.
- Bake in the preheated oven for about 25-30 minutes, or until the bread is golden brown and sounds hollow when tapped on the bottom.
- Allow the Guyanese bread to cool on a wire rack before slicing and serving.
Serving and Enjoying
To fully savor the Guyanese bread, indulge in its warm, pillowy texture and delightful buttery aroma. Here are some serving suggestions, variations, and additions to enhance your enjoyment:
- Slather it with butter: Spread a generous amount of creamy butter on a freshly sliced piece of Guyanese bread. Let the butter melt into the soft crumb, creating a mouthwatering combination of flavors.
- Make a sandwich: Slice the Guyanese bread horizontally and fill it with your favorite ingredients. Whether it’s a classic ham and cheese or a vegetarian medley, the bread’s lightness and fluffiness will complement any filling.
- Toast it: Pop a slice of Guyanese bread into the toaster until it turns golden brown. The toasting process intensifies the bread’s flavors and provides a satisfying crunch.
- Pair it with a hot beverage: Enjoy a slice of Guyanese bread alongside a cup of tea or coffee. Dip it into your drink for a comforting and delightful experience.
With these serving suggestions and variations, you can fully appreciate the deliciousness of Guyanese bread. So, go ahead, embrace the freedom to indulge in this delectable treat.
Nutrition facts
Serving Size: 1 slice (assuming 16 slices per loaf)
Calories: Approximately 120-150 calories per slice
Protein: Around 3-5 grams per slice
Carbohydrates: Approximately 20-25 grams per slice
Dietary Fiber: 1-2 grams per slice
Fat: Around 3-5 grams per slice
Saturated Fat: 1-2 grams per slice
Cholesterol: 10-20 mg per slice
Sodium: 150-250 mg per slice
Sugar: 1-3 grams per slice
Frequently Asked Questions
How Long Does It Take for the Bread Dough to Rise During the Fermentation and Proofing Process?
During the fermentation process, the bread dough needs time to rise and develop flavor. The proofing time can vary, but it typically takes around 1-2 hours for the dough to double in size.
Can I Use a Bread Machine to Mix and Knead the Dough for This Guyanese Bread Recipe?
Using a bread machine is a convenient option for kneading the dough in this Guyanese Bread Recipe. It saves time and effort, allowing you to focus on alternative ingredients, oven temperature, and cooling time.
Can I Substitute Any of the Ingredients in This Recipe, Such as Using Whole Wheat Flour Instead of All-Purpose Flour?
You can definitely substitute ingredients in the Guyanese bread recipe! Feel free to experiment with using alternative flours like whole wheat instead of all-purpose flour to add a healthier twist to your bread.
What Type of Oven Temperature Should I Set to Bake the Guyanese Bread?
To bake the Guyanese bread, set your oven to a temperature of 350 degrees Fahrenheit. This will ensure that the bread bakes evenly and to perfection. Keep an eye on the baking time to avoid any burnt surprises. Happy baking!
How Long Should I Let the Bread Cool Before Slicing and Serving It?
Let the bread cool for about 15-20 minutes before slicing and serving. This allows it to reach the perfect serving temperature, ensuring a delicious and enjoyable experience. Take your time and savor every bite!


Conclusion
In conclusion, this Guyanese bread recipe is the ultimate culinary adventure that will transport your taste buds to the vibrant streets of Georgetown.
With its soft yet crusty texture and the heavenly aroma that fills your kitchen, this bread is simply irresistible.
So go ahead, indulge in the flavors of Guyana and experience a slice of paradise right in your own home.
Get ready to savor every bite and let your senses embark on a mouthwatering journey like never before.