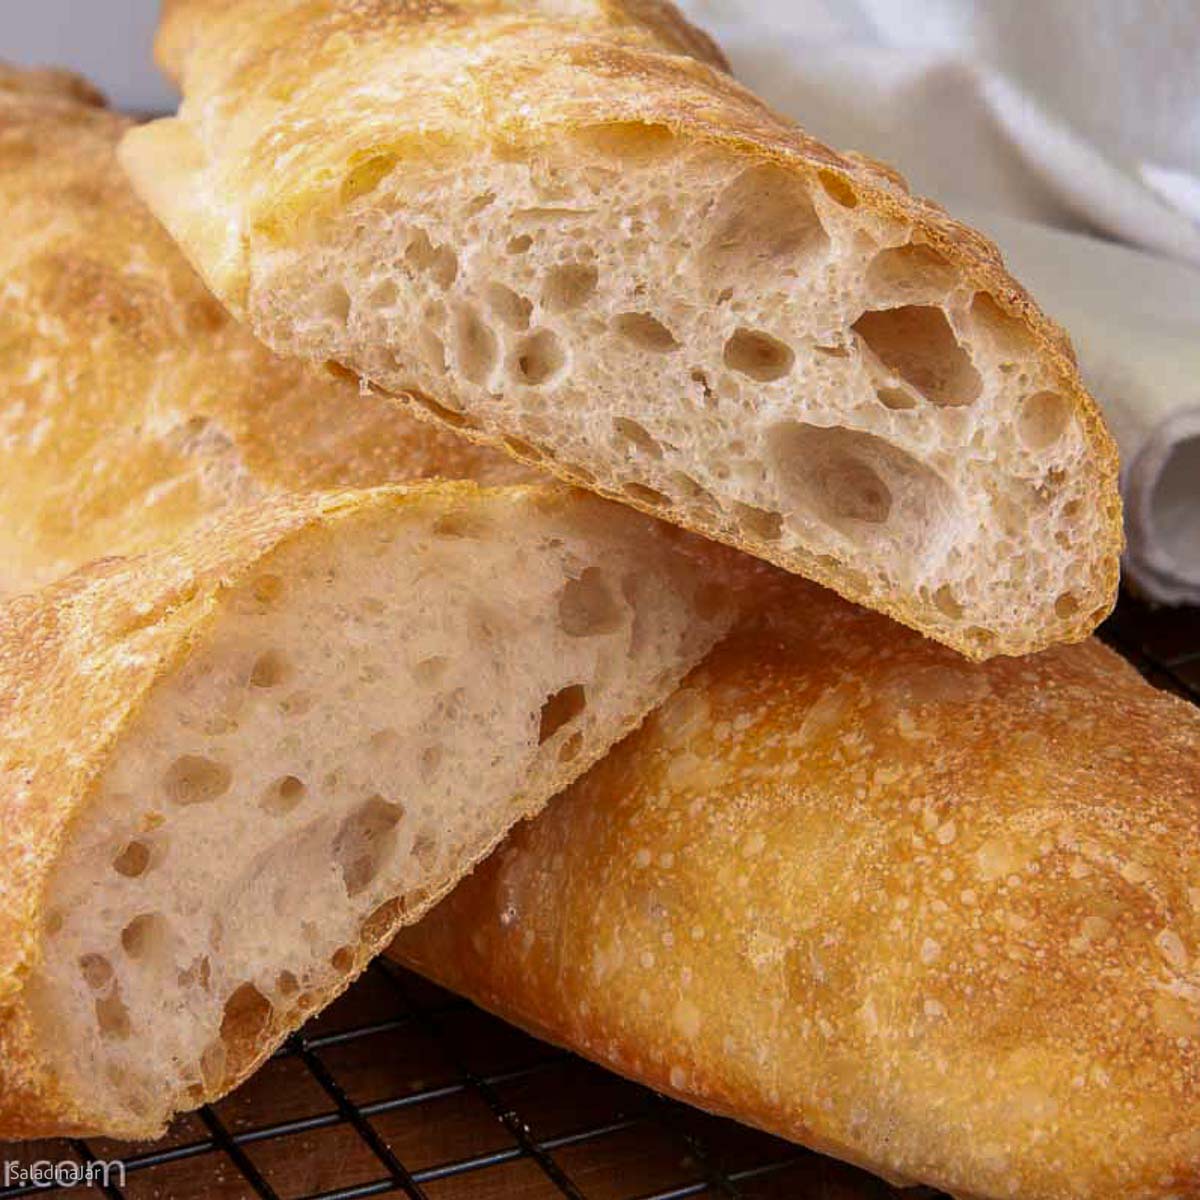
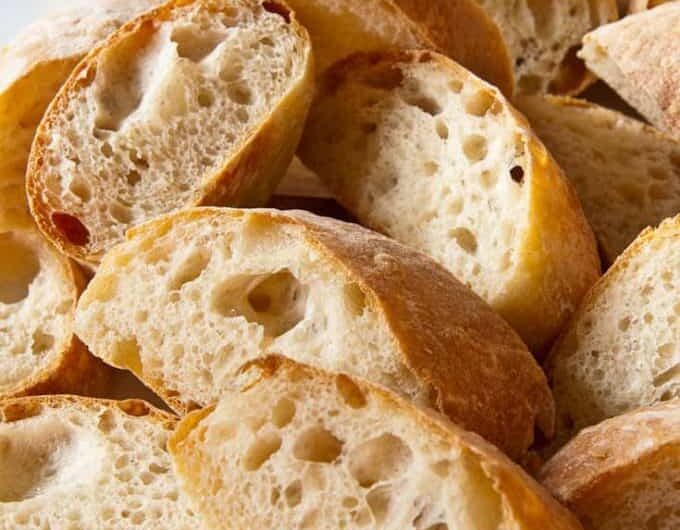
Embrace the art of creating Ciabatta bread in your bread machine. Enjoy the authentic taste of Italy with a crispy crust and airy interior. Elevate your baking skills by utilizing high-quality ingredients like bread flour and olive oil. Follow precise techniques for perfect dough hydration and baking. Discover the secrets to customized Ciabatta bread with unique herb variations. Enhance your baking game with every delicious slice. Explore the world of Ciabatta bread and become a master baker in your own kitchen.
Contents
- 1 Key Takeaways
- 2 Ingredients for Ciabatta Bread
- 3 Setting up Your Bread Machine
- 4 Adding Ingredients to the Machine
- 5 Selecting the Dough Cycle
- 6 Ciabatta Bread Machine Recipe
- 7 Shaping and Baking the Ciabatta
- 8 Enjoying Your Homemade Ciabatta
- 9 Frequently Asked Questions
- 9.1 Can I Use a Different Type of Flour in This Ciabatta Bread Machine Recipe?
- 9.2 How Long Does the Dough Need to Rise for Before Shaping and Baking the Ciabatta?
- 9.3 Can I Add Additional Ingredients Like Herbs or Cheese to the Ciabatta Dough?
- 9.4 Can I Freeze the Ciabatta Dough for Later Use?
- 9.5 How Can I Store the Baked Ciabatta to Keep It Fresh for Longer?
- 10 Conclusion-Ciabatta Bread Machine Recipe
Key Takeaways
- Properly load high-quality ingredients in the bread machine for authentic Ciabatta flavor.
- Select the correct program and adjust settings for ideal dough consistency and fermentation.
- Shape the dough accurately for the signature open crumb structure of Ciabatta.
- Ensure proper resting times to develop flavors and enhance gluten extensibility.
- Experiment with different baking times and temperatures for the perfect crunchy crust.
Ingredients for Ciabatta Bread
To create delicious Ciabatta bread, gather high-quality ingredients that will elevate the taste and texture of your final product. When exploring Ciabatta bread variations, contemplate how different flours, such as bread flour or all-purpose flour, can impact the bread’s texture and flavor. Experiment with adding ingredients like olive oil or herbs to infuse your Ciabatta with unique tastes.
One important aspect to ponder is the Ciabatta bread crustiness. Achieving that perfect crust requires attention to detail. The high hydration of the dough and the proper baking technique are essential. A hot oven and steam during the baking process help develop that signature crunchy crust that Ciabatta is known for.
Remember that the beauty of baking Ciabatta lies in its versatility. Embrace the freedom to play with ingredients and techniques to create a bread that suits your taste preferences. Whether you prefer a chewy interior or an extra crispy crust, the possibilities are endless when making your own Ciabatta bread.
Setting up Your Bread Machine
Get prepared to elevate your bread-making game by arranging your bread machine like a pro. Guarantee you nail the fundamentals of machine setup, select the appropriate program for ciabatta, and load those ingredients in the correct order for a flawless loaf every time.
Mastering these steps will set the stage for a delightful homemade ciabatta bread that will impress your taste buds.
Machine Setup Basics
For ideal bread-making success with your machine, make sure that your bread machine is set up correctly by following these essential machine setup basics.
First, confirm that your bread pan is securely in place before adding any ingredients.
Next, verify that the kneading blade is properly attached to avoid any mixing mishaps.
Additionally, always plug your machine into a stable power source to prevent interruptions during the baking process.
Remember, regular cleaning and maintenance are key to keeping your bread machine in top shape. Wipe down the exterior with a damp cloth and follow the manufacturer’s guidelines for deep cleaning.
Selecting the Program
When setting up your bread machine, be sure to choose the correct program for making ciabatta bread to achieve ideal results.
Here’s how to select the perfect program:
- Program Customization: Look for a program that allows you to customize the kneading and rising times to suit the specific requirements of ciabatta dough.
- Bread Texture: Select a setting that offers longer kneading cycles for a chewier ciabatta, or shorter cycles for a lighter texture.
- Crust Preferences: Choose a program that lets you adjust the crust setting to achieve your desired level of crispiness.
- Troubleshooting: Familiarize yourself with the troubleshooting options on your machine in case any issues arise during the baking process.
Loading Ingredients Correctly
Utilize the correct placement of ingredients to guarantee optimal results when setting up your bread machine for baking ciabatta bread.
When loading your bread machine, remember to follow specific mixing techniques for ciabatta dough. Start by adding water, then flour, salt, and yeast in that order. Be precise with measurements to ensure the ideal balance of ingredients in your ciabatta bread.
If needed, you can explore ingredient substitutions to cater to dietary preferences or allergies. For instance, consider using whole wheat flour for a healthier twist or honey instead of sugar for a touch of sweetness.
Adding Ingredients to the Machine
To achieve the perfect ciabatta bread, make sure every ingredient is measured precisely before adding them to the machine. The art of creating a mouthwatering ciabatta lies in the details of the ingredients and how they’re incorporated. Here’s a step-by-step guide to help you master the process:
- Ingredient Measurements: Use a digital kitchen scale to weigh your flour accurately. Different flours can vary in weight, affecting the bread texture.
- Mixing Techniques: Follow the order specified in your bread machine’s manual. Typically, liquids go in first, followed by dry ingredients.
- Rising Time: Allow the dough to rise properly. This step is vital for developing the airy structure that ciabatta is known for.
- Quality Ingredients: Choose high-quality olive oil and sea salt to enhance the flavor of your ciabatta.
Selecting the Dough Cycle
When selecting the dough cycle for your ciabatta bread, consider the time and temperature settings to guarantee proper fermentation. Pay attention to the dough consistency throughout the cycle, adjusting as necessary for a perfect texture.
Familiarize yourself with your bread machine’s settings to get the best results for your homemade ciabatta.
Time and Temperature
For best results, always make sure that you select the suitable dough cycle based on the recipe requirements and your desired bread texture. Here are some tips to help you achieve the perfect ciabatta using your bread machine:
- Timing is Key: Follow the recipe instructions for proofing and rising times to achieve that delicious, airy texture.
- Temperature Matters: Confirm your ingredients are at room temperature to assist the yeast work its magic and develop flavor.
- Crust Control: Adjust the baking time and temperature to achieve your preferred crust texture, whether you like it crispy or soft.
- Flavor Fusion: Experiment with different temperature settings to enhance the flavor profiles of your ciabatta loaf.
Dough Consistency
Choose carefully the appropriate dough cycle on your bread machine to achieve the perfect consistency for your ciabatta bread. The dough cycle plays a critical role in developing the ideal dough elasticity and gluten structure necessary for the airy texture of ciabatta.
Pay attention to the hydration level of your dough during the kneading process to guarantee proper gluten development. This step is vital for creating those signature large air pockets within the bread.
Additionally, the fermentation process, impacted by the dough cycle, is key to enhancing the flavor profile of your ciabatta. By selecting the right cycle, you can control the time and temperature needed for the dough to ferment adequately, resulting in a more complex and delicious final product.
Machine Settings
To guarantee the perfect consistency and texture in your ciabatta bread, adjust the machine settings, specifically by selecting the appropriate dough cycle that will improve gluten development and fermentation for optimal results. When choosing the dough cycle, take into account the following:
- Crust Settings: Choose a light crust setting to maintain the traditional soft and airy texture of ciabatta.
- Yeast Measurements: Confirm accurate yeast measurements to achieve the desired rise and flavor in your bread.
- Kneading Time: Allow for ample kneading time to fully develop the gluten, contributing to the bread’s structure.
- Resting Periods: Include resting periods in the cycle to enhance flavor and texture development in your ciabatta dough.
Ciabatta Bread Machine Recipe
Course: BreadCuisine: ItalianDifficulty: Moderate8
servings15
minutes25
minutes180
kcalA simple yet delicious recipe for making Ciabatta bread using a bread machine. Enjoy the rustic Italian flavors with minimal effort and maximum satisfaction.
Ingredients
1 1/2 cups warm water
2 tablespoons olive oil
3 cups bread flour
1 1/2 teaspoons salt
1 1/2 teaspoons sugar
2 teaspoons active dry yeast
Directions
- Place all ingredients into the bread machine in the order recommended by the manufacturer.
- Select the dough cycle and start the machine.
- Once the dough cycle is complete, remove the dough from the machine and transfer it to a lightly floured surface.
- Divide the dough into two equal portions and shape each portion into a rectangle.
- Place the dough rectangles onto a baking sheet lined with parchment paper.
- Cover the dough with a clean kitchen towel and let it rise in a warm place for about 30 minutes.
- Preheat the oven to 425°F (220°C).
- Bake the ciabatta bread for 20-25 minutes or until golden brown.
- Allow the bread to cool slightly before slicing and serving. Enjoy your homemade ciabatta bread!
Shaping and Baking the Ciabatta
Prepare the dough for shaping and baking the Ciabatta with confidence and precision. This step is essential to achieving that perfect crusty texture and artisanal look in your homemade bread. As you work through the shaping process, remember that each movement contributes to the final result. Here is a helpful guide to shaping your Ciabatta:
| Shaping Steps | Description | Tips |
|---|---|---|
| Pre-shaping | Divide the dough into portions and shape into rounds | Gentle handling preserves air bubbles for a lighter crumb |
| Resting | Allow the dough to rest before final shaping | This relaxes the gluten for easier stretching |
| Final Shaping | Stretch the dough into the classic Ciabatta shape | Wet hands help prevent sticking and shape retention |
Enjoying Your Homemade Ciabatta
Indulge in the tantalizing aroma and irresistible texture of your freshly baked Ciabatta, elevating your culinary experience to new heights. Now that you have created this artisan bread masterpiece, it’s time to savor it in various delightful ways:
- Ciabatta Sandwich Options: Explore endless possibilities by using your Ciabatta to craft gourmet sandwiches. Fill it with classic combinations like prosciutto and mozzarella or get creative with roasted vegetables and pesto.
- Serving Suggestions for Ciabatta: Enhance your dining experience by serving slices of warm Ciabatta alongside a charcuterie board, drizzled with quality olive oil and balsamic vinegar for dipping. Alternatively, toast thick slices and serve them with a comforting bowl of soup or salad.
- Bruschetta Brilliance: Transform your Ciabatta into bruschetta by toasting it, rubbing with garlic, and topping it with fresh tomatoes, basil, and a sprinkle of sea salt for a burst of Mediterranean flavors.
- Sweet Endings: Don’t forget the sweet side of Ciabatta! Toast slices, spread with Nutella, and top with sliced bananas for a decadent treat that balances the bread’s savory nature with a hint of sweetness.
Frequently Asked Questions
Can I Use a Different Type of Flour in This Ciabatta Bread Machine Recipe?
Yes, you can use a different type of flour in your recipe. Experiment with various flour substitutions to discover unique textures and flavors. Baking techniques can be adjusted to accommodate gluten-free options or yeast alternatives.
How Long Does the Dough Need to Rise for Before Shaping and Baking the Ciabatta?
To achieve the perfect rise for your ciabatta dough before shaping and baking, guarantee proper yeast activation and kneading techniques. Let it rise for approximately 1.5 to 2 hours, depending on dough hydration and shaping methods.
Can I Add Additional Ingredients Like Herbs or Cheese to the Ciabatta Dough?
You can definitely get creative with your ciabatta dough! Adding herbs or cheese can elevate the flavor. Experiment with different toppings for a personalized touch. Explore various baking techniques to achieve your desired crust preferences. Enjoy the process!
Can I Freeze the Ciabatta Dough for Later Use?
When freezing dough for later, make sure it’s cozy as a bug in a rug. Maintain the correct consistency for successful thawing. Be cautious of flavor impact during the process. Your future loaves will thank you.
How Can I Store the Baked Ciabatta to Keep It Fresh for Longer?
To keep your baked ciabatta fresh longer, store it in a paper bag for a crispy crust or a plastic bag for a softer texture. Avoid the fridge, as it can dry out the bread. Enjoy the bread!
Conclusion-Ciabatta Bread Machine Recipe
In just a few simple steps, you can create a delicious ciabatta bread right in your own kitchen. By following this easy recipe and using your bread machine, you’ll be amazed at the professional-quality results you can achieve.
So why settle for store-bought when you can enjoy the satisfaction of homemade ciabatta? Give it a try today and elevate your baking game to a whole new level!


