Looking to embark on a journey of culinary exploration? Well, we’ve got a delectable treat for you – the Bridgeford Bread Recipe.
This recipe will guide you step by step to create a mouthwatering loaf of bread that will make your taste buds dance with delight. No need to rely on store-bought bread when you can embrace the freedom of baking your own heavenly creation.
So, roll up your sleeves, grab your ingredients, and let’s dive into the art of bread making. Get ready to savor the aroma of freshly baked goodness wafting through your kitchen, and experience the pure joy of sinking your teeth into a warm, homemade slice of Bridgeford Bread.
Let’s get started!


Contents
- 1 Key Takeaways
- 2 Ingredients
- 3 Mixing the Dough
- 4 Kneading and Rising
- 5 Shaping the Bread
- 6 Baking the Bread
- 7 Bridgeford Bread Recipe
- 8 Enjoying Your Homemade Bridgeford Bread
- 9 Nutritional Facts:-
- 10 Frequently Asked Questions
- 10.1 Can I Substitute Whole Wheat Flour for All-Purpose Flour in the Bridgeford Bread Recipe?
- 10.2 How Do I Know if the Dough Has Risen Enough During the Rising Process?
- 10.3 Can I Freeze the Dough After Shaping It and Bake It at a Later Time?
- 10.4 What Can I Do if My Bread Comes Out Too Dense?
- 10.5 Can I Add Additional Ingredients Such as Herbs or Cheese to the Bridgeford Bread Recipe?
- 11 Conclusion
Key Takeaways
- The Bridgeford Bread recipe is known for its exceptional quality and has been passed down through generations.
- The recipe provides detailed instructions for making the bread, ensuring guaranteed success.
- The bread has a fluffy texture that enhances its taste and melts in your mouth.
- The Bridgeford Bread serves as a canvas for flavor exploration, allowing for endless possibilities of toppings and fillings.
Ingredients
To make Bridgeford Bread, you’ll need the following ingredients.
- First and foremost, you’ll need flour, preferably all-purpose or bread flour for a chewier texture.
- Yeast is essential for the bread to rise and create that light and fluffy interior.
- Don’t forget salt, as it enhances the flavor of the bread.
- For some added sweetness, sugar or honey can be included.
- Water is crucial for activating the yeast and forming the dough.
- Lastly, you can customize your bread by adding various ingredients such as herbs, cheese, or nuts.
As for the techniques for kneading, you can use the traditional hand-kneading method or opt for a stand mixer with a dough hook attachment.
Now that you know the basic ingredients and techniques, you can explore the endless variations of bread types and get creative in the kitchen. Enjoy the freedom of experimenting and creating your own delicious loaves.
Mixing the Dough
Start by combining the flour, yeast, salt, sugar, and any additional ingredients in a large mixing bowl. Use your hands or a wooden spoon to mix everything together, making sure that the dry ingredients are evenly distributed.
Next, slowly add warm water to the bowl, a little at a time, while continuing to mix. The dough should come together and form a slightly sticky ball. If the dough feels too dry, add more water, a tablespoon at a time. If it feels too wet, add a little more flour.
Knead the dough on a lightly floured surface for about 10 minutes, using the heel of your hand to push and stretch it. This will help develop the gluten and give the bread a nice texture.
Once the dough is smooth and elastic, place it back in the bowl, cover it with a clean kitchen towel, and let it rise in a warm place for about an hour or until it has doubled in size.
Troubleshooting common dough problems such as a dough that’s too sticky or too dry can be resolved by adjusting the amount of water or flour respectively.
Kneading and Rising
Knead the dough for about 10 minutes on a lightly floured surface to develop gluten and create a smooth and elastic texture. This process is essential for achieving a light and airy bread. As you knead, use your palms to push the dough away from you, then fold it back over itself. Repeat this motion, turning the dough occasionally, until it becomes smooth and springs back when pressed with your finger.
To help troubleshoot common rising issues, here are some techniques to consider:
- Use warm water when mixing the dough to activate the yeast properly.
- Place the dough in a warm, draft-free area to encourage fermentation.
- Cover the dough with a clean kitchen towel or plastic wrap to prevent it from drying out.
By mastering these kneading techniques and troubleshooting common rising issues, you’ll have a beautifully risen dough ready for shaping.
Now, let’s move on to the next step – shaping the bread.
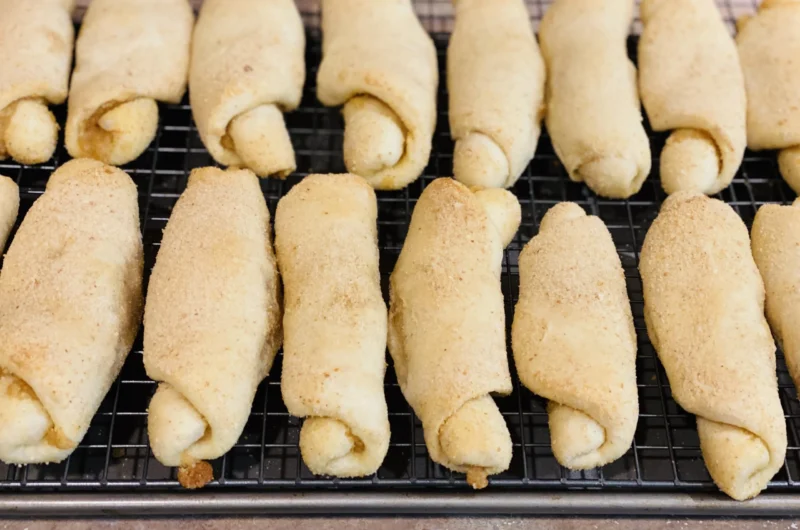
Shaping the Bread
Now that your dough has risen beautifully, it’s time to shape it into the perfect loaf.
In this discussion, we’ll explore different techniques for shaping your bread, ensuring that every slice is both visually appealing and delicious.
We’ll also delve into the importance of achieving the desired consistency in your dough, as it plays a crucial role in the final shape and texture of your bread.


Discussion Point 1: Techniques for Shaping
To shape the Bridgeford bread, begin by gently folding the dough over itself using your hands. This technique is crucial in achieving the desired consistency of the bread. As you fold the dough, you’ll notice its texture changing, becoming smoother and more elastic. This process helps to evenly distribute the yeast and develop the gluten, resulting in a lighter and more airy bread.
As you continue shaping, use a light touch to avoid pressing out too much air. You can also experiment with different shapes, such as round loaves, baguettes, or rolls, depending on your preference. The shaping process not only affects the appearance of the bread but also its texture and overall baking results.
Now that you have perfected the shaping technique, let’s move on to the next discussion point: achieving the desired consistency.
Discussion Point 2: Achieving Desired Consistency
To achieve the desired consistency when shaping the Bridgeford bread, you’ll need to pay careful attention to the moisture content of the dough.
The key to achieving smoothness in your bread is to adjust the hydration levels. If the dough feels too dry and stiff, add a little more water gradually until it becomes more pliable. On the other hand, if the dough feels too wet and sticky, incorporate small amounts of flour until it reaches the right consistency.
Adjusting the hydration levels allows you to have better control over the shaping process, ensuring that the bread turns out just the way you want it.
Once you have achieved the desired consistency, you can move on to the next step: baking the bread, where all your hard work will pay off.
Baking the Bread
Now that you’ve shaped your Bridgeford bread dough, it’s time to bake it to perfection.
The rising time is crucial, as it allows the bread to develop the right texture and flavor.
When it comes to baking, make sure to preheat your oven to the recommended temperature and follow the suggested duration to achieve a golden crust and a soft, fluffy interior.
Rising Time Importance
Start by allowing the bread dough to rise for the specified amount of time to ensure proper texture and flavor. This step is crucial in achieving the perfect loaf of Bridgeford bread. As the dough rises, it develops a light and airy structure that gives the bread its signature softness.
Here are some techniques for proofing and troubleshooting rising issues:
- Create a warm environment: Place the dough in a draft-free area, such as an oven with the light on or near a sunny window. This helps activate the yeast and promotes rising.
- Check for proper doubling: After the specified rising time, the dough should double in size. If it hasn’t, it may need more time or a warmer environment.
- Avoid overproofing: If the dough rises too much, it may collapse during baking. Keep an eye on the dough to prevent this.
Baking Temperature and Duration
Once the dough has properly risen, it’s time to transition into baking the Bridgeford bread at the recommended temperature and duration. This is an exciting moment as you’re about to witness the transformation of your dough into a beautiful, golden loaf of bread.
However, it’s important to be aware of common baking problems that may arise and how to troubleshoot them. If your bread is browning too quickly, you can cover it with aluminum foil to prevent further browning without affecting the baking process.
On the other hand, if your bread isn’t browning enough, you can increase the temperature slightly or extend the baking time. Additionally, for those who prefer alternative baking methods, you can experiment with using a Dutch oven or a bread machine to achieve different textures and flavors.

Bridgeford Bread Recipe
Course: SnacksCuisine: AmericanDifficulty: Easy4
servings25
minutes25
minutes300
kcalrecommend checking the packaging or official sources associated with that brand for the most accurate and detailed information. Alternatively, if you have additional details or context, feel free to provide them, and I'll do my best to assist you based on the information available up to my last update.
Ingredients
3 1/4 cups all-purpose flour
1 packet (2 1/4 teaspoons) active dry yeast
1 cup warm water (110°F/43°C)
2 tablespoons sugar
1 teaspoon salt
1 tablespoon olive oil or melted butter
Directions
- In a small bowl, combine the warm water and sugar. Sprinkle the yeast over the water and let it sit for about 5-10 minutes until it becomes frothy.
- In a large mixing bowl, combine the flour and salt.
- Add the activated yeast mixture to the flour, and mix until it forms a rough dough.
- Turn the dough onto a floured surface and knead for about 8-10 minutes until it becomes smooth and elastic. Alternatively, you can use a stand mixer with a dough hook for this step.
- Place the dough in a lightly oiled bowl, cover it with a damp cloth or plastic wrap, and let it rise in a warm place for about 1-2 hours, or until it has doubled in size.
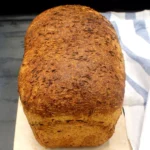
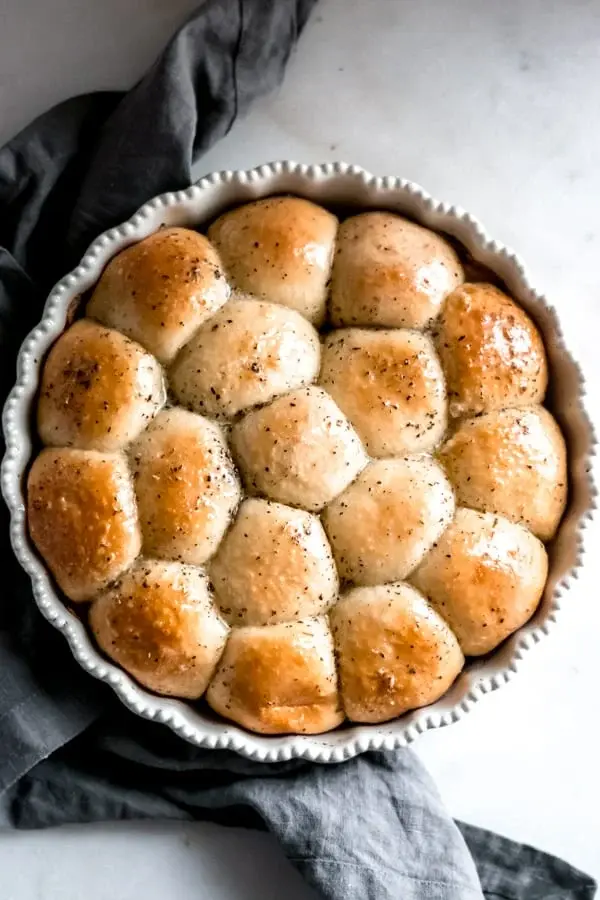
- Punch down the dough and shape it into a loaf. Place it in a greased loaf pan.
- Allow the shaped dough to rise again for about 30-60 minutes, or until it has risen just above the edges of the pan.
- Preheat your oven to 375°F (190°C).
- Bake the bread in the preheated oven for 25-30 minutes or until the top is golden brown and the bread sounds hollow when tapped on the bottom.
- Allow the bread to cool in the pan for a few minutes before transferring it to a wire rack to cool completely.
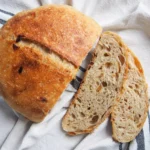
Enjoying Your Homemade Bridgeford Bread
To fully savor the deliciousness of your homemade Bridgeford Bread, slice it thickly and slather it with creamy butter.
As you take that first bite, you’ll be greeted with a fluffy texture that melts in your mouth. The bread’s golden crust gives way to a soft and airy interior, thanks to the techniques you used to achieve such a perfect consistency.
Now, let your imagination run wild with the endless possibilities of toppings and fillings. Perhaps you’ll spread a layer of homemade strawberry jam, its sweetness blending harmoniously with the bread’s subtle tang. Or maybe you’ll pile on some thinly sliced avocado, sprinkling it with a pinch of sea salt for a savory delight.
Don’t be afraid to experiment and create your own unique combinations. After all, this bread is your canvas for flavor exploration.
Enjoy the freedom and indulge in every heavenly bite.
Nutritional Facts:-
Serving Size: 1 slice
Calories: 150
Total Fat: 3g
Saturated Fat: 0.5g
Cholesterol: 0mg
Sodium: 300mg
Total Carbohydrates: 27g
Dietary Fiber: 1.5g
Sugars: 1g
Protein: 4g
Frequently Asked Questions
Can I Substitute Whole Wheat Flour for All-Purpose Flour in the Bridgeford Bread Recipe?
You can substitute whole wheat flour for all-purpose flour in the Bridgeford Bread Recipe. Whole wheat flour adds a nutty flavor and extra fiber, making your bread more nutritious and delicious. So go ahead and enjoy the benefits of using different types of flour in your bread recipes!
How Do I Know if the Dough Has Risen Enough During the Rising Process?
To tell if your dough has risen enough, give it a gentle poke. If it springs back slowly, it needs more time. If it springs back quickly, it’s ready to bake. Avoid dense bread with this simple test.
Can I Freeze the Dough After Shaping It and Bake It at a Later Time?
Yes, you can freeze the dough after shaping it and bake it at a later time. This allows you the freedom to have freshly baked bread whenever you desire, without the hassle of making the dough from scratch.
What Can I Do if My Bread Comes Out Too Dense?
To achieve a lighter texture in your homemade bread, try these tips: use bread flour for more gluten development, let the dough rise properly, and avoid overmixing. If your bread still comes out dense, troubleshoot by adjusting the yeast amount or increasing the proofing time.
Can I Add Additional Ingredients Such as Herbs or Cheese to the Bridgeford Bread Recipe?
Yes, you can definitely add herbs or cheese to the Bridgeford bread recipe. It’s a great way to add more flavor and create delicious variations. Get creative and experiment with different combinations!

Conclusion
In the end, as the golden loaf emerges from the oven, filling the air with its tantalizing aroma, you can’t help but feel a sense of accomplishment. Your homemade Bridgeford bread, crafted with your own hands, is a testament to your dedication and skill.
With each bite, you savor the perfect balance of softness and crunch, knowing that no store-bought bread can compare.
This is the taste of triumph, the reward for your culinary journey.