

Create irresistible Turkish Bread Rolls Recipe by combining flour, yeast, sugar, salt, olive oil, and warm water. Activate yeast for fluffy rolls and knead for gluten structure. Let dough rise and shape into rolls. Baking temperature is key. Serve warm with butter. Pair with dips like hummus or create tasty sandwiches. Experiment with seeds, cheese, herbs, olives, or wheat flour for variations. Enjoy with salads or Mediterranean snacks. Try alongside mint tea for a delightful experience. Master the art of Turkish bread rolls with these steps for delicious results.
Contents
- 1 Key Takeaways
- 2 Ingredients for Turkish Bread Rolls
- 3 Step-by-Step Instructions
- 4 Kneading and Rising the Dough
- 5 Shaping the Bread Rolls
- 6 Baking the Rolls to Perfection
- 7 Turkish Bread Rolls Recipe
- 8 Enjoying Freshly Baked Turkish Rolls
- 9 Frequently Asked Questions
- 10 Conclusion-Turkish Bread Rolls Recipe
Key Takeaways
- Use high-quality ingredients like flour, yeast, and olive oil for authentic flavor.
- Activate yeast properly for fluffy rolls.
- Knead dough for gluten structure and texture.
- Shape rolls evenly for consistent baking.
- Bake at the right temperature for crispy crust and fluffy interior.
Ingredients for Turkish Bread Rolls
For perfect Turkish Bread Rolls, gather these essential ingredients before you begin creating this delicious recipe. Turkish cuisine is known for its rich flavors and diverse bread variations. When making homemade breads like Turkish Bread Rolls, it’s important to use high-quality ingredients to achieve an authentic taste.
Start by gathering all-purpose flour, yeast, sugar, salt, olive oil, and warm water. These basic ingredients are the building blocks for creating fluffy and flavorful Turkish Bread Rolls. Baking tips for this recipe include ensuring your yeast is fresh and activating it in warm water with a pinch of sugar before adding it to the flour mixture. Kneading the dough until smooth and elastic will help develop the gluten structure, resulting in soft and airy bread rolls.
In Turkish cuisine, bread holds a special place as a staple food. Homemade breads are a beloved tradition, with each region having its unique variations. Embrace the spirit of Turkish cooking by preparing these delightful Turkish Bread Rolls at home.
Step-by-Step Instructions
Now, let’s get started with the step-by-step instructions for making delicious Turkish Bread Rolls.
You’ll learn about the essential ingredients needed, the preparation steps involved, and how to bake and serve these delightful rolls.
Follow along closely to create a batch of these tasty treats in your own kitchen!
Ingredients Needed
Start by gathering all the necessary ingredients for making these delicious Turkish bread rolls. For these bread roll variations influenced by Turkish cuisine, you’ll need:
- 2 cups of all-purpose flour
- 1 packet of active dry yeast
- 1 teaspoon of salt
- 1 tablespoon of sugar
- 1/2 cup of warm water
- 2 tablespoons of olive oil
- 1 egg (for egg wash)
- sesame or nigella seeds for topping
These ingredients come together to create a flavorful and aromatic dough that reflects the rich culinary heritage of Turkey. The combination of traditional Turkish spices and the soft, fluffy texture of the bread rolls will surely delight your taste buds. Get ready to start a culinary journey with these Turkish-inspired bread rolls!
Preparation Steps
To kick off the preparation steps for making these delectable Turkish bread rolls, begin by activating the yeast in warm water. Ensuring the yeast is frothy sets the foundation for the perfect bread texture.
Here are the steps to guide you through the process:
- Activate Yeast: Mix warm water with yeast and a pinch of sugar.
- Combine Ingredients: Blend the yeast mixture with flour, salt, and olive oil.
- Knead Dough: Work the dough until it’s smooth and elastic.
- Let it Rise: Allow the dough to rise until doubled in size.
- Shape Rolls: Divide the dough, shape into rolls, and let them rise again.
These steps will lead you to the ideal bread texture. Remember, the baking temperature plays a significant role, so stay tuned for the next steps.

Baking and Serving
Upon the completion of the preparation steps, the aroma of freshly baked Turkish bread rolls wafts through your kitchen, enticing your senses with anticipation of the delightful flavors to come.
Allow the golden-brown rolls to cool slightly before serving. For a classic touch, spread some salted butter over a warm roll and enjoy its soft texture.
If you’re looking to elevate your experience, consider serving the rolls alongside a selection of cheeses, olives, and sliced tomatoes. These rolls also make a perfect accompaniment to hearty soups or stews.
To store any leftovers, wrap the cooled rolls in a kitchen towel or place them in an airtight container to maintain their freshness. Experiment with different flavor variations by adding herbs or seeds to the dough for a unique twist.
Kneading and Rising the Dough
Now let’s talk about how to perfect the art of kneading and letting your dough rise just right.
You’ll learn essential dough kneading techniques to guarantee your bread rolls turn out fluffy and delicious.
Plus, we’ll share some helpful tips on how to get your dough to rise to its full potential for that perfect texture.
Dough Kneading Techniques
Begin kneading the dough by pressing and folding it repeatedly until it becomes smooth and elastic. This process helps develop the gluten strands, giving the bread structure and a chewy texture. Here are some tips to perfect your dough kneading technique:
- Apply gentle pressure to the dough while kneading to avoid overworking it.
- Use the heel of your hand to push the dough away from you, then fold it back towards yourself.
- Rotate the dough a quarter turn after each fold to guarantee even kneading.
- Knead for the recommended time to achieve the desired dough elasticity.
- Adjust the flour hydration if the dough feels too sticky or dry to maintain the right consistency.
Mastering these techniques will enhance the quality of your Turkish bread rolls.
Dough Rising Tips
To enhance the flavor and texture of your Turkish bread rolls, allow the dough to rise slowly at room temperature for best results. Proper fermentation is key to developing a rich taste and airy texture in your bread rolls.
When kneading the dough, make sure it’s smooth and elastic before letting it rise. Cover the dough with a damp cloth or plastic wrap to prevent it from drying out during the rising process.
Temperature control is essential; keep the dough in a draft-free area to maintain a consistent environment for fermentation. Letting the dough rise for the specified time allows the yeast to work its magic, creating those delicious air pockets that will make your Turkish bread rolls light and fluffy.
Shaping the Bread Rolls
When shaping the bread rolls, gently divide the dough into equal portions and begin forming each piece into a smooth, round ball. This step guarantees that your rolls will bake evenly and have an appealing shape. Here are some tips to help you shape your Turkish bread rolls:
- Use a light dusting of flour on your hands and work surface to prevent sticking.
- Apply gentle pressure when shaping the dough to maintain a light and airy texture.
- Roll the dough balls between your palms in a circular motion to create a smooth surface.
- Make sure that the rolls are evenly sized for consistent baking.
- Place the shaped rolls on a baking sheet lined with parchment paper, leaving enough space between each roll for them to expand during proofing.
Baking the Rolls to Perfection
As you preheat your oven to the designated temperature, make sure that it’s fully heated to achieve the perfect baking environment for your Turkish bread rolls. The key to achieving that ideal texture is getting a crispy crust while maintaining a fluffy interior.
Once your rolls are placed in the oven, the magic begins. The heat will interact with the dough, creating steam that helps develop that sought-after crispy crust. This process also guarantees that the interior remains soft and airy, giving you the best of both worlds in each bite.
Timing is vital during the baking process. Keep a close eye on your rolls as they transform into golden perfection. The aroma wafting through your kitchen will be your cue that they’re almost ready. Once you notice the rolls turning a beautiful golden brown, it’s time to take them out. Let them cool for a few minutes before indulging in the delightful contrast of textures – the crispy crust and the fluffy interior.

Turkish Bread Rolls Recipe
Course: Appetizer, Side Dish, BreadCuisine: Turkish, Middle EasternDifficulty: Medium8
servings20
minutes25
minutes180
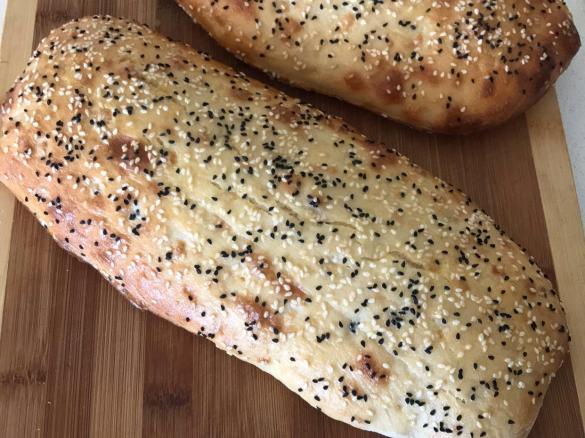
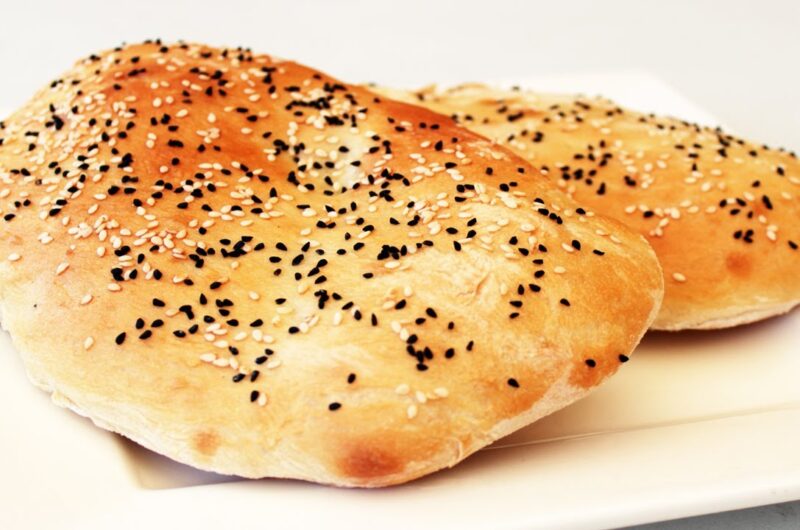
kcalTurkish Bread Rolls are soft and fluffy with a slightly chewy texture, perfect as a side dish or for making sandwiches. These rolls are often sprinkled with sesame or nigella seeds, adding a distinctive flavor and crunch.
Ingredients
500g bread flour
10g salt
7g instant yeast
300ml warm water
2 tbsp olive oil
1 tbsp sugar
1 egg, beaten (for egg wash)
Sesame seeds or nigella seeds (for topping)
Directions
- Mix Dry Ingredients: In a large bowl, combine flour, salt, and yeast. Make a well in the center.
- Add Wet Ingredients: Pour in warm water, olive oil, and sugar. Mix until a dough forms.
- Knead Dough: Turn out onto a floured surface and knead for 10 minutes until smooth and elastic.
- First Rise: Place dough in a greased bowl, cover with a damp cloth, and let rise in a warm place for 1 hour or until doubled in size.
- Shape Rolls: Punch down the dough and divide it into 8 equal portions. Shape each portion into a roll and place them on a baking tray lined with parchment paper.
- Second Rise: Cover with a cloth and let rise for another 30 minutes.
- Preheat Oven: Preheat oven to 200°C (390°F).
- Prepare for Baking: Brush the tops of the rolls with beaten egg and sprinkle with sesame or nigella seeds.
- Bake: Bake for 20-25 minutes until golden brown and cooked through.
- Cool: Let cool on a wire rack before serving.
Enjoying Freshly Baked Turkish Rolls
Indulge in the delightful contrast of textures by savoring the crispy crust and fluffy interior of your freshly baked Turkish rolls. As you enjoy the fruits of your baking labor, consider these exciting ways to elevate your experience:
- Bread Roll Variations
- Experiment with adding different seeds like sesame, poppy, or sunflower to the dough for added flavor and texture.
- Try incorporating grated cheese into the dough for a cheesy twist on the classic Turkish roll.
- Serving Suggestions
- Pair your Turkish rolls with a variety of dips such as hummus, tzatziki, or baba ganoush for a Mediterranean-inspired snack.
- Use your freshly baked rolls to make delicious sandwiches filled with your favorite meats, cheeses, and veggies.
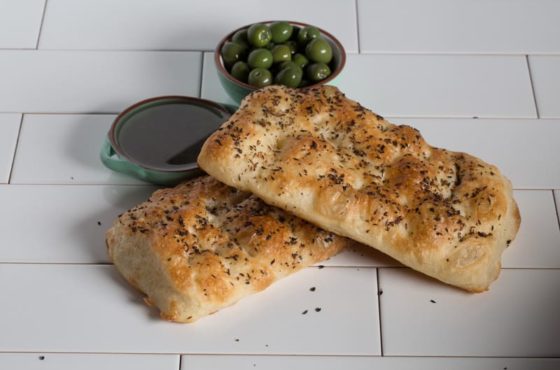
- Serve the Turkish rolls warm with a drizzle of olive oil and a sprinkle of sea salt for a simple yet indulgent treat.
With these ideas, your Turkish bread rolls can be enjoyed in a multitude of ways, making each bite a delightful experience.
Frequently Asked Questions
Can I Use Whole Wheat Flour Instead of All-Purpose Flour?
You can use whole wheat flour instead of all-purpose flour for a nuttier flavor and added nutrition. When substituting, make sure you adjust the liquid content as whole wheat flour absorbs more. Embrace this change with confidence!
How Long Can I Store the Turkish Bread Rolls?
You can store Turkish bread rolls for up to three days at room temperature in an airtight container. To extend freshness, consider freezing them for up to three months. Enjoy them warm or toasted!
Can I Freeze the Dough for Later Use?
When you’re ready to hit pause on your baking adventure, stash that dough in the freezer for a future bread-making fiesta! Just wrap it up snugly to keep it happy until you’re ready.
What Can I Add to the Dough for Extra Flavor?
For extra flavor variations in your dough, try adding herbs like rosemary, thyme, or oregano. You can also experiment with garlic powder, Parmesan cheese, or even olives. These additions will elevate your rolls.
Can I Make Smaller Rolls for Appetizers?
Sure, you can definitely make smaller rolls for appetizers! Mini roll variations are perfect party snack options. Just divide the dough into smaller pieces before shaping and baking. Your guests will love these bite-sized treats!
Conclusion-Turkish Bread Rolls Recipe
Now that you’ve mastered the art of making Turkish bread rolls, isn’t it time to enjoy the delicious fruits of your labor?
The warm, fluffy rolls with a crispy crust are perfect for any meal or snack. So why hesitate? Indulge in these delectable treats and savor every bite of your homemade creation.
Your taste buds will thank you!