

Create your own bakery-quality Tiger Bread Recipe with a unique crust texture by adding a rice paste. Elevate the flavor with sesame seeds or a touch of garlic powder. Mix flour, salt, sugar, and yeast for a sticky dough, knead until smooth, and try different herbs or spices for variety. Enhance with a sesame seed and sugar topping before baking. Experiment with tiger stripe designs and food coloring for a visually stunning result.
Bake to a crispy crust, allow to cool, and enjoy the crunchy exterior with a soft interior. Pair it with olive oil or balsamic vinegar, toast lightly for extra crunch, or serve as a delightful side. Master the art of Tiger Bread from start to finish, and discover a world of creative culinary possibilities awaiting your expertise.
Contents
- 1 Key Takeaways
- 2 Ingredients for Tiger Bread
- 3 Steps to Make the Dough
- 4 Preparing the Crunchy Topping
- 5 Applying the Tiger Stripe Design
- 6 Tiger Bread Recipe
- 7 Baking and Finishing Touches
- 8 Serving and Enjoying Tiger Bread
- 9 Frequently Asked Questions
- 9.1 Can I Use Whole Wheat Flour Instead of All-Purpose Flour in This Tiger Bread Recipe?
- 9.2 Is It Possible to Make This Tiger Bread Recipe Without Using a Bread Machine?
- 9.3 Can I Substitute Honey for Sugar in the Dough for Tiger Bread?
- 9.4 How Long Does Tiger Bread Last Before It Goes Stale?
- 9.5 Can I Freeze Tiger Bread for Later Consumption?
- 10 Conclusion-Tiger Bread Recipe
Key Takeaways
- Create a unique crust texture with a rice paste method.
- Enhance flavor with sesame seeds or garlic powder.
- Experiment with herbs, spices, or ingredient substitutions.
- Add a delightful crunchy topping with sesame seeds and sugar.
- Explore tiger stripe designs using piping or coloring techniques.
Ingredients for Tiger Bread
For this delicious Tiger Bread recipe, you’ll need to gather a few key ingredients to create the perfect combination of flavors and textures.
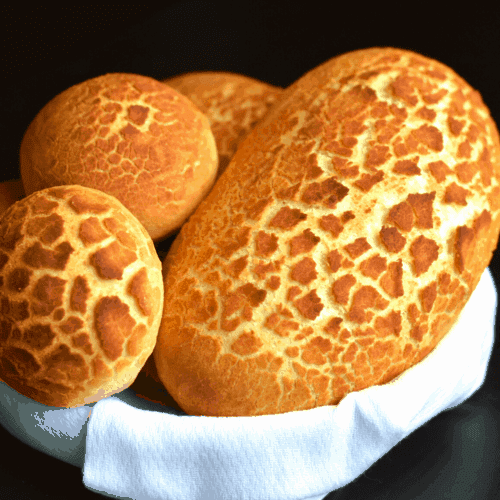
When it comes to baking techniques for this bread, the secret lies in the unique crust texture that’s achieved through a special method involving a rice paste. This technique not only gives Tiger Bread its distinctive appearance but also contributes to its crunchy crust that contrasts beautifully with the soft interior.
To enhance the flavor of your Tiger Bread, consider incorporating variations such as adding sesame seeds or even a hint of garlic powder to the dough before baking. These small tweaks can elevate the taste profile and surprise your taste buds with each bite.
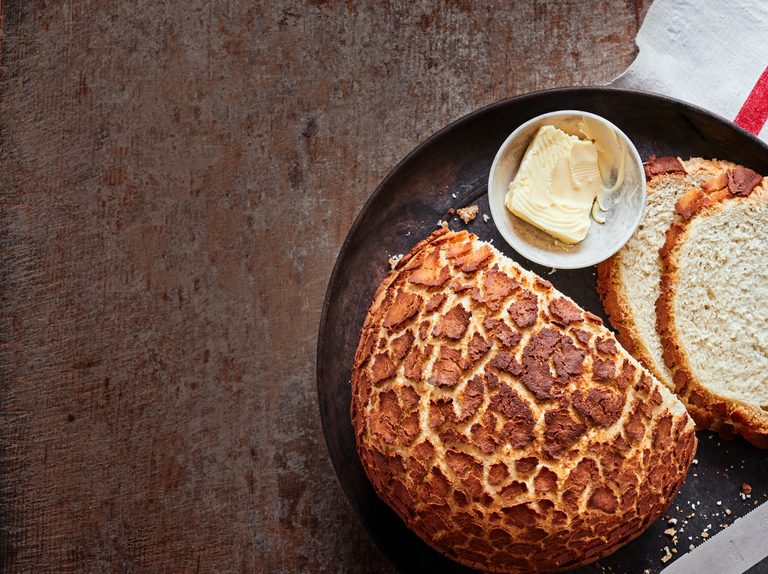
When serving this bread, it pairs wonderfully with a side of creamy butter or a selection of charcuterie and cheeses for a delightful snack or light meal. The versatility of Tiger Bread makes it a perfect addition to any dining occasion, be it a casual brunch or an elegant dinner spread.
Steps to Make the Dough
Now it’s time to bring your Tiger Bread to life by mixing the ingredients, kneading the dough, and allowing it to rise.
First, combine your flour, yeast, sugar, and warm water until a sticky dough forms.
Then, knead the dough until smooth and elastic before letting it rest and rise until doubled in size.
Mixing the Ingredients
Mixing the ingredients begins by combining the flour, salt, sugar, and yeast in a large mixing bowl. Use mixing techniques like gently stirring with a wooden spoon until the ingredients are well incorporated. Confirm the dough consistency is smooth and slightly sticky.
For flavor variations, consider adding herbs like rosemary or thyme, or spices like paprika for a unique twist. Ingredient substitutions can include using whole wheat flour for a nuttier flavor or honey instead of sugar for a touch of sweetness. Experiment with different combinations to personalize your tiger bread.
Once the dry ingredients are combined, you can move on to kneading the dough to develop its structure further.
Kneading the Dough
When kneading the dough for your tiger bread, concentrate on achieving a smooth and elastic texture through consistent folding and pressing motions. For hand kneading, make sure the dough consistency is slightly tacky but not sticking to your hands. Knead on a lightly floured surface for about 10-15 minutes until the dough becomes smooth and springs back when poked. Machine kneading offers benefits like saving time and effort while ensuring a more consistent texture. Allow the machine to knead the dough for about 8-10 minutes until it reaches the desired elasticity. Here is a table highlighting the key points of hand kneading versus machine kneading:
| Aspect | Hand Kneading | Machine Kneading |
|---|---|---|
| Dough Consistency | Slightly tacky | Consistent |
| Texture Outcome | Smooth & elastic | Even & elastic |
| Time Required | 10-15 minutes | 8-10 minutes |
| Effort | Moderate | Minimal |
Allowing to Rise
As the dough is kneaded to the desired texture, the next essential step is allowing it to rise properly for best results in your tiger bread recipe. The rising process is critical for developing flavor and texture. Here are some tips to troubleshoot common rising issues:
- Temperature Control: Guarantee your dough rises in a warm environment to activate the yeast effectively.
- Covering the Dough: Use a damp cloth or plastic wrap to cover the dough securely, preventing a dry surface that can hamper rising.
- Patience: Allow the dough to rise for the specified time; rushing this step can lead to a dense loaf.
When considering different rising methods, a comparison analysis reveals variations in flavor development and texture, influencing the final outcome of your tiger bread.
Preparing the Crunchy Topping
For a delightful crunchy topping on your Tiger Bread, consider incorporating a generous amount of sesame seeds and a dash of sugar for added sweetness and texture. To prepare this flavorful topping, mix together a quarter cup of sesame seeds with a tablespoon of sugar in a small bowl. The sesame seeds will add a nutty flavor and a satisfying crunch, while the sugar will caramelize during baking, creating a beautiful golden crust on your loaf.
Once your Tiger Bread dough has risen and is ready for baking, gently brush the surface with a light coating of water using a pastry brush. Sprinkle the sesame seed and sugar mixture generously over the dampened dough. The water will help the topping adhere to the bread during baking, ensuring a beautifully decorated loaf.
This combination of sesame seeds and sugar not only enhances the visual appeal of your Tiger Bread but also adds a delightful contrast of flavors and textures. Get ready to impress with your baking techniques and bread decorations by incorporating this flavorful topping for a stunning bread presentation.
Applying the Tiger Stripe Design
To create the distinctive tiger stripe design on your bread, you can explore different techniques such as using a piping bag or a toothpick for detailing.
The tools for decorating the tiger stripes may include food coloring, cocoa powder, or even a mix of both for a visually striking effect.
Experiment with various patterns and thicknesses to achieve the desired tiger-inspired look on your delicious bread.
Stripe Design Techniques
Get ready to master the art of applying the striking Tiger Stripe design to your Tiger Bread with these innovative techniques. To create perfect stripes that will impress your guests, follow these steps:
- Prep the Dough: Make sure your dough has the right consistency by kneading it thoroughly until it’s smooth and elastic.
- Sectioning: Divide the dough into equal parts and shape them into balls before gently elongating and flattening them to form the base for your stripes.
- Scoring Technique: Use a sharp knife to create deep, diagonal cuts on the dough’s surface, then carefully spread a thin layer of the special paste to emphasize the stripes.
Tools for Decorating
Enhance your Tiger Bread with the striking Tiger Stripe design by utilizing essential decorating tools for precise application. To achieve this eye-catching pattern, you can employ creative techniques such as using a pastry brush or a piping bag with a small round tip for accuracy.
Another decorative tool that can be handy is a toothpick, which allows you to refine the details of your stripes. Additionally, a bench scraper or a sharp knife can help you create clean lines and shapes on the bread’s surface.
These tools will assist you in executing the Tiger Stripe design flawlessly, adding a visually appealing touch to your Tiger Bread. Experiment with different methods to find the one that suits your style best.
Tiger Bread Recipe
Course: BreadCuisine: VariousDifficulty: Moderate1
servings20
minutes40
minutes200
kcalTiger Bread, known for its distinctive crackly crust, is a delightful homemade bread recipe. With a crispy exterior and soft interior, it's perfect for sandwiches or as a standalone treat. Prepare your kitchen for the delightful aroma of freshly baked bread with this recipe.
Ingredients
3 cups bread flour
1 ½ teaspoons instant yeast
1 teaspoon salt
1 tablespoon sugar
1 tablespoon vegetable oil
1 cup warm water
For the topping:
2 tablespoons rice flour
1 tablespoon sugar
1 tablespoon vegetable oil
1 teaspoon yeast
2/3 cup warm water
Directions
- In a mixing bowl, combine bread flour, instant yeast, salt, sugar, vegetable oil, and warm water. Knead until a smooth dough forms.
- Cover the dough and let it rise in a warm place until doubled in size, about 1 hour.
- Punch down the dough and shape it into a loaf. Place it on a baking sheet lined with parchment paper.
- In a separate bowl, mix together rice flour, sugar, vegetable oil, yeast, and warm water to make the topping.
- Spread the topping evenly over the loaf.
- Preheat the oven to 400°F (200°C).
- Allow the loaf to rise again for about 20 minutes.
- Bake in the preheated oven for 30-40 minutes, or until golden brown and hollow-sounding when tapped on the bottom.
- Let it cool before slicing. Enjoy your homemade Tiger Bread!
Baking and Finishing Touches
Consider adding a sprinkle of sesame seeds to the top of the bread before baking for an extra burst of flavor and visual appeal. This simple addition not only enhances the taste but also creates a beautiful contrast against the tiger-like pattern that will emerge on the crust of your bread.
- Baking Time: Make sure you monitor the bread closely while it bakes to achieve the perfect balance of a crispy crust without overdoing it.
- Temperature Control: Maintain a consistent temperature in your oven for even baking, allowing the unique tiger stripes to form beautifully.
- Cooling Process: Once the bread is baked to perfection, let it cool on a wire rack to preserve its texture and prevent sogginess.
Serving and Enjoying Tiger Bread
As you relish the mouthwatering aroma of freshly baked tiger bread, get ready to indulge in a delightful culinary experience that will captivate your taste buds. When it comes to serving and enjoying tiger bread, there are a few tips and tricks to enhance your experience. To start, master the art of bread slicing. For tiger bread, it’s best to use a serrated knife to guarantee clean cuts through the crunchy crust without squishing the soft interior. Aim for even slices to highlight the beautiful marbled pattern inside.
When it comes to storing your tiger bread, it’s crucial to keep it fresh and delicious for as long as possible. To maintain its texture and flavor, store the bread in a paper bag at room temperature. Avoid sealing it in a plastic bag, as this can cause the crust to lose its crispiness. If you want to enjoy your tiger bread beyond a few days, consider freezing it in airtight packaging and reheating it in the oven when ready to eat.
To make the most of your tiger bread experience, pair it with your favorite spreads, cheeses, or enjoy it as a side to soups and salads. With these tips in mind, you’re prepared to fully appreciate the unique and delightful flavors of tiger bread.
| Bread Slicing Techniques | Tiger Bread Storage Tips | Additional Tips |
|---|---|---|
| Use a serrated knife for clean cuts | Store in a paper bag at room temperature | Pair with olive oil and balsamic vinegar |
| Aim for even slices | Avoid sealing in plastic bags | Serve with a variety of cheeses |
| Showcase the marbled pattern inside | Freeze in airtight packaging for long-term storage | Toast lightly for a crunchy texture |
Frequently Asked Questions
Can I Use Whole Wheat Flour Instead of All-Purpose Flour in This Tiger Bread Recipe?
Yes, you can use whole wheat flour instead of all-purpose in this tiger bread recipe for a nuttier flavor. Adjust baking techniques, as whole wheat absorbs more moisture. Experiment with ratios for desired texture.
Is It Possible to Make This Tiger Bread Recipe Without Using a Bread Machine?
Yes, you can make the Tiger Bread recipe without a bread machine. Instead, try hand kneading the dough to guarantee proper texture. Utilize traditional baking techniques like shaping, proofing, and baking in an oven for delicious results.
Can I Substitute Honey for Sugar in the Dough for Tiger Bread?
Yes, you can substitute honey for sugar in baking. Honey adds a subtle sweetness and moisture to the dough. Experiment with different sweeteners for unique flavor variations. Enjoy exploring new baking techniques and bread making!
How Long Does Tiger Bread Last Before It Goes Stale?
When it comes to bread, freshness is key. Proper storage is essential for extending its shelf life. Keep your tiger bread in an airtight container at room temperature to maintain its crispness and flavor.
Can I Freeze Tiger Bread for Later Consumption?
Yes, you can freeze tiger bread for later consumption. To do so, wrap the loaf tightly in plastic wrap and then in foil. When ready to eat, let it thaw at room temperature. Enjoy!
Conclusion-Tiger Bread Recipe
Now that you have mastered making tiger bread, did you know that in the wild, tigers can run up to 40 miles per hour?
So while you may not be as fast as a tiger, you can certainly enjoy the delicious homemade tiger bread you just baked.
So go ahead, impress your friends and family with this unique and tasty treat!