

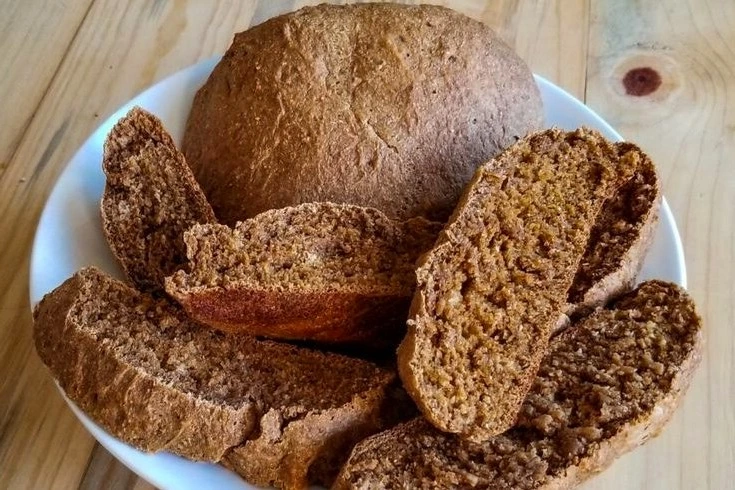
Have you ever wondered if you could recreate that delicious, hearty Squaw Bread you had at a local bakery? Well, wonder no more! In this discussion, we will explore a tried and tested Squaw Bread recipe that will transport you right back to that warm, inviting aroma and rich flavor.
But that’s not all – there’s a secret ingredient that takes this recipe to a whole new level. Stay tuned to uncover the mystery behind this beloved bread and prepare to be amazed by the results.


Contents
- 1 Key Takeaways
- 2 Ingredients
- 3 Mixing the Dough
- 4 Shaping and Proofing
- 5 Baking the Bread
- 6 Squaw Bread Recipe
- 7 Serving and Storing
- 8 Nutrition facts
- 9 Frequently Asked Questions
- 9.1 How Long Does It Take for the Dough to Rise During the Proofing Process?
- 9.2 Can I Use a Different Type of Flour Instead of the One Mentioned in the Ingredients?
- 9.3 Are There Any Alternative Methods for Shaping the Bread if I Don’t Have a Bread Loaf Pan?
- 9.4 Can I Add Additional Ingredients, Such as Nuts or Dried Fruits, to the Dough?
- 9.5 How Long Does the Bread Typically Stay Fresh When Stored Properly?
- 10 How Can I Modify the Squaw Bread Recipe to Include Spinach?
- 11 Conclusion
Key Takeaways
- Squaw Bread is a nutritious alternative to traditional bread, as it incorporates whole wheat flour, cornmeal, and is sweetened with brown sugar and honey.
- The kneading techniques for making Squaw Bread involve different methods to adjust the dough consistency and texture.
- Shaping and proofing the dough are important steps in creating tension for better rise and crust development.
- When baking Squaw Bread, it is crucial to preheat the oven, create steam, and monitor the bread to prevent burning or denseness.
Ingredients
To make delicious Squaw Bread, gather the following ingredients. You’ll need 2 cups of whole wheat flour, 1 cup of all-purpose flour, 1/2 cup of cornmeal, 1/4 cup of brown sugar, 1 tablespoon of baking powder, 1 teaspoon of salt, 1/2 teaspoon of baking soda, 1/4 cup of melted butter, 1 1/2 cups of buttermilk, and 1/4 cup of honey.
The combination of these ingredients creates a unique and flavorful bread that will satisfy your taste buds and support your health. Squaw Bread is a great alternative to traditional bread because it incorporates whole wheat flour, which is rich in fiber and nutrients. This bread also contains cornmeal, which adds a delightful texture and taste. The brown sugar and honey give it a touch of sweetness, making it the perfect accompaniment to your favorite dishes.
If you have dietary restrictions or preferences, don’t worry! Squaw Bread is versatile, and you can make some substitutions. For a vegan version, you can replace the butter with coconut oil and buttermilk with almond milk mixed with lemon juice. If you’re gluten intolerant, you can substitute the wheat flour with gluten-free flour blends. These substitutions ensure that everyone can enjoy the health benefits and deliciousness of Squaw Bread.
Mixing the Dough
As you gather the ingredients for Squaw Bread, it’s time to roll up your sleeves and mix the dough, creating a perfect blend of flavors and textures. Kneading the dough is a crucial step in achieving the desired consistency and ensuring a successful outcome. The technique you use can greatly affect the final result, so it’s important to understand the proper way to knead.
To help you master the art of kneading, here are a few tips and troubleshooting suggestions:
| Kneading Techniques | Troubleshooting Dough Consistency |
|---|---|
| Press and Fold | If the dough feels too sticky, add small amounts of flour until it becomes more manageable. |
| Push and Turn | If the dough is too dry and crumbly, gradually add water, a tablespoon at a time, until it becomes smooth and elastic. |
| Stretch and Fold | Should the dough be too tough and resistant, let it rest for a few minutes, then continue kneading. This allows the gluten to relax and makes kneading easier. |
| Rub and Roll | If the dough is too wet and sticky, dust your hands and work surface with flour, or use a dough scraper to help handle it. |
Shaping and Proofing
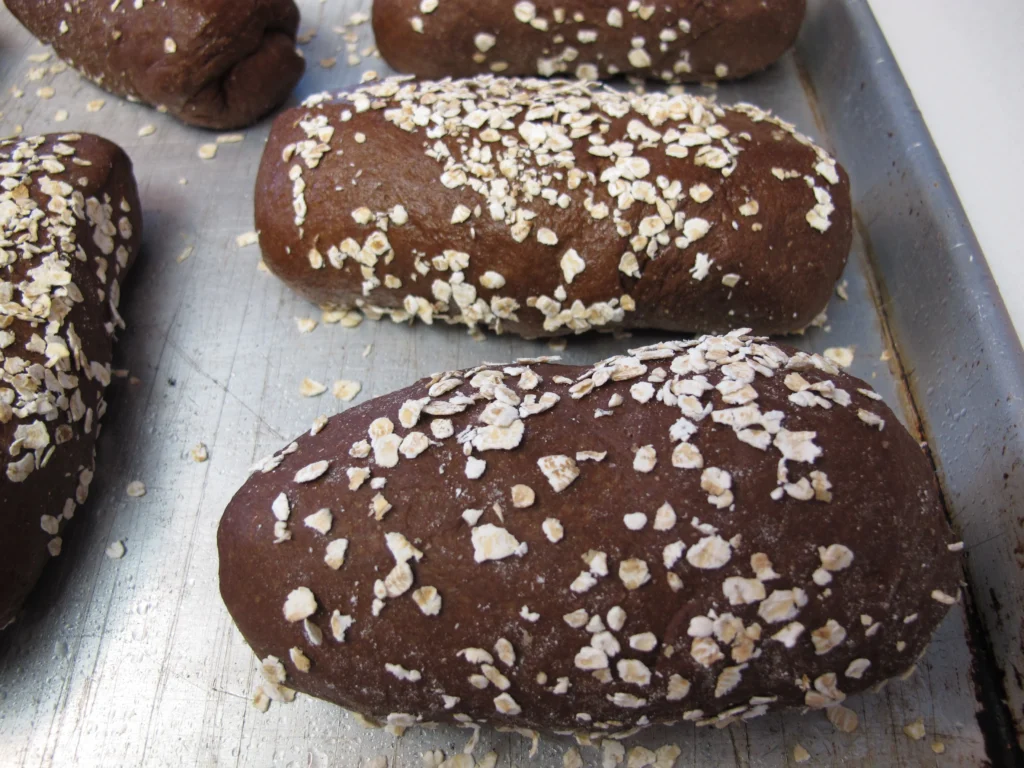
Start by shaping the dough into the desired form and allowing it to proof, a crucial step in developing the bread’s flavor and texture. Shaping the dough gives you the freedom to create a loaf that suits your preferences. There are various shaping techniques you can try, such as the traditional round loaf or the rustic oval shape. To shape the dough, gently press it into a rectangle, then fold the sides towards the center and roll it tightly. This will create tension on the surface of the bread, resulting in a better rise and a beautiful crust.
Once you have shaped the dough, it’s time to let it proof. Proofing is the process of allowing the dough to rise before baking. This step is essential for the yeast to ferment and produce carbon dioxide, which gives the bread its light and airy texture. Troubleshooting proofing can be tricky, but fear not, there are a few tips to help you along the way. If the dough isn’t rising enough, check the room temperature. Yeast is sensitive to temperature, so a warm environment will promote a faster rise. On the other hand, if the dough is rising too quickly, you can slow it down by placing it in a cooler area.
Shaping and proofing are crucial steps in the bread-making process, and by mastering these techniques, you’ll be well on your way to baking delicious, homemade bread. So go ahead, shape that dough, let it proof, and enjoy the freedom of creating your own delectable loaf.

Baking the Bread
Get ready to witness the transformation of your shaped and proofed dough as it bakes into a delectable loaf of bread. Baking is the final step in the process, where the magic really happens. Preheat your oven to 375°F (190°C) and place your dough on a parchment-lined baking sheet. This will ensure that your bread bakes evenly and doesn’t stick to the pan.
Baking bread requires some techniques to achieve that perfect golden crust and soft interior. One important technique is creating steam in the oven. You can do this by placing a pan of hot water on the lower rack while the bread bakes. The steam will help the bread rise and develop a beautiful crust.
Keep a close eye on your bread as it bakes, as oven temperatures can vary. If you notice the top browning too quickly, cover it loosely with aluminum foil to prevent it from burning. Bake the bread for about 30-35 minutes, or until it sounds hollow when tapped on the bottom.
Troubleshooting tips: If your bread comes out too dense, it may be due to underproofing or overmixing the dough. Adjust your proofing time or gently knead the dough next time. If the bottom of your bread is too pale, try placing it on a hot baking stone or preheated cast-iron skillet to enhance browning.
Now, grab a cup of coffee and enjoy the tantalizing aroma that fills your kitchen as your homemade squaw bread bakes to perfection.

Squaw Bread Recipe
Course: Side DishCuisine: Native American-inspiredDifficulty: Easy10
servings15
minutes15
minutes200
kcalTribal Bread, inspired by Native American traditions, offers a taste of history and heritage. This simple recipe combines cornmeal and flour, capturing the essence of traditional Native American bread. With a touch of honey or maple syrup for sweetness, this bread provides a versatile addition to your table. You can even customize it by adding dried fruits or nuts for extra flavor and texture. While the term "Squaw bread" has been considered offensive, this recipe seeks to honor and celebrate Native American culinary influences. Enjoy this easy-to-make Tribal Bread, perfect for breakfast, as a snack, or alongside your favorite dishes.
Ingredients
2 cups cornmeal
1 cup all-purpose flour
1 teaspoon salt
1 tablespoon baking powder
1 tablespoon honey or maple syrup
2 cups water
Optional: 1/2 cup dried fruits or nuts (like raisins or chopped nuts)
Directions
- Preheat your oven to 375°F (190°C).
- In a mixing bowl, combine the cornmeal, flour, salt, and baking powder.
- In a separate bowl, mix together the honey or maple syrup with water until well combined.
- Gradually add the wet ingredients to the dry ingredients, stirring continuously to avoid lumps.
- If desired, fold in dried fruits or nuts into the batter.
- Grease a baking pan or use parchment paper to prevent sticking. Pour the batter into the pan, spreading it evenly.
- Bake in the preheated oven for 25-30 minutes or until a toothpick inserted into the center comes out clean.
- Allow the bread to cool before slicing and serving.
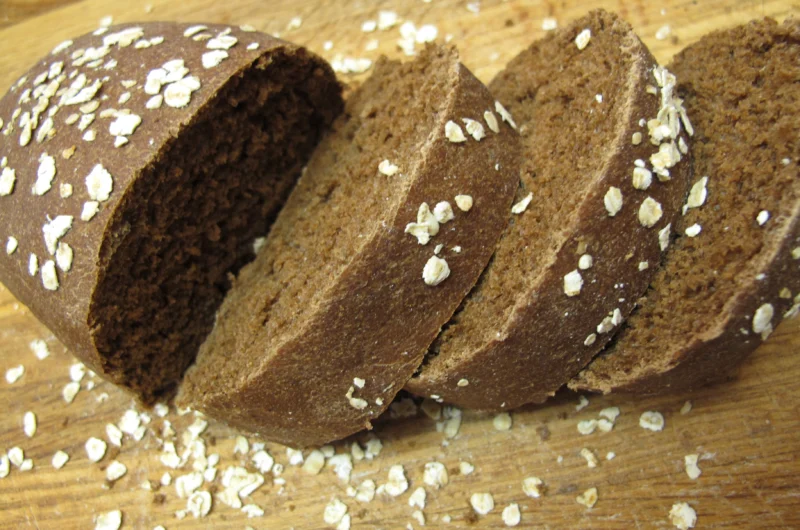
Serving and Storing
Indulge in the delightful experience of serving and storing your freshly baked squaw bread. With its rich and nutty flavor, this bread is a versatile treat that can be enjoyed in various ways.
When it comes to serving options, you have a multitude of choices. For a simple yet satisfying snack, slather a warm slice of squaw bread with butter or your favorite spread. If you’re feeling adventurous, try making a delicious sandwich with your favorite fillings. The nuttiness of the bread pairs perfectly with savory meats and fresh vegetables.
If you have leftovers or want to make your squaw bread last longer, here are some tips for storing. It’s best to store the bread in a cool, dry place, such as a bread box or a plastic bag. To maintain its freshness, avoid exposing the bread to direct sunlight or moisture. If you don’t plan on consuming the bread within a few days, consider freezing it. Simply wrap the bread tightly in plastic wrap or aluminum foil and place it in the freezer. When you’re ready to enjoy it again, let it thaw at room temperature or gently warm it in the oven.
With these serving options and tips for storing, you can fully savor the goodness of your freshly baked squaw bread. Don’t be afraid to experiment and discover new ways to enjoy this delicious treat.
Nutrition facts
- Calories: 150-180 kcal
- Total Fat: 1-2g
- Saturated Fat: 0g
- Cholesterol: 0mg
- Sodium: 300-400mg
- Total Carbohydrates: 32-38g
- Dietary Fiber: 2-4g
- Total Sugars: 4-6g
- Protein: 3-5g
Frequently Asked Questions
How Long Does It Take for the Dough to Rise During the Proofing Process?
During the proofing process, the dough needs time to rise and activate the yeast. The length of this proofing time depends on various factors, such as room temperature and the specific recipe you’re using.
Can I Use a Different Type of Flour Instead of the One Mentioned in the Ingredients?
Yes, you can use a different type of flour instead of the one mentioned in the ingredients. Experimenting with alternative flours in the Squaw Bread Recipe can lead to unique flavors and textures.
Are There Any Alternative Methods for Shaping the Bread if I Don’t Have a Bread Loaf Pan?
If you don’t have a bread loaf pan, there are alternative shaping techniques you can try. Get creative and shape the dough into round loaves, baguettes, or even rolls. Just use your hands and let your imagination guide you!
Can I Add Additional Ingredients, Such as Nuts or Dried Fruits, to the Dough?
You can definitely add additional ingredients like nuts or dried fruits to the dough. It can enhance the flavor and texture of the bread. Just make sure to chop the nuts and soak the dried fruits before incorporating them into the dough for better results.
How Long Does the Bread Typically Stay Fresh When Stored Properly?
When stored properly, Squaw Bread stays fresh for about 3-5 days. To maintain its freshness, store it in a cool, dry place, or wrap it tightly in plastic wrap and freeze it for up to 3 months. Enjoy!


How Can I Modify the Squaw Bread Recipe to Include Spinach?
To modify the Squaw Bread recipe to include spinach, simply add finely chopped spinach to the dough during the mixing process. You can also incorporate spinach puree into the recipe for a more vibrant green color and added nutrients. With these adjustments, you’ll have a delicious and nutritious tasty spinach bread recipe.
Conclusion
In conclusion, this squaw bread recipe is a delicious and satisfying way to enjoy homemade bread.
Despite any concerns about the complexity of baking bread, this recipe provides simple and clear directions that anyone can follow.
So don’t let fear hold you back – give it a try and experience the joy of baking your own warm and flavorful squaw bread.
Your taste buds will thank you!