Hey there! Looking to whip up a batch of delicious Senorita Bread Recipe? Well, you’ve come to the right place.
This recipe takes you on a journey back in time, as you channel your inner bread-making skills. But hold on, there’s more to this story than meets the eye.
Get ready to uncover the secrets behind this timeless recipe and discover why it has stood the test of time. So, grab your apron and let’s get started on this mouthwatering adventure together.
Contents
Key Takeaways
- Fresh and active yeast is essential for making the perfect Senorita Bread.
- Proper kneading of the dough until smooth and elastic is important.
- Controlling the temperature of the ingredients helps in achieving the best results.
- Allowing the dough to rest for proper rising is crucial for a fluffy and light bread.
Ingredients
To make delicious Senorita Bread, gather all the necessary ingredients for this delectable treat. Just imagine sinking your teeth into warm, soft bread, with a hint of sweetness and a touch of cinnamon. It’s the perfect treat to satisfy your cravings and bring a smile to your face.
Now, let’s talk about the ingredients. The beauty of Senorita Bread lies in its simplicity. You don’t need a long list of complicated items. All you need is flour, sugar, butter, eggs, milk, yeast, cinnamon, and salt. These basic ingredients come together to create a bread that’s both flavorful and comforting.
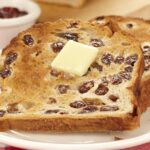
Variations are also possible with Senorita Bread. If you want to add a little twist to the classic recipe, you can incorporate raisins into the dough for a burst of sweetness in every bite. Or, if you prefer a nutty flavor, you can sprinkle chopped walnuts on top before baking. The possibilities are endless, and you can get creative with your own variations.
Tips and tricks for making the perfect Senorita Bread? Make sure your yeast is fresh and active, as this is what gives the bread its light and fluffy texture. Also, don’t be afraid to knead the dough until it becomes smooth and elastic. This will ensure that your bread rises beautifully and has that perfect chewy consistency.


Mixing the Dough
Now that you have gathered all the ingredients for the dough, it’s time to start mixing! Proper mixing techniques are key to achieving the perfect texture and consistency for your Senorita Bread.
Remember to follow the directions closely to ensure that all the ingredients are well incorporated and the dough is smooth and elastic.
Get ready to roll up your sleeves and dive into the world of dough mixing!
Ingredients for Dough
Once you’ve gathered all the necessary ingredients, it’s time to dive into the delightful process of mixing the dough for your Senorita Bread recipe. Start by combining the flour, sugar, salt, and yeast in a large mixing bowl. Give it a quick stir to evenly distribute the ingredients.
Next, add the warm water and melted butter. Using your hands, mix everything together until a sticky dough forms.
Now comes the fun part – kneading the dough! Sprinkle some flour onto a clean surface and turn the dough out onto it. Begin kneading by pushing the dough away from you with the heel of your hand, then folding it back towards you. Repeat this motion for about 10 minutes or until the dough becomes smooth and elastic.
If you encounter any issues with the dough consistency, don’t panic. If it’s too dry, add a little bit of water at a time until it becomes more pliable. If it’s too sticky, sprinkle in some flour and continue kneading until it reaches the right texture.
Proper Mixing Techniques
You’ll want to start by combining the flour, sugar, salt, and yeast in a large mixing bowl for the perfect Senorita Bread dough. Once you have all the dry ingredients together, it’s time to mix them up and bring the dough to life. Here are some important tips to keep in mind:
- Temperature Control: It’s crucial to use ingredients at the right temperature. Make sure your water is warm, but not too hot, as it can kill the yeast. Similarly, ensure the butter is softened, not melted, for the ideal texture.
- Avoid Overmixing: Overmixing can result in tough bread. Mix the dough until it comes together and forms a smooth ball. Resist the temptation to keep kneading beyond this point.
- Proper Resting Time: After mixing, allow the dough to rest in a warm place. This gives the yeast time to work its magic, resulting in a light and fluffy bread.
Preparing the Filling
To create the mouthwatering filling for your senorita bread, gather the following delightful ingredients:
- 1 cup of sweetened condensed milk
- 1 cup of desiccated coconut
- 1/2 cup of chopped cashews
- 1/4 cup of melted butter
These ingredients will give your filling a luscious, creamy texture and a rich, nutty flavor.
Now, let’s talk about filling variations. If you want to add a fruity twist to your senorita bread, you can mix in some diced pineapple or mashed bananas. The sweetness of the fruit will complement the richness of the condensed milk and coconut. Alternatively, you can experiment with different nuts like almonds, pistachios, or even hazelnuts for a unique and crunchy filling.
When it comes to achieving a moist filling, make sure to evenly combine all the ingredients. This will ensure that each bite of senorita bread is filled with an explosion of flavors. You can also add a teaspoon of vanilla extract to enhance the overall taste. Additionally, be generous with the butter to maintain the moisture in the filling.
Rolling and Shaping the Bread
Now that you’ve prepared the filling, it’s time to move on to the next step: rolling and shaping the bread.
This is where the magic happens! Take your dough and roll it out into a rectangle, making sure it’s evenly thin.
Then, carefully spread the filling onto the dough, leaving a small border around the edges.
Finally, roll the dough tightly into a log and seal the edges.
Get ready to witness the transformation as your bread takes shape!
Rolling the Dough
Once the dough has finished rising, it’s time to roll and shape your Senorita Bread into its delicious form. Here’s how you can achieve the perfect consistency and technique for rolling the dough:
- Dust your work surface with flour to prevent sticking and place the risen dough on it.
- Gently press down on the dough to release any air bubbles, then use a rolling pin to roll it out into a rectangular shape, about ¼ inch thick.
- Starting from one end, tightly roll the dough into a log, tucking in the ends as you go. This will give your bread a beautiful swirl when sliced.
Shaping the Bread
After rolling the dough into a log, the next step in shaping your Senorita Bread is to create its final form. Shaping bread isn’t just about aesthetics, but also affects the texture and taste of the finished product.
Different bread recipes require different shaping techniques, so it’s important to understand the specific instructions for each. For example, some breads may require a simple roll and tuck method, while others may involve braiding or forming intricate patterns.
When shaping bread dough, there are common mistakes to avoid. One is overworking the dough, which can result in a tough and dense bread. Another isn’t properly sealing the seams, leading to an uneven rise and potential bursting during baking.
Take your time and follow the instructions carefully to ensure that your Senorita Bread comes out beautifully shaped and delicious.

Senorita Bread Recipe
Course: DessertCuisine: MexicanDifficulty: Intermediate8
servings20
minutes25
minutes250
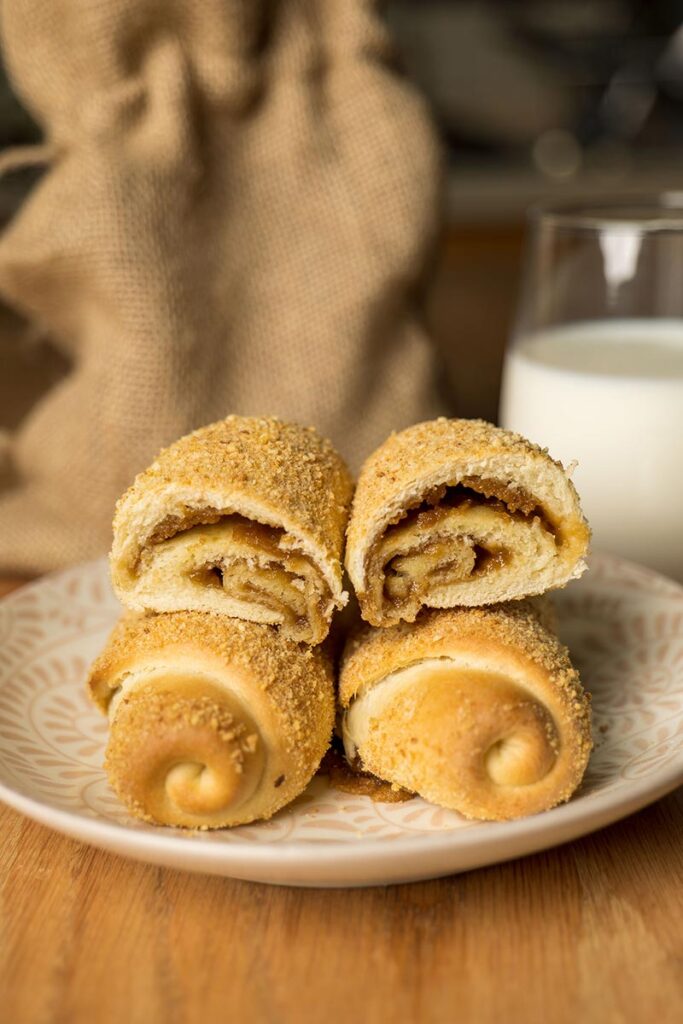
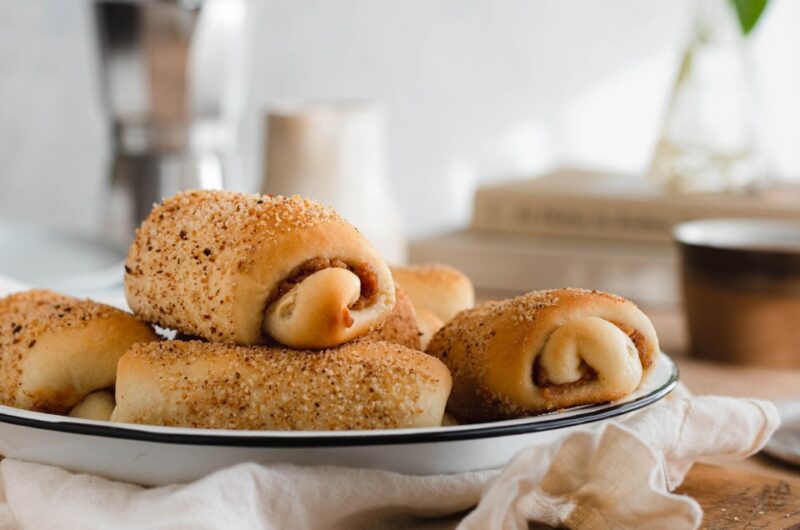
kcalSenorita Bread is a delightful Mexican dessert, combining the richness of buttery bread with a sweet cinnamon-sugar filling. Perfect for breakfast or as a sweet treat, it's a favorite for any occasion.
Ingredients
2 cups all-purpose flour
1/4 cup sugar
1/2 teaspoon salt
1 tablespoon active dry yeast
1/2 cup warm water
1/4 cup butter, melted
1 egg
1/4 cup sugar
1 tablespoon ground cinnamon
Directions
- In a large mixing bowl, combine flour, sugar, salt, and yeast.
- Add warm water, melted butter, and egg to the dry ingredients. Mix until a dough forms.
- Knead the dough on a floured surface for about 5-7 minutes, until smooth and elastic.
- Place the dough in a greased bowl, cover with a clean kitchen towel, and let it rise in a warm place for about 1 hour, or until doubled in size.
- Punch down the risen dough and divide it into 8 equal pieces.
- In a small bowl, mix sugar and cinnamon for the filling.
- Roll out each piece of dough into a rectangle and sprinkle with the cinnamon-sugar mixture.
- Roll up each rectangle tightly and place them seam-side down on a baking sheet lined with parchment paper.
- Cover the rolls and let them rise for another 30 minutes.
- Preheat the oven to 350°F (175°C).
- Bake the rolls for 20-25 minutes, until golden brown.
- Let the Senorita Bread cool slightly before serving. Enjoy!
Baking and Finishing Touches
To achieve the perfect Senorita Bread, you’ll want to focus on the crucial step of baking and adding those final touches that will elevate your bread to a whole new level of deliciousness. Here are some baking techniques and decorating tips to help you create a mouthwatering masterpiece:
- Bake at the right temperature: Preheat your oven to 350°F (175°C) and make sure it reaches the desired temperature before placing your bread inside. This will ensure even baking and a golden crust.
- Use a baking stone or tray: To achieve a crispy bottom and a perfectly baked bread, place your dough on a baking stone or tray lined with parchment paper. This will help the bread rise evenly and avoid sticking.
- Add a finishing touch: Once your Senorita Bread is baked to perfection, it’s time to add some final touches. Brush the top with melted butter for a glossy finish and sprinkle some sugar on top to give it a sweet crunch. You can also drizzle some chocolate or caramel sauce over the bread for an extra indulgence.
Serving and Enjoying
As you take your perfectly baked Senorita Bread out of the oven, the anticipation of serving and savoring this mouthwatering masterpiece begins to build. The aroma of the freshly baked bread fills the air, making your taste buds tingle with excitement.
Now, it’s time to add the finishing touches and make this bread truly irresistible.
When it comes to decorating ideas, the possibilities are endless. You can drizzle a sweet glaze over the top, sprinkle it with powdered sugar, or even add a colorful icing for a festive touch. The key is to let your creativity flow and make it visually appealing, as beautiful as it tastes.
Now, let’s talk about alternative fillings. While the classic combination of cream cheese and guava paste is undeniably delicious, don’t be afraid to experiment with other flavors. How about a creamy Nutella filling? Or perhaps a tangy lemon curd? The choice is yours, and it all depends on your personal preference and the occasion.
Frequently Asked Questions
How Long Does It Take for the Dough to Rise?
To properly knead the dough and achieve a light and fluffy texture, it’s crucial to let it rise for the right amount of time. So, how long does it take? Well, it depends on the recipe and the temperature in your kitchen.
Can I Use a Different Type of Filling for the Bread?
Yes, you can definitely use a different type of filling for the bread! Get creative with your bread fillings and explore different flavor combinations. The possibilities are endless when it comes to adding your own personal touch to the recipe.
Can I Freeze the Bread Dough Before Baking?
Freezing bread dough before baking has pros and cons. The pros include convenience and time-saving, while the cons include a potential loss of texture. To successfully freeze and thaw bread dough, wrap it tightly in plastic wrap and thaw it in the refrigerator overnight.
How Long Does It Take for the Bread to Bake?
You’ll be amazed at how quickly your bread bakes to achieve that perfect golden crust. Remember, adjusting baking time is key for different sized or shaped loaves. Get ready for freedom in every delicious bite!
Can I Substitute Any of the Ingredients in the Recipe?
Yes, you can definitely substitute ingredients in the recipe! Get creative and try different options to customize the bread to your liking. Don’t be afraid to experiment and make it your own!
Conclusion-Senorita Bread Recipe
In conclusion, making senorita bread isn’t only a delicious experience, but also a journey of love and creativity.
As you knead the dough and fill it with sweet goodness, you’re reminded of the joy that comes from creating something beautiful with your own hands.
Just like the bread, our lives are shaped by the choices we make and the love we put into what we do.
So, go ahead and savor every bite of your homemade senorita bread, knowing that it’s a reflection of your own unique flavor and passion.