If variety is the spice of life, then perhaps it’s time to add a pinch of adventure to your culinary repertoire. Imagine sinking your teeth into a loaf of bread that not only satisfies your cravings but also surprises your taste buds.
Well, look no further, because today we are going to introduce you to a delightful recipe that combines the comforting familiarity of bread with the unique twist of rice. Get ready to embark on a gastronomic journey that will leave you wanting more.
Contents
- 1 Key Takeaways
- 2 Choosing the Right Rice Flour
- 3 Mixing the Dry Ingredients
- 4 Preparing the Wet Ingredients
- 5 Rice Bread Recipe
- 6 Combining the Wet and Dry Mixtures
- 7 Baking the Rice Bread
- 8 Cooling and Storing the Bread
- 9 Nutritional facts
- 10 Frequently Asked Questions
- 10.1 How Do I Know Which Type of Rice Flour to Use for This Bread Recipe?
- 10.2 Can I Substitute the Rice Flour With Another Gluten-Free Flour?
- 10.3 Can I Use a Different Type of Sweetener Instead of the Suggested One in the Recipe?
- 10.4 How Long Does It Take for the Bread to Bake in a Convection Oven?
- 10.5 Can I Freeze the Rice Bread for Later Consumption?
- 11 Conclusion
Key Takeaways
- Choosing the right rice flour is important for a gluten-free recipe and to match the specific recipe requirements.
- Sifting the flour removes lumps and creates a lighter texture in the bread.
- Adding baking powder helps the bread rise and gives it a light and airy texture.
- Properly mixing the wet and dry ingredients ensures a moist and flavorful rice bread.
Choosing the Right Rice Flour
When it comes to making delicious rice bread, choosing the right rice flour is key to achieving the perfect texture and flavor. Whether you’re a seasoned gluten-free baker or just starting out, finding the best quality rice flour can make all the difference in your bread-making journey.
So, let’s dive into some tips for choosing the right rice flour for gluten-free baking.
First and foremost, opt for a rice flour that’s specifically labeled as gluten-free. This ensures that it has been processed in a facility that’s free from cross-contamination with gluten-containing grains. Look for certifications like the gluten-free symbol or statements on the packaging that guarantee its purity.
Next, consider the type of rice used to make the flour. Brown rice flour is a popular choice for its nutty flavor and higher nutritional content, while white rice flour tends to have a milder taste. You can also experiment with other varieties like sweet rice flour or even wild rice flour for added complexity.
Lastly, pay attention to the texture of the rice flour. Fine rice flour works well for lighter, fluffier breads, while coarser flours can add a pleasant crunch to your loaves. Consider the specific recipe you’ll be using and choose a rice flour that complements it best.
Mixing the Dry Ingredients
Now that you’ve chosen the right rice flour, it’s time to tackle the next step in making your delicious rice bread: mixing the dry ingredients.
First, you’ll want to accurately measure out the ingredients to ensure the perfect balance of flavors.
Then, sift the flour to remove any lumps and create a light and airy texture.
Finally, don’t forget to add baking powder for that extra rise and fluffiness.
Get ready to create a mouthwatering loaf of rice bread!
Measuring the Ingredients
To ensure precise measurements and a perfect balance of flavors in your rice bread, follow these simple steps for mixing the dry ingredients.
- Measuring Techniques:
- Use a kitchen scale to weigh the ingredients accurately. This will guarantee consistent results every time you bake.
- Level off dry ingredients like flour, sugar, and baking powder with the back of a knife to avoid excess or insufficient amounts.
- Common Mistakes:
- Scooping flour directly from the bag can lead to dense and dry bread. Instead, spoon the flour into the measuring cup and level it off.
- Neglecting to sift the flour can result in clumps and uneven distribution. Sifting not only removes lumps but also aerates the flour for a lighter texture.
Sifting the Flour
For a light and fluffy texture in your rice bread, it’s essential to properly sift the flour when mixing the dry ingredients. Sifting the flour not only helps to remove any lumps, but also aerates it, resulting in a lighter and more delicate bread.
To sift the flour, place a sieve over a bowl and pour the measured flour into it. Gently tap or shake the sieve to let the flour pass through and collect in the bowl. If you don’t have a sieve, you can use a fine-mesh strainer as an alternative.
Sifting also allows you to incorporate other flour alternatives, such as almond flour or gluten-free flour, ensuring a smooth and even consistency in your rice bread.
Adding Baking Powder
To achieve a light and airy texture in your rice bread, ensure that you incorporate baking powder into the mixture of dry ingredients. Baking powder is a leavening agent that helps the bread rise and gives it a nice, fluffy texture.
Here are some benefits of using baking powder:
- Consistency: Baking powder provides a reliable and consistent rise to your bread, ensuring that it turns out light and fluffy every time.
- Convenience: Unlike alternative leavening agents, such as yeast, baking powder doesn’t require any proofing or rising time. It can be added directly to the dry ingredients, making the bread-making process quicker and easier.
- Versatility: Baking powder can be used in a variety of recipes, not just bread. It’s a staple in many baked goods, including cakes, muffins, and pancakes.
Preparing the Wet Ingredients
Now that you have successfully mixed the dry ingredients, it’s time to move on to the next step: preparing the wet ingredients.
This is where the magic happens and the batter starts to come together.
You’ll be incorporating the liquids into the dry mixture, carefully blending everything until you achieve the perfect consistency.
Mixing the Batter
How can you create a moist and flavorful rice bread batter that will make your taste buds dance with delight? Mixing the batter is a crucial step in achieving the perfect texture and taste. To ensure success, here are some mixing techniques and troubleshooting tips to keep in mind:
- Mixing Techniques:
- Gently fold the wet ingredients into the dry ones using a spatula. This will help prevent overmixing and maintain a tender crumb.
- Incorporate the ingredients just until they’re combined. Overmixing can lead to a dense and tough bread.
- Troubleshooting Tips:
- If the batter seems too dry, add a tablespoon of milk at a time until the desired consistency is reached.
- If the batter is too wet, gradually add more flour, a tablespoon at a time, until it thickens.
Incorporating the Liquids
After mastering the art of mixing the batter, it’s time to move on to the next step: preparing the wet ingredients for your delicious rice bread. Incorporating the liquids is crucial to achieving the perfect texture and flavor in your bread. To help you out, here are the best types of liquid to use and some tips for achieving a moist bread texture:
| Best Types of Liquid | Tips for Achieving a Moist Bread Texture |
|---|---|
| Milk | Use whole or buttermilk for added richness and moisture. |
| Yogurt | Greek yogurt adds tanginess and moisture to the bread. |
| Fruit Juice | Add a splash of orange or apple juice to enhance the sweetness and moistness. |
| Water | Don’t underestimate the power of plain water. It keeps the bread light and moist. |
Achieving the Right Consistency
To ensure the perfect consistency in your rice bread, it’s important to properly prepare the wet ingredients. Achieving the right texture can be a game-changer for your bread, so let’s dive into the process.
Here are some tips to help you troubleshoot common issues and achieve that dreamy, fluffy rice bread you deserve:
- Use room temperature liquids: Cold liquids can slow down yeast activation, resulting in a dense texture. Let your milk, water, or other liquid ingredients come to room temperature before incorporating them into the recipe.
- Gradually add the wet ingredients: Pouring all the liquids at once can lead to an overly sticky dough. Instead, add them in small increments and mix well before adding more. This will help you achieve a smooth, manageable dough.
Rice Bread Recipe
Course: Side DishCuisine: GlobalDifficulty: Easy6
servings15
minutes30
minutes120
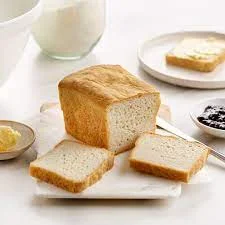
kcalThis Rice Bread Recipe offers a delightful twist to traditional bread, incorporating the goodness of rice into a light and fluffy loaf, perfect for accompanying a variety of dishes or enjoying on its own.
Ingredients
Rice flour
All-purpose flour
Salt
Yeast
Directions
- Mix rice flour, all-purpose flour, yeast, and salt in a bowl.
- Knead the dough until smooth and elastic.
- Allow the dough to rise until doubled in size.
- Bake in a preheated oven until golden brown.
Combining the Wet and Dry Mixtures
You’ll now blend the wet and dry mixtures together to create a cohesive and delicious rice bread dough. This step is crucial in achieving even distribution of ingredients throughout the dough, ensuring that every bite is bursting with flavor.
As you combine the two mixtures, you may encounter some common issues that can easily be resolved.
One common issue is clumping. If you notice clumps forming in the dough, it means that the wet and dry ingredients aren’t fully incorporated. To troubleshoot this, simply continue mixing until the clumps disappear and the dough becomes smooth and uniform. You can use a wooden spoon or your hands to gently fold and press the mixture together, breaking up any lumps along the way.
Another issue you might encounter is a dry or crumbly dough. This can happen if the wet and dry mixtures weren’t properly measured or if you added too much flour. To fix this, gradually add a tablespoon of water at a time, mixing well after each addition, until the dough reaches the desired consistency. The dough should be soft and slightly sticky, but not overly wet.
Baking the Rice Bread
Now it’s time to let the aroma of freshly baked rice bread fill your kitchen. The anticipation is building as you preheat your oven to the perfect baking temperature of 350°F. As you place the bread dough into the oven, you can already imagine the golden crust forming and the soft, fluffy interior.
Baking the rice bread is a transformative experience, bringing both comfort and joy. Here are some troubleshooting tips to ensure your bread comes out perfectly every time:
- Check the baking temperature: Make sure your oven is properly calibrated to ensure even heat distribution. An oven thermometer can be a helpful tool in achieving the perfect temperature.
- Don’t rush the process: Avoid opening the oven door too frequently, as this can cause fluctuations in temperature and affect the baking time.
- Use the toothpick test: Insert a toothpick into the center of the bread. If it comes out clean, your bread is done. If there are still crumbs clinging to the toothpick, allow the bread to bake for a few more minutes.
As the bread bakes, the kitchen fills with a comforting scent, creating an atmosphere of warmth and freedom. You can’t help but feel a sense of accomplishment as you eagerly await the moment when you can finally sink your teeth into a slice of freshly baked rice bread.
Cooling and Storing the Bread
Once your rice bread has finished baking to perfection, it’s crucial to follow the proper steps for cooling and storing to preserve its deliciousness.
After you remove the bread from the oven, allow it to cool on a wire rack for at least 30 minutes. This cooling time is essential as it allows the bread to set and prevents it from becoming soggy. As you patiently wait for the bread to cool, you’ll be greeted by the tantalizing aroma of freshly baked goodness.
When it’s finally time to store your rice bread, it’s important to do it right to maintain its texture and flavor. The best storage method is to wrap the bread tightly in plastic wrap or place it in an airtight container. This will prevent it from drying out and keep it moist and soft. If you prefer a crustier texture, you can leave the bread uncovered, but make sure it’s stored in a cool, dry place.
For maximum freshness, it’s recommended to consume the rice bread within 2-3 days. If you want to enjoy it for a longer period, you can freeze the bread slices individually. Just wrap them tightly in plastic wrap and place them in a freezer bag. When you’re ready to enjoy a slice, simply thaw it at room temperature or heat it in the toaster.
Nutritional facts
Calories: Around 120 calories
Total Fat: 1g
Saturated Fat: 0.5g
Cholesterol: 0mg
Sodium: Varies depending on salt content
Total Carbohydrates: Around 25g
Dietary Fiber: 1g
Sugars: Around 1g
Protein: 3g
Frequently Asked Questions
How Do I Know Which Type of Rice Flour to Use for This Bread Recipe?
To choose the right rice flour for your bread recipe, consider the texture you want. Use fine rice flour for a lighter bread, and coarse rice flour for a denser one. Adjust the recipe accordingly for different types of rice flour.
Can I Substitute the Rice Flour With Another Gluten-Free Flour?
You can totally switch up the gluten-free flour in your recipe! But hold up, rice flour brings a unique advantage to bread. It adds a delicate texture and a subtle nutty taste.
Can I Use a Different Type of Sweetener Instead of the Suggested One in the Recipe?
You can definitely use a different type of sweetener in the recipe. Consider options like honey, maple syrup, or coconut sugar. Each sweetener has its own unique flavor and benefits, so choose the one that suits your taste and dietary needs.
How Long Does It Take for the Bread to Bake in a Convection Oven?
In a convection oven, the baking time for bread can vary depending on the size of the loaf. To achieve a crispy crust, try brushing the bread with olive oil before baking.
Can I Freeze the Rice Bread for Later Consumption?
Yes, you can freeze the rice bread for later. Just wrap it tightly in plastic wrap or place it in a freezer bag. When you’re ready to enjoy, simply thaw it out and savor every bite.
Conclusion
In just a few simple steps, you can create a delicious and gluten-free rice bread that will satisfy your cravings. By using the right rice flour and carefully combining the wet and dry ingredients, you’ll achieve a moist and flavorful loaf.
So why not give it a try? With its enticing aroma and mouthwatering taste, this rice bread recipe is sure to become a staple in your kitchen.
Don’t miss out on this opportunity to indulge in a guilt-free delight!