

Create a masterpiece in your kitchen today with the authentic Pane Di Casa Bread Recipe. Elevate your baking skills as you craft this delightful artisan bread. Select the finest flour types – bread and whole wheat. Guarantee fresh yeast for fermentation, aim for smooth dough. Activate yeast right, knead for perfect texture. Let it rest for best time, maintain ideal rise conditions. Shape, proof, then bake to perfection. Enjoy the aroma, savor your creation. From balancing hydration to enhancing flavor, this recipe has it all. Unleash your inner baker and immerse yourself in the world of artisan bread-making.
Contents
- 1 Key Takeaways
- 2 Ingredients for Pane Di Casa Bread
- 3 Mixing and Kneading the Dough
- 4 First Proofing of the Dough
- 5 Shaping and Second Proofing
- 6 Baking the Pane Di Casa Bread
- 7 Pane Di Casa Bread Recipe
- 8 Enjoying Your Homemade Bread
- 9 Frequently Asked Questions
- 9.1 Can I Substitute All-Purpose Flour With Whole Wheat Flour in This Recipe?
- 9.2 How Can I Adjust the Recipe to Make a Gluten-Free Version of Pane Di Casa Bread?
- 9.3 Is It Possible to Add Herbs or Cheese to the Dough for Extra Flavor?
- 9.4 Can I Use a Bread Machine for Mixing and Kneading the Pane Di Casa Dough?
- 9.5 What Is the Best Way to Store Pane Di Casa Bread to Keep It Fresh Longer?
- 10 Conclusion-Pane Di Casa Bread Recipe
Key Takeaways
- Select finest bread and whole wheat flour for ideal texture and flavor.
- Activate yeast properly to ensure successful fermentation.
- Allow dough to rest for recommended time for optimal rise.
- Master shaping techniques for beautiful loaves.
- Preheat oven correctly and utilize scoring techniques for perfect crust.
Ingredients for Pane Di Casa Bread
To craft the delectable Pane Di Casa Bread, gather the following high-quality ingredients. For this masterpiece of bread baking, you’ll need to select the finest flour types. Opt for a mix of bread flour and whole wheat flour to achieve a perfect balance of texture and flavor. When it comes to yeast activation, make sure it’s fresh and alive by dissolving it in warm water with a touch of sugar. This step is vital to kickstart the fermentation process and obtain that wonderful rise in your bread.
Dough consistency is key in Pane Di Casa Bread. You want a dough that’s smooth, elastic, and slightly tacky to the touch. Adjust the flour and water ratio as needed to reach the ideal texture. Remember, the dough should be soft but not overly sticky. By paying attention to these details, you’ll set the foundation for a loaf that isn’t only visually appealing but also a delight to bite into. Now, let’s move on to the next step of mixing and kneading the dough to bring this bread to life.
Mixing and Kneading the Dough
Crafting the perfect Pane Di Casa Bread involves an essential step: mixing and kneading the dough with precision and care. To begin, make sure your yeast is activated properly to kickstart the fermentation process.
Next, focus on flour hydration; the right balance is key for achieving the desired dough consistency. When mixing, combine the ingredients gradually, allowing for even distribution. As you knead, remember that technique matters; use the heel of your hand to push, fold, and turn the dough. This process helps develop gluten, giving the bread structure and a satisfying chew.
Pay attention to the dough’s texture – it should be smooth, elastic, and slightly tacky. Don’t rush the kneading; it’s a critical step that shouldn’t be hurried. Embrace the rhythm of the kneading process; let your hands work the dough until it transforms into a cohesive, springy mass. Mastering the art of mixing and kneading will set the foundation for a delightful Pane Di Casa Bread.
First Proofing of the Dough
Now, it’s time to let your dough rest and rise – the first proofing stage is vital for developing flavor and texture. Make sure your dough rests for the recommended time to allow the yeast to work its magic, creating those beautiful air pockets.
Keep an eye on the temperature and humidity of your proofing environment to guarantee the ideal conditions for a successful rise.
Dough Resting Time
During the first proofing of the dough, let the magic happen as the yeast works its wonders, transforming the mixture into a pillowy and flavorful base for your Pane Di Casa bread.
The dough hydration levels play an essential role in this stage, ensuring the ideal texture and structure of your bread.
As the dough ferments, it develops complex flavors and aromas, enhancing the overall taste profile of the bread.
Paying attention to the dough’s fermentation process will also influence the crust texture, giving you that perfect crispy exterior.
Remember, the best baking time is key to achieving the desired golden-brown crust and soft interior.
Embrace this time of waiting as your dough rests and matures, setting the stage for a delightful baking experience.
Temperature and Humidity
Maintaining the correct temperature and humidity levels during the first proofing of your dough is essential for creating an ideal environment for yeast activity and fermentation. Baking tips suggest that a warm, draft-free spot is perfect for proofing your dough. Here’s a quick reference guide to help you achieve the best conditions for your dough:
| Temperature | Humidity | Ideal Conditions |
|---|---|---|
| 75-85°F | 70-75% | Yeast activity and dough rise at their best |
| Below 75°F | Above 75% | Slower fermentation, more tangy flavor |
| Above 85°F | Below 70% | Faster rise, but may affect final texture |
Experimenting with different temperature and humidity levels can lead to exciting recipe variations, so feel free to adjust based on your preferences and desired outcomes.
Shaping and Second Proofing
Now it’s time to bring your dough to life by shaping it into beautiful loaves. Utilize your hands to craft the dough with finesse, employing techniques like rolling, folding, and shaping to create the desired result.
Allow your loaves to rest and rise once more, ensuring they reach their full potential before baking.
Shaping Techniques
Crafting perfect loaves starts with mastering the art of shaping techniques, ensuring your Pane Di Casa bread not only looks impressive but tastes exceptional too.
Explore crust variations and scoring techniques to create a crunchy exterior that captivates the senses.
Get creative with shapes, from traditional round loaves to unique braided designs, allowing your bread to stand out on any table.
Dabble in decorative scoring, a skill that adds both aesthetic appeal and texture to your bread.
As you shape your dough, remember that each movement contributes to the final product’s flavor and appearance.
Embrace the freedom to express yourself through your bread shaping, knowing that each loaf is a canvas for your culinary artistry.
Tools for Shaping
For ideal shaping and second proofing of your Pane Di Casa bread, selecting the right tools is crucial to achieving bakery-quality results. The key to successful shaping lies in the dough consistency and having the appropriate shaping tools at your disposal.
Make sure your dough is at the right elasticity and hydration level, as this will greatly impact your final loaf. Experiment with different technique variations to find what works best for you when it comes to dough shaping.
From bench scrapers to specialized bread lames, having the correct tools can make the process smoother and more enjoyable. Embrace the freedom to explore various shaping methods and tools to craft your perfect Pane Di Casa bread loaf.
Timing for Proofing
To ensure the ideal shaping and second proofing of your Pane Di Casa bread, mastering the timing for proofing is a key element in achieving bakery-quality results. Proper proofing techniques and understanding proofing time variations are essential for a successful bake. Here is a simple guide to help you troubleshoot and perfect your proofing process:
| Proofing Stage | Time Needed | Variations |
|---|---|---|
| First Proofing | 1.5 – 2 hours | Varies with room temp |
| Shaping | 15 – 20 minutes | Depends on experience |
| Second Proofing | 45 – 60 minutes | Adjust based on dough |
| Baking | As per recipe | Follow recipe closely |
Baking the Pane Di Casa Bread
When getting ready to bake the Pane Di Casa Bread, make sure your oven is preheated to the correct temperature. This is essential for achieving that perfect crust and texture you crave.
Before placing your dough in the oven, consider using bread scoring techniques to allow for controlled expansion during baking and to create an artisanal look. These techniques not only enhance the appearance but also guarantee even baking.
If you want that ultimate crispy crust, here’s a secret – try using a baking stone. It helps distribute heat evenly, mimicking a traditional brick oven for that authentic taste and texture.
As you slide your bread into the hot oven, you’re one step closer to enjoying your homemade masterpiece. Remember, proper storage is key to preserving the freshness of your Pane Di Casa Bread. Once cooled, store it in a paper bag or cloth to maintain its crusty exterior.
Now, as the aroma fills your kitchen, revel in the satisfaction of baking your own delicious bread.
Pane Di Casa Bread Recipe
Course: Main dishCuisine: ItalianDifficulty: Intermediate8
servings1
hour35
minutes150
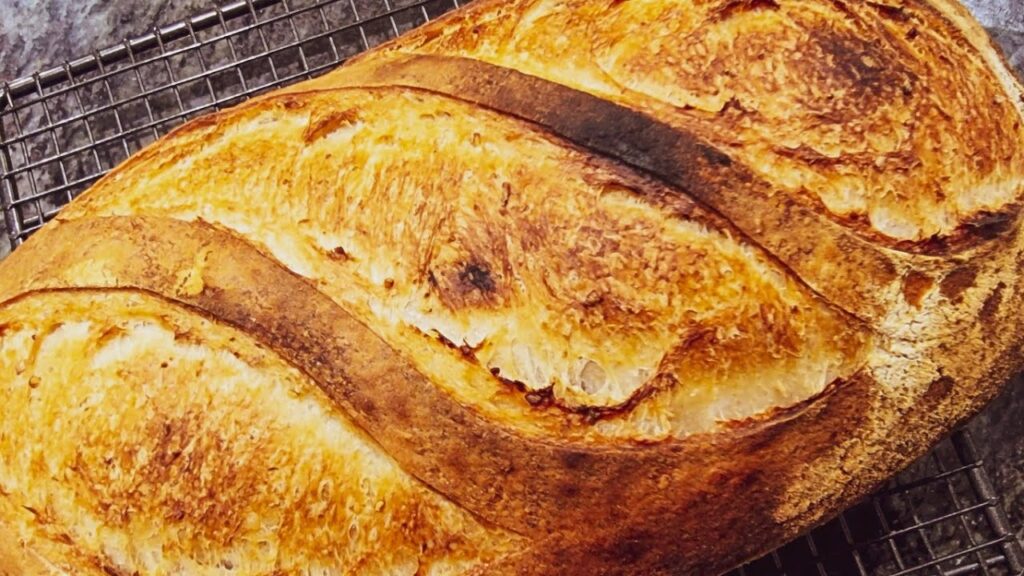
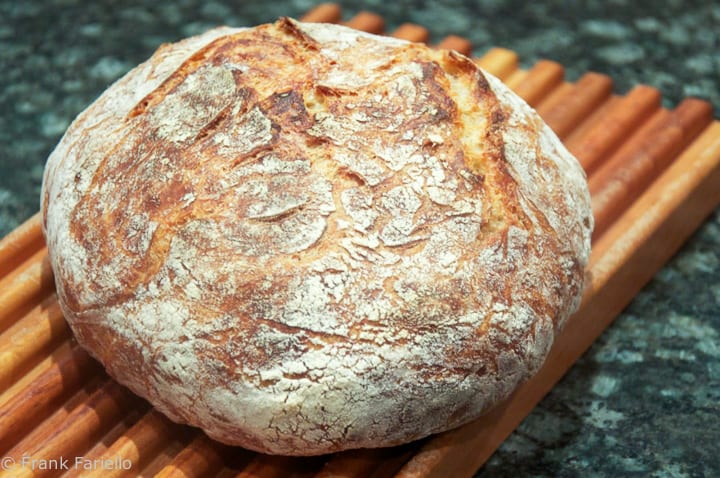
kcalPane Di Casa, a traditional Italian bread, features a crisp crust and a soft, airy interior. Perfect for accompanying meals or enjoying with olive oil and balsamic vinegar, this bread is a staple in Italian cuisine.
Ingredients
4 cups all-purpose flour
1 1/2 teaspoons salt
2 teaspoons sugar
2 teaspoons active dry yeast
1 1/2 cups warm water
2 tablespoons olive oil
Directions
- In a large bowl, combine the flour, salt, and sugar.
- Dissolve the yeast in warm water and let it sit for about 5 minutes, until foamy.
- Add the yeast mixture and olive oil to the dry ingredients, mixing until a dough forms.
- Knead the dough on a floured surface for about 10 minutes, until smooth and elastic.
- Place the dough in a lightly oiled bowl, cover with a damp cloth, and let it rise in a warm place for about 1 hour, or until doubled in size.
- Punch down the dough and shape it into a round or oval loaf.
- Place the loaf on a baking sheet lined with parchment paper, cover, and let it rise for another 30 minutes.
- Preheat the oven to 400°F (200°C).
- Make a few slashes on the top of the loaf with a sharp knife.
- Bake for 30-35 minutes, or until the bread is golden brown and sounds hollow when tapped on the bottom.
- Let cool on a wire rack before slicing and serving.
Enjoying Your Homemade Bread
Indulge in the rewarding experience of savoring your homemade Pane Di Casa Bread, relishing every bite of your artisan creation. After patiently waiting for your bread to cool down, it’s time to slice into it. Grab a serrated bread knife, and with a gentle sawing motion, cut through the crust to reveal the soft, airy crumb inside. Take in the warm aroma that fills the air as you slice into your creation, each piece a tribute to your baking prowess.
When it comes to storing your precious loaf, make sure it stays fresh for as long as possible. To maintain the crust’s crispness, store your bread in a paper bag or a bread box at room temperature. Avoid sealing it in plastic, as this can make the crust soggy. If you won’t finish it within a few days, consider slicing the bread and freezing individual portions for later enjoyment. Just pop a slice in the toaster to revive its freshness whenever you crave a taste of your delicious Pane Di Casa Bread.
Enjoy every moment of your bread-making journey, from baking to savoring!
Frequently Asked Questions
Can I Substitute All-Purpose Flour With Whole Wheat Flour in This Recipe?
You can substitute all-purpose flour with whole wheat flour in baking. Experiment with ratios for different textures. Whole wheat adds nuttiness and fiber. Embrace baking variations to discover new flavors and textures. Happy baking!
How Can I Adjust the Recipe to Make a Gluten-Free Version of Pane Di Casa Bread?
To make a gluten-free Pane Di Casa bread, try using alternatives like almond flour or a gluten-free flour blend. Experiment with baking techniques such as adding xanthan gum for elasticity. Embrace the challenge and enjoy the creative process!
Is It Possible to Add Herbs or Cheese to the Dough for Extra Flavor?
Yes, you can definitely elevate the flavor of your bread by adding herbs or cheese to the dough. Herb-infused variations bring a fragrant and fresh taste, while cheese-stuffed options offer a gooey, savory surprise in every bite.
Can I Use a Bread Machine for Mixing and Kneading the Pane Di Casa Dough?
You can absolutely use a bread machine for kneading and mixing dough! It’s like having a personal sous chef that does all the hard work for you. Just toss in the ingredients, press a button, and let it work its magic.
What Is the Best Way to Store Pane Di Casa Bread to Keep It Fresh Longer?
To keep your Pane Di Casa bread fresh longer, store it in a paper bag at room temperature for a crusty crust and a soft interior. Use a serrated knife for clean slices, and reheat in the oven for a crispy bite.
Conclusion-Pane Di Casa Bread Recipe
Now that you’ve mastered the art of making Pane Di Casa bread, did you know that bread consumption has been linked to increased happiness and satisfaction levels?
Studies show that people who regularly eat homemade bread report feeling more content and fulfilled in their daily lives.
So keep baking and enjoying the delicious rewards of your hard work!