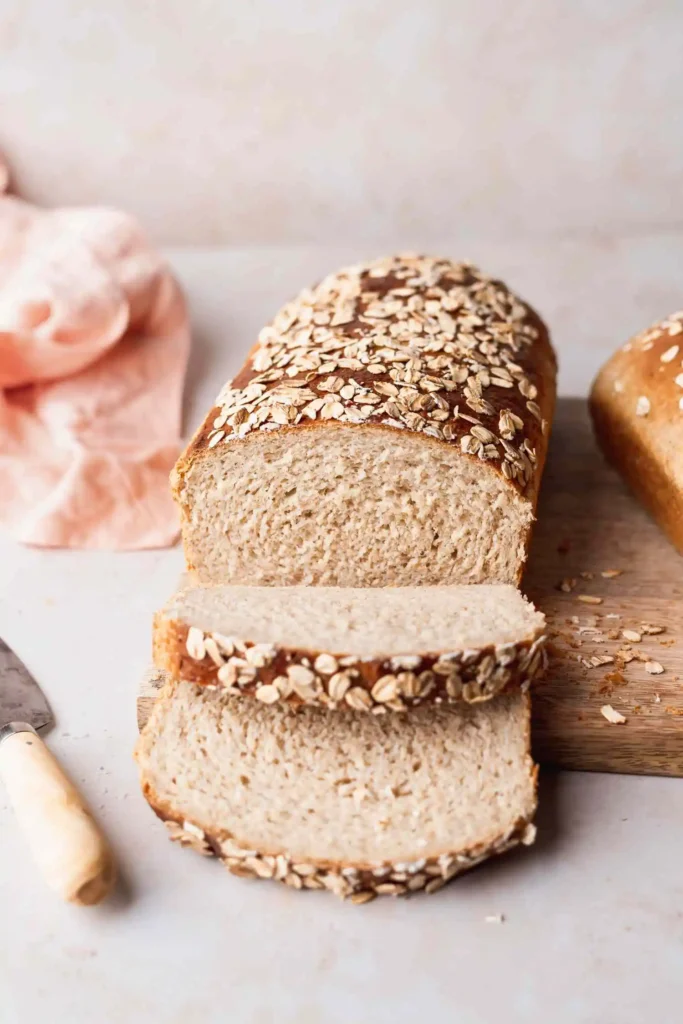
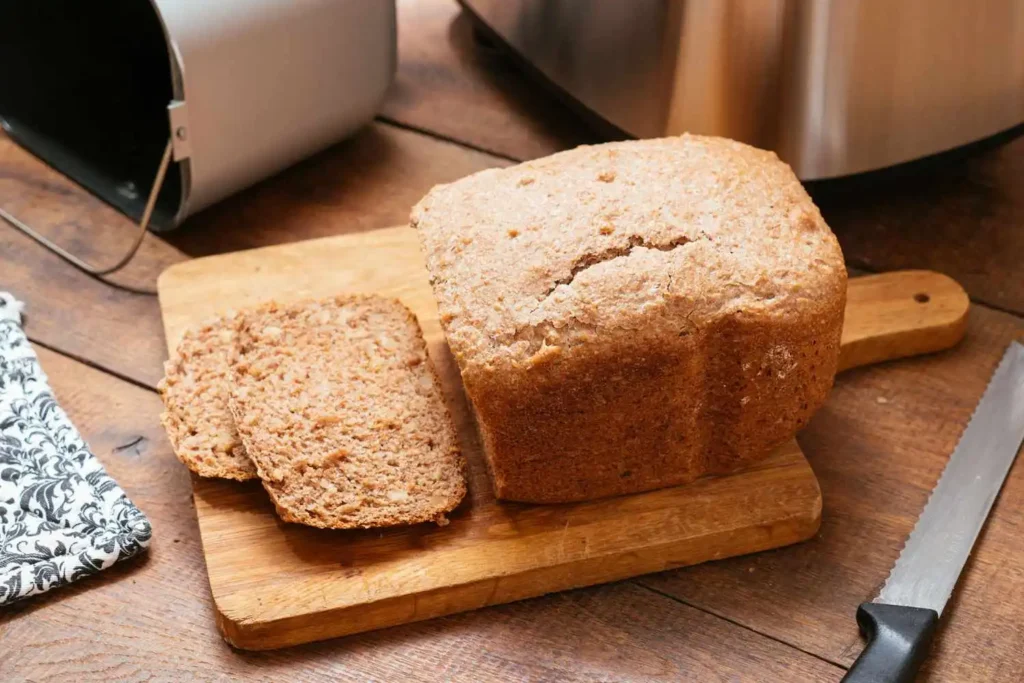
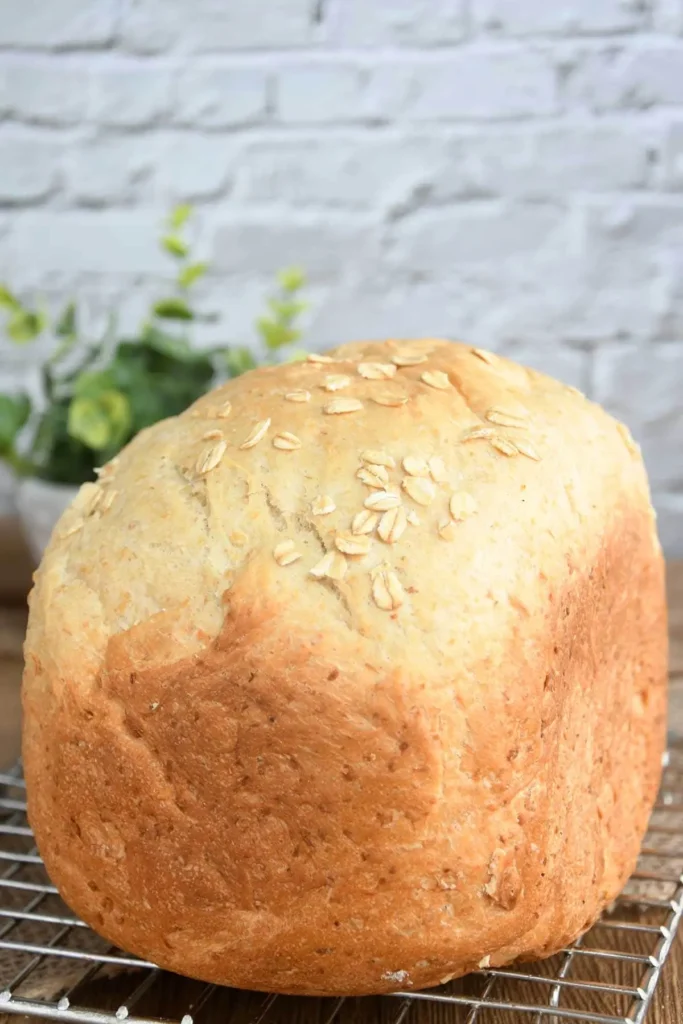
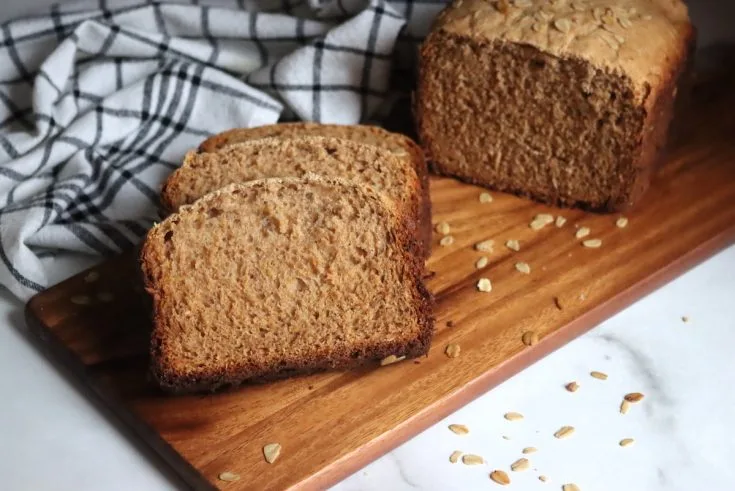
Are you tired of the same old bread options from the store? Looking for a way to add some wholesome goodness to your breakfast routine?
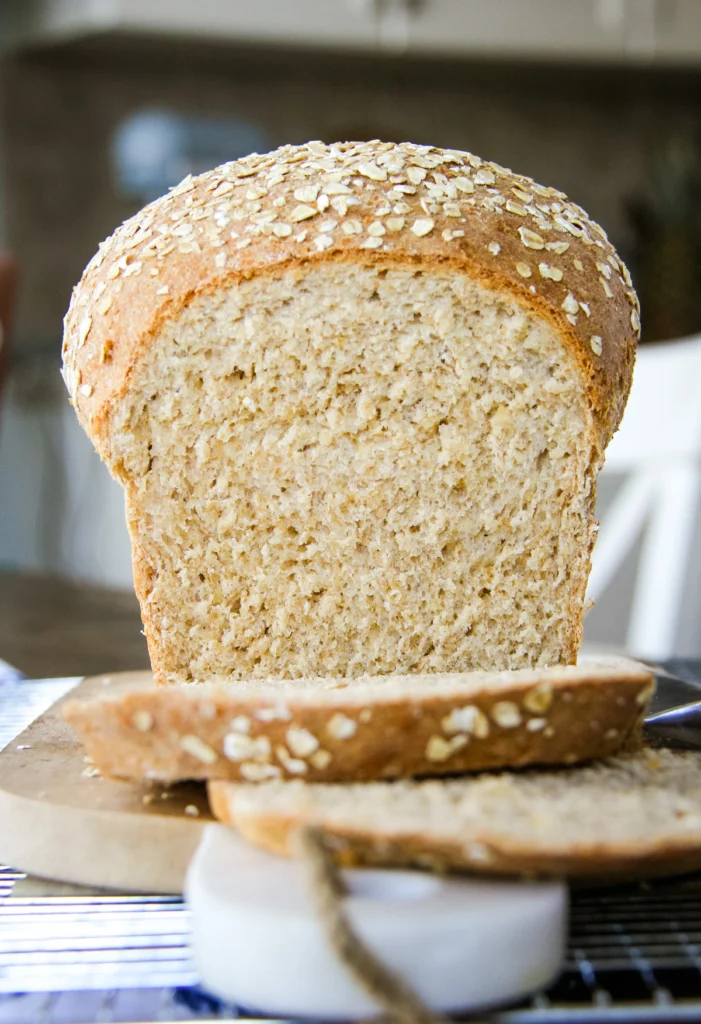
Well, look no further because this oatmeal bread machine recipe is here to save the day. With its perfect combination of hearty oats and fluffy bread, this recipe will have you coming back for more.
But how exactly do you achieve that perfect loaf of oatmeal bread? Stay tuned to find out the secrets behind this delicious creation.
Contents
- 1 Key Takeaways
- 2 Ingredients for Oatmeal Bread
- 3 Choosing the Right Bread Machine
- 4 Preparing the Dough in the Bread Machine
- 5 Baking Settings for Oatmeal Bread
- 6 Tips for Perfect Oatmeal Bread Every Time
- 7 Oatmeal Bread Machine Recipe
- 8 Serving and Storing Your Homemade Oatmeal Bread
- 9 Nutrition facts
- 10 Frequently Asked Questions
- 10.1 How Long Does It Take to Bake Oatmeal Bread in a Bread Machine?
- 10.2 Can I Substitute Instant Oats for Rolled Oats in the Oatmeal Bread Recipe?
- 10.3 Can I Add Nuts or Dried Fruits to the Oatmeal Bread Dough?
- 10.4 How Should I Store My Homemade Oatmeal Bread to Keep It Fresh?
- 10.5 Can I Use a Gluten-Free Flour Blend in the Oatmeal Bread Recipe?
- 11 Conclusion
Key Takeaways
- Rolled oats or old-fashioned oats are recommended for making oatmeal bread in a bread machine, while instant oats should be avoided.
- Choosing the right bread machine with features like a dough setting and delay timer is important for successful bread making.
- Use a digital scale for precise ingredient measurements and follow the recommended mixing techniques provided by the bread machine.
- Baking settings should be adjusted for longer baking due to the presence of oats, and selecting the appropriate crust setting is crucial for desired texture.
Ingredients for Oatmeal Bread
To make a delicious batch of oatmeal bread, gather the following ingredients.
Start by choosing the oats. Rolled oats or old-fashioned oats are the best options for this recipe, as they provide a hearty texture and nutty flavor to the bread. Avoid using instant oats, as they tend to become mushy during the baking process.
Next, consider the bread machine options. If you have a bread machine with a built-in oatmeal bread setting, you’re in luck! Simply follow the instructions provided by the manufacturer for the best results. If your bread machine doesn’t have a specific setting for oatmeal bread, don’t worry. You can still make a fantastic loaf by using the basic bread setting and adding the oats during the mixing stage.
In addition to oats, you’ll also need flour, yeast, salt, sugar, butter, and water.
The flour can be all-purpose or bread flour, depending on your preference. The yeast should be active dry yeast, and make sure to check the expiration date to ensure its effectiveness. Salt and sugar add flavor to the bread, while butter adds richness and moisture. Lastly, water is necessary to activate the yeast and bind all the ingredients together.
Once you have gathered all these ingredients, you’re ready to embark on your oatmeal bread-making adventure. Get ready to enjoy the freedom of creating a homemade loaf that’s both wholesome and delicious.
Choosing the Right Bread Machine
When it comes to choosing the right bread machine, there are a few key points to consider.
First, look for machine features that are specifically designed for making bread, such as a dough setting and a delay timer.
Second, consider the size and capacity options of the machine to ensure it can handle the amount of bread you want to make.
Machine Features for Bread
Choosing the right bread machine involves considering various machine features that will enhance your bread-making experience. Here are three key features to look for when selecting a bread machine:
- Programmable settings: Look for a machine that offers a range of programmable options, such as crust color, loaf size, and different types of bread. This will allow you to customize your bread to your preferences and experiment with a variety of recipes.
- Delayed start timer: A delayed start timer allows you to set the machine to start baking at a specific time, which is perfect if you want to wake up to the smell of freshly baked bread in the morning or have it ready when you come home from work.
- Non-stick pan: A non-stick pan is essential for easy bread removal and cleanup. It prevents the dough from sticking to the sides of the pan, ensuring that your bread comes out perfectly shaped and intact.
Size and Capacity Options
Consider the size and capacity options of a bread machine to ensure that it meets your baking needs and fits seamlessly into your kitchen.
When selecting a bread machine, it’s important to determine the right bread machine size and capacity for your household. Bread machine sizes can vary, ranging from compact models that are perfect for smaller kitchens to larger machines that can handle larger batches of bread.
The capacity of a bread machine refers to the amount of dough it can handle at once. If you have a smaller family or prefer baking smaller loaves, a bread machine with a smaller capacity may be sufficient. However, if you have a larger family or enjoy baking larger loaves, a bread machine with a larger capacity would be more suitable.
Consider your baking needs and kitchen space when choosing the right bread machine size and capacity for you.
Preparing the Dough in the Bread Machine
To achieve a perfect batch of oatmeal bread, let your trusty bread machine do all the hard work of preparing the dough. Here are some tips to ensure your dough turns out just right:
- Measure your ingredients accurately: Use a digital scale for precise measurements of flour, oats, and liquid ingredients. This will help you achieve the perfect consistency.
- Follow the recommended mixing techniques: Most bread machines have a specific order in which the ingredients should be added. Typically, you start with the liquid ingredients, followed by the dry ingredients, and finally the yeast. Make sure to follow these instructions to ensure proper mixing and rising of the dough.
- Troubleshooting tips: If your dough is too dry, add a tablespoon of water at a time until it reaches the right consistency. If it’s too wet, add a tablespoon of flour at a time until it becomes easier to handle. Adjustments may be necessary depending on the humidity of your kitchen.
Once you’ve added the ingredients to the bread machine, select the appropriate setting for oatmeal bread and let the machine work its magic. Soon, you’ll be greeted with the aroma of freshly baked oatmeal bread, ready to be enjoyed.
Baking Settings for Oatmeal Bread
For a perfectly baked loaf of oatmeal bread, selecting the right baking settings in your bread machine is crucial. The baking time and temperature will determine the final texture and taste of your bread. Most bread machines have pre-programmed settings for different types of bread, including oatmeal bread. However, you can also customize the settings to achieve your desired results.
First, consider the baking time. Oatmeal bread generally takes longer to bake compared to regular bread. This is because the oats need more time to soften and absorb moisture. Set the baking time according to the instructions provided in your bread machine manual or recipe. It’s important to follow the recommended time closely to avoid under or over-baking the bread.
Next, pay attention to the bread texture. Oatmeal bread should have a moist and slightly dense texture, with a soft and chewy crust. To achieve this, select a medium or dark crust setting on your bread machine. This will give the bread a nice golden brown color and a slightly crispy crust.
Experiment with different baking settings to find the perfect combination for your taste preferences. Remember to take notes of the settings you use and the results you get, so you can make adjustments for future batches. With the right baking settings, you’ll be able to enjoy a delicious loaf of oatmeal bread every time.
Tips for Perfect Oatmeal Bread Every Time
To ensure perfect oatmeal bread every time, it’s crucial to mix your ingredients properly. Make sure to follow the instructions carefully, measuring each ingredient accurately and adding them in the correct order.
Also, choosing the right oats is important for achieving the desired texture and flavor. Opt for rolled oats or quick oats, as they work best in bread recipes.
Mixing Ingredients Properly
Achieving the perfect texture and flavor in your oatmeal bread begins with skillfully combining the ingredients in your bread machine. To ensure a successful mixing process, follow these tips:
- Measure the ingredients accurately: Use measuring cups and spoons to ensure precise measurements for each ingredient. This will help maintain the correct balance of flavors and textures in your oatmeal bread.
- Add the ingredients in the correct order: Most bread machine recipes recommend adding the liquid ingredients first, followed by the dry ingredients. This ensures that the mixing process goes smoothly and results in a well-incorporated dough.
- Avoid overmixing: Once the ingredients are combined, avoid overmixing the dough. Overmixing can lead to a denser texture and tougher bread. Mix until the ingredients are just combined and the dough forms a cohesive ball.
Choosing the Right Oats
As you move forward in your quest for the perfect oatmeal bread, the key to success lies in selecting the right oats for your recipe. Oats are not only delicious, but they also offer numerous health benefits. They are packed with fiber, protein, and essential nutrients that promote heart health, aid digestion, and regulate blood sugar levels. When it comes to choosing oats for your bread, there are different types to consider. The most common types are rolled oats, steel-cut oats, and instant oats. Each type has its own unique texture and cooking time, so it’s important to choose the one that suits your taste and preference. To help you make an informed decision, here is a table outlining the pros and cons of each type:
| Type of Oats | Pros | Cons |
|---|---|---|
| Rolled Oats | Quick cooking time, smooth texture | Less chewy compared to steel-cut oats |
| Steel-Cut Oats | Chewy texture, nutty flavor | Longer cooking time |
| Instant Oats | Convenient and quick to prepare | Less texture compared to rolled and steel-cut oats |
Oatmeal Bread Machine Recipe
Course: SnackCuisine: AmericanDifficulty: Easy12
servings25
minutes25
minutes200
kcalThis Oatmeal Bread Machine Recipe is a delightful and nutritious addition to your breakfast or snack options. The recipe incorporates the simplicity and convenience of a bread machine, making the bread-making process easy and accessible for all levels of home bakers.
Ingredients
1 cup old-fashioned rolled oats
1 1/4 cups milk (you can use regular milk or a non-dairy alternative)
2 tablespoons butter or vegetable oil
3 cups bread flour
1/4 cup brown sugar
1 1/2 teaspoons salt
1 1/2 teaspoons active dry yeast
Directions
- Place the rolled oats in a bowl and pour the milk over them. Let the oats soak in the milk for about 10-15 minutes to soften.
- In a microwave-safe bowl or on the stovetop, melt the butter or heat the vegetable oil. Add it to the oats and milk mixture.
- In the bread machine pan, add the soaked oats mixture.
- In a separate bowl, combine the bread flour, brown sugar, and salt. Add this dry mixture on top of the oats in the bread machine pan.
- Make a small well in the center of the dry ingredients and add the yeast to it.
- Place the bread machine pan into the bread machine and set the machine to the "Basic" or "White Bread" setting. Choose your desired crust setting.
- Start the bread machine, and let it run through the complete cycle.
- Once the baking cycle is complete, carefully remove the bread from the machine and place it on a wire rack to cool.
- Allow the bread to cool completely before slicing.
Serving and Storing Your Homemade Oatmeal Bread
When it comes to enjoying your homemade oatmeal bread, there are a few essential tips to ensure it stays fresh and delicious for as long as possible. Here are some serving suggestions and homemade bread storage ideas to help you make the most of your delicious creation:
- Serve warm: Nothing beats the taste of freshly baked bread. To enjoy your oatmeal bread at its best, serve it warm. Simply pop a slice in the toaster or warm it in the oven for a few minutes. The warmth will enhance the flavors and give you that comforting feeling.
- Pair with spreads: Oatmeal bread is incredibly versatile and pairs well with a variety of spreads. From classic butter and jam to cream cheese or Nutella, the options are endless. Get creative and experiment with different combinations to find your favorite.
- Store properly: To keep your homemade oatmeal bread fresh, store it in a cool, dry place. Avoid placing it in the refrigerator, as this can cause the bread to become stale faster. Instead, wrap it tightly in plastic wrap or store it in an airtight container. This will help maintain its moisture and prevent it from drying out.
Nutrition facts
- Calories: 150-200 kcal
- Total Fat: 3-5g
- Saturated Fat: 1-2g
- Trans Fat: 0g
- Cholesterol: 5-10mg
- Sodium: 200-250mg
- Total Carbohydrates: 25-30g
- Dietary Fiber: 2-3g
- Sugars: 3-5g
- Protein: 4-6g
Frequently Asked Questions
How Long Does It Take to Bake Oatmeal Bread in a Bread Machine?
Baking oatmeal bread in a bread machine takes about 2-3 hours, depending on the machine. To ensure success, follow these tips: use warm water, add ingredients in the right order, and select the appropriate setting.
Can I Substitute Instant Oats for Rolled Oats in the Oatmeal Bread Recipe?
You can substitute instant oats for rolled oats in the oatmeal bread recipe. However, keep in mind that the texture of the bread may be slightly different. Instant oats are more finely ground, so the bread may have a smoother texture.
Can I Add Nuts or Dried Fruits to the Oatmeal Bread Dough?
You can get creative with your oatmeal bread by adding nuts or dried fruits to the dough. This will give your bread a delightful crunch or burst of sweetness. Customize it to your heart’s content!
How Should I Store My Homemade Oatmeal Bread to Keep It Fresh?
To keep your homemade oatmeal bread fresh, store it in a cool, dry place, like a bread box or airtight container. Avoid storing it in the fridge, as it can make the bread stale faster.
Can I Use a Gluten-Free Flour Blend in the Oatmeal Bread Recipe?
Yes, you can use a gluten-free flour blend in the oatmeal bread recipe. It’s a great alternative for those with gluten sensitivities. Just make sure to follow the recipe and experiment with different blends for the best texture. Enjoy!
Conclusion
In conclusion, with just a few simple steps and the right bread machine, you can enjoy the satisfying and wholesome taste of homemade oatmeal bread.
Remember, as the saying goes, ‘Practice makes perfect,’ so don’t be discouraged if your first attempt isn’t flawless.
Experiment with different ingredients and baking settings to find your perfect recipe.
So go ahead, slice a warm piece of oatmeal bread, spread some butter, and savor the comforting flavors of your own creation.
Bon appétit!

