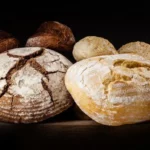
Step into the warm embrace of Nonna Pia’s kitchen, where the aroma of freshly baked bread dances through the air like a symphony of flavors.
With every bite, you are transported to a world of comfort and tradition.
But how can you recreate this magic in the comfort of your own home? Fear not, for we have uncovered the secret to Nonna Pia’s famous bread recipe.
Are you ready to embark on a culinary journey that will leave your taste buds yearning for more?
Contents
- 1 Key Takeaways
- 2 Ingredients
- 3 Mixing the Dough
- 4 Proofing the Dough
- 5 Shaping the Loaf
- 6 Nonna Pia Bread Recipe
- 7 Baking the Bread
- 8 Enjoying Your Homemade Bread
- 9 Nutrition facts
- 10 Frequently Asked Questions
- 10.1 Can I Substitute All-Purpose Flour With Bread Flour for the Nonna Pia Bread Recipe?
- 10.2 How Long Should I Let the Dough Rise During the Proofing Process?
- 10.3 Can I Use Active Dry Yeast Instead of Instant Yeast for This Bread Recipe?
- 10.4 Can I Add Some Herbs or Spices to the Dough for Extra Flavor?
- 10.5 How Long Does the Bread Need to Cool Down After Baking Before I Can Slice It?
- 11 Conclusion
Key Takeaways
- Bread flour is essential for achieving the perfect texture and structure in the dough.
- Proper proofing is crucial for yeast activation and fermentation, ensuring a light and fluffy texture in the bread.
- Shaping the dough correctly, such as creating surface tension, helps with the rise and overall appearance of the loaf.
- Baking techniques, such as preheating the oven, using a baking stone, and creating steam, contribute to achieving a golden brown crust and a hollow sound when tapped.
Ingredients
To create the delicious Nonna Pia Bread, you’ll need a carefully selected combination of high-quality ingredients. This recipe is all about simplicity and flavor, so each ingredient plays a crucial role in making this bread a culinary masterpiece.
First and foremost, you’ll need bread flour. Its high protein content ensures the perfect texture and structure of the bread, giving it that satisfying chewiness.
Next, you’ll need warm water to activate the yeast and help the dough rise. Yeast, a living organism, is the magical ingredient that gives the bread its airy and light texture.
For added flavor, you’ll need olive oil. This golden elixir not only enriches the taste but also contributes to the bread’s moistness.
Salt, a humble yet essential ingredient, enhances the overall flavor profile, bringing out the natural goodness of the bread.
Lastly, don’t forget the secret ingredient: love. Nonna Pia Bread isn’t just about the ingredients; it’s about the care and passion you put into every step.
Mixing the Dough
Now that you have gathered all the necessary ingredients, it’s time to dive into the exciting process of mixing the dough for your Nonna Pia Bread. Get ready to unleash your inner chef and experience the joy of creating homemade bread that’s sure to impress.
To begin, combine the flour, yeast, salt, and sugar in a large mixing bowl. Make a well in the center and slowly pour in the warm water. Using a wooden spoon or your hands, mix the ingredients together until a sticky dough forms.
Next comes the important step of kneading the dough. Sprinkle some flour onto a clean surface and turn the dough out onto it. With the heel of your hand, push the dough away from you, then fold it back over itself. Repeat this motion, adding more flour as needed, for about 10 minutes. This kneading technique helps to develop the gluten in the dough, giving it a light and fluffy texture.
Once the dough is smooth and elastic, place it back into the mixing bowl and cover it with a clean kitchen towel. Let it rise in a warm place for about an hour, or until it has doubled in size. This rising process allows the yeast to work its magic, creating those beautiful air pockets that will make your bread light and airy.
Now that you’ve mastered the art of mixing the dough, get ready for the next step: shaping the bread and baking it to perfection. But for now, take a moment to savor the satisfaction of a job well done. Your delicious Nonna Pia Bread is one step closer to being a reality.
Proofing the Dough
Now it’s time to let the dough rest and rise to perfection.
The first point to consider is time and temperature. Find a warm spot in your kitchen where the dough can proof undisturbed for the recommended amount of time.
Second, ensure the dough has the proper consistency. It should be elastic and smooth, indicating that the yeast has done its job.
Time and Temperature
When proofing the dough for Nonna Pia Bread, ensure that you create the perfect environment for yeast activation and fermentation. Time and temperature play a crucial role in this process.
To activate the yeast, you need to provide enough time for it to feed on the sugars in the dough and produce carbon dioxide gas. The ideal temperature for yeast activation is around 80°F to 85°F (27°C to 29°C). This warm environment helps the yeast to multiply and ferment the dough, resulting in a light and airy texture. However, be cautious not to exceed the recommended temperature, as it can kill the yeast.
Additionally, the proofing time may vary depending on the recipe and ambient temperature. So keep an eye on the dough and check for signs of it doubling in size, indicating that fermentation is happening effectively.
Proper Dough Consistency
To achieve the perfect rise and flavor in your Nonna Pia Bread, it’s crucial to ensure that your dough has the proper consistency during the proofing process. Here are some tips for kneading dough and troubleshooting dough consistency:
- Start with the right amount of flour: Too much flour can make the dough dry and dense, while too little can make it sticky and difficult to work with.
- Knead thoroughly: Proper kneading helps develop gluten, which gives the dough its elasticity and structure. Knead until the dough is smooth and elastic.
- Adjust the moisture level: If the dough is too dry, add a little water. If it’s too sticky, add a little flour. Gradually adjust until you reach the right consistency.
- Give it time to rise: Allow the dough to proof in a warm, draft-free place until it has doubled in size. This will ensure a light and fluffy texture.
- Keep an eye on the temperature: Extreme temperatures can affect the dough’s consistency. Avoid proofing in a too cold or too hot environment.
Shaping the Loaf
Now that your dough has finished proofing, it’s time to shape it into a loaf.
Start by gently rolling the dough into a rectangle, making sure it’s evenly thick.
Next, tuck the ends of the dough underneath, creating a smooth surface on top.
This will help create that beautiful, round shape and ensure a nice rise in the oven.
Rolling the Dough
Shape the dough into a perfectly round loaf, ensuring a delightful texture and appearance for your Nonna Pia Bread.
To achieve this, follow these dough rolling techniques and tips for even dough thickness:
- Start with a well-floured surface to prevent sticking.
- Flatten the dough with your hands into a rough rectangular shape.
- Use a rolling pin to gently roll the dough outward from the center, applying even pressure.
- Rotate the dough occasionally to maintain an even thickness.
- Check the thickness by placing your hand underneath the dough to ensure there are no thin spots.
Tucking the Ends
As you continue working with the dough, the final step in creating your perfectly round Nonna Pia Bread is tucking the ends to shape the loaf.
Tucking the ends is a crucial step that ensures your bread maintains its shape and bakes evenly.
To achieve the perfect shape, gently take the ends of the dough and fold them towards the center. As you fold, make sure to apply slight pressure to seal the ends together. This proper technique will prevent the bread from spreading out too much during baking.
Common mistakes to avoid include not tucking the ends tightly enough, resulting in a flat and misshapen loaf.
Creating Surface Tension
To achieve a beautifully shaped loaf of Nonna Pia Bread, you’ll want to create surface tension by applying gentle pressure and strategically shaping the dough. This step is crucial for ensuring an even rise and a nice, crispy crust.
Here’s how to do it:
- Start by lightly dusting your work surface with flour.
- Gently pat the dough into a rectangle shape, being careful not to deflate it too much.
- Fold the bottom third of the dough up towards the center, then fold the top third down over it.
- Use the heels of your hands to gently press the dough together, creating surface tension.
- Rotate the dough and repeat the folding and pressing process a few more times.

Nonna Pia Bread Recipe
Course: bakingCuisine: ItalianDifficulty: Intermediate4
servings30
minutes40
minutes300
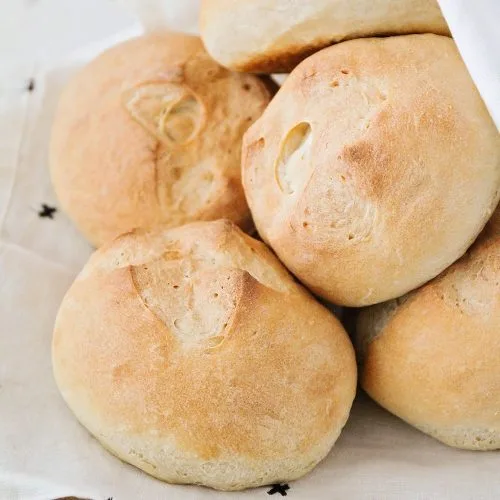
kcalIndulge in the rustic flavors of homemade Italian bread with this Nonna Pia-inspired recipe. Perfect for a cozy family dinner or a special occasion, this bread is characterized by its golden crust and soft, chewy interior. The simple combination of all-purpose flour, yeast, olive oil, and a touch of sugar creates a dough that rises to perfection, delivering an authentic Italian taste.
Ingredients
4 cups all-purpose flour
1 tablespoon sugar
1 tablespoon active dry yeast
1 1/2 teaspoons salt
1 1/2 cups warm water (approximately 110°F/43°C)
2 tablespoons olive oil
Directions
- In a small bowl, combine warm water and sugar. Stir until the sugar is dissolved. Sprinkle the yeast over the water and let it sit for about 5-10 minutes, or until it becomes frothy.
- In a large mixing bowl, combine the flour and salt. Make a well in the center and pour in the activated yeast mixture. Add the olive oil. Mix until the dough comes together.
- Turn the dough out onto a floured surface and knead for about 8-10 minutes, or until it becomes smooth and elastic. If the dough is too sticky, add a little more flour.
- Place the kneaded dough in a lightly oiled bowl, cover it with a damp cloth, and let it rise in a warm place for about 1-2 hours or until it has doubled in size.
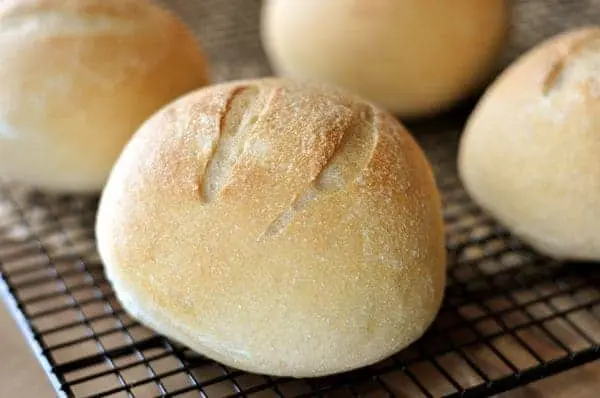
- Punch down the risen dough and turn it out onto a floured surface. Shape it into a loaf or divide it into smaller portions for individual rolls.
- Place the shaped dough on a baking sheet, cover it again, and let it rise for an additional 30-60 minutes.
- Preheat your oven to 375°F (190°C).
- Allow the bread to cool on a wire rack before slicing.
Baking the Bread
Have you ever wondered how to achieve the perfect golden crust and soft interior when baking Nonna Pia bread? Well, look no further! In this section, we will explore the art of baking this delectable bread, using a few key baking techniques and troubleshooting tips.
To start, preheat your oven to 425°F (220°C) and place a baking stone or sheet pan on the center rack. This will ensure even heat distribution and a crispy crust. While the oven preheats, let the dough rise for about 30 minutes, covered with a clean kitchen towel.
Next, carefully transfer the risen dough onto the hot baking stone or sheet pan. To create steam, place a small metal pan on the bottom rack and fill it with boiling water. The steam will help achieve that coveted soft interior.
Now, let’s take a look at some troubleshooting tips that may come in handy during the baking process. If your bread is browning too quickly, tent it with aluminum foil to prevent further browning. On the other hand, if the crust is not golden enough, brush the loaf with an egg wash made from one beaten egg and a tablespoon of water before baking.
Remember, baking is both an art and a science. So, don’t be afraid to experiment and make adjustments along the way. With a little practice, you’ll soon be enjoying the perfect Nonna Pia bread, with its golden crust and fluffy interior. Happy baking!
| Baking Technique | Troubleshooting Tips |
|---|---|
| Preheat the oven | Tent with aluminum foil |
| Transfer the dough | Brush with egg wash |
| Use a baking stone | Adjust baking time |
| Create steam | Monitor browning |
Enjoying Your Homemade Bread
Indulge in the delightful experience of savoring your homemade Nonna Pia bread, with its irresistible combination of a golden crust and a fluffy interior. Now that you have baked this mouthwatering bread, it’s time to enjoy it to the fullest. Here are some tips for storing your homemade bread and different variations you can try:
- Storing Tips: To keep your bread fresh for longer, store it in a bread box or an airtight container. Avoid refrigerating the bread as it can make it go stale faster. If you have sliced the bread, place parchment paper between the slices to prevent them from sticking together.
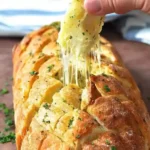
- Variation 1: Herb and Cheese Bread: Add a savory twist to your bread by mixing in some dried herbs like rosemary or thyme, along with grated cheese such as Parmesan or cheddar. The aroma and flavors will take your taste buds on a delightful journey.
- Variation 2: Whole Wheat Bread: For a healthier option, substitute a portion of the all-purpose flour with whole wheat flour. This will give your bread a nutty flavor and boost its nutritional value.
- Variation 3: Cinnamon Raisin Bread: Sweeten up your bread by incorporating cinnamon and raisins into the dough. The warm spices and juicy raisins will add a touch of indulgence to your breakfast or afternoon snack.
- Variation 4: Olive and Sundried Tomato Bread: Infuse your bread with Mediterranean flavors by adding chopped olives and sundried tomatoes. The combination of tangy and savory ingredients will transport you to a sunny seaside café.
With these storage tips and delicious variations, you can continue to enjoy your homemade Nonna Pia bread in different ways, ensuring every bite is a moment of pure bliss.
Nutrition facts
- Calories: Around 180 calories
- Total Fat: 3g
- Saturated Fat: 0.5g
- Monounsaturated Fat: 2g
- Polyunsaturated Fat: 0.5g
- Cholesterol: 0mg
- Sodium: 300mg
- Total Carbohydrates: 32g
- Dietary Fiber: 1g
- Sugars: 1g
- Protein: 5g
Frequently Asked Questions
Can I Substitute All-Purpose Flour With Bread Flour for the Nonna Pia Bread Recipe?
You can substitute all-purpose flour with bread flour for a chewier texture in your Nonna Pia bread recipe. Just keep in mind that bread flour requires longer proofing time for the dough to rise properly.
How Long Should I Let the Dough Rise During the Proofing Process?
Let the dough rise for at least an hour during the proofing process. The proofing time may vary depending on the yeast types used. Follow the recipe instructions for best results.
Can I Use Active Dry Yeast Instead of Instant Yeast for This Bread Recipe?
Yes, you can use active dry yeast instead of instant yeast for this bread recipe. However, keep in mind that you’ll need to activate the yeast first. Using bread flour instead of all-purpose flour will result in a lighter and chewier texture.
Can I Add Some Herbs or Spices to the Dough for Extra Flavor?
You can definitely add herbs or spices to the dough for an extra burst of flavor. It’s a great way to elevate your bread! Just make sure to use the right amount to avoid overpowering the taste.
How Long Does the Bread Need to Cool Down After Baking Before I Can Slice It?
Once the bread is out of the oven, give it some time to cool down. Be patient, friend. Let it rest for at least 30 minutes before you slice into that warm, golden goodness. Trust me, it’s worth the wait.

Conclusion
So go ahead, give this Nonna Pia bread recipe a try and experience the joy of baking your own delicious homemade bread.
Don’t worry if you’ve never baked bread before – this recipe breaks it down into simple steps that anyone can follow.
And don’t let the time it takes to proof and shape the dough discourage you; the end result is well worth the wait.
Trust me, once you taste the warm, crusty loaf fresh out of the oven, you’ll never want to buy store-bought bread again.
Happy baking!