

To make scrumptious homemade bread with your Kenwood Bread Recipe start by combining flour, yeast, and salt for flavor and rise. Adjust mixer speed as needed and knead dough till it’s just right. Let it proof and shape into perfect loaves before baking at 375°F for that golden crust. Cool, slice, and savor your creation with endless topping options. Enjoy the process of creating and tasting your very own Kenwood bread masterpiece. Master the techniques and explore a world of possibilities with each delicious batch.
Contents
- 1 Key Takeaways
- 2 Mixing the Dough
- 3 Kneading With Your Kenwood Mixer
- 4 Proofing and Shaping
- 5 Baking in Your Oven
- 6 Cooling and Slicing
- 7 Kenwood Bread Recipe
- 8 Enjoying Your Homemade Bread
- 9 Frequently Asked Questions
- 9.1 Can I Use Whole Wheat Flour Instead of All-Purpose Flour for This Recipe?
- 9.2 How Can I Adjust the Recipe for High Altitude Baking?
- 9.3 What Is the Best Way to Store Homemade Bread for Freshness?
- 9.4 Can I Add Nuts or Seeds to the Bread Dough for Extra Flavor?
- 9.5 Is It Possible to Make This Recipe Gluten-Free by Using Alternative Flours?
- 10 Conclusion-Kenwood Bread Recipe
Key Takeaways
- Adjust Kenwood mixer speed for optimal dough consistency.
- Monitor proofing to double dough size for ideal rise.
- Use serrated knife for clean slices post-cooling.
- Preheat oven to 375°F for a golden-brown crust.
- Experiment with toppings and spreads for diverse flavors.
Mixing the Dough
When mixing the dough for Kenwood Bread, begin by combining the flour, yeast, and salt in a large mixing bowl. The flour provides the base, the yeast activates the rising process, and the salt enhances the flavor. Make sure the ingredients are evenly distributed before moving on to the next step.
Now, it’s time to activate the yeast. Warm water is key here. It should be around 110°F (43°C) – warm to the touch but not scalding. Yeast is a living organism, and this warmth wakes it up, kickstarting the fermentation process. Pour the warm water over the yeast and let it sit for a few minutes until it becomes frothy; this is the yeast coming alive. The magic of dough rising begins here.
Once your yeast is activated, slowly pour it into the flour mixture while stirring gently. This marks the beginning of a beautiful dough that will soon rise and transform into delicious Kenwood Bread.
Kneading With Your Kenwood Mixer
When using your Kenwood mixer for kneading, remember to adjust the speed settings based on the recipe requirements.
It’s crucial to periodically check the dough’s consistency throughout the kneading process to guarantee it’s progressing as needed.
Mixer Speed Settings
To achieve the perfect dough consistency when kneading with your Kenwood mixer, adjust the speed settings gradually as you incorporate the ingredients. Starting at a lower speed allows for proper mixing without overworking the dough. As the ingredients come together, gradually increase the speed to further develop gluten structure. Here’s a helpful guide for mixer speed settings:
| Mixing Stage | Speed Setting | Time |
|---|---|---|
| Ingredient Incorporation | Low | 2-3 minutes |
| Gluten Development | Medium | 8-10 minutes |
| Final Kneading | High | 5-7 minutes |
Dough Consistency Check
For optimal outcomes in kneading dough with your Kenwood mixer, make sure the consistency is smooth and elastic by periodically pausing to perform a quick touch test.
To check the texture, stop the mixer and touch the dough. It should feel slightly tacky but not stick to your fingers. If the dough feels too dry, add a tablespoon of water and continue kneading. Conversely, if it feels too wet, sprinkle a bit of flour and allow it to incorporate before reassessing.
Troubleshooting tips include adjusting the hydration levels gradually to avoid overcorrection. Remember, achieving the ideal dough consistency is essential for baking delicious bread with your Kenwood mixer.
Keep practicing, and soon you’ll master the art of kneading!
Proofing and Shaping
During the proofing and shaping stage of the Kenwood bread recipe, make sure your dough has doubled in size before moving on to the next step. This is vital for a light and airy loaf. To achieve this, consider proofing tips such as finding a warm, draft-free spot for your dough to rise. Cover it with a damp cloth to maintain moisture.
When the dough has risen appropriately, it’s time to shape it. Shaping techniques are essential for creating a well-formed loaf. Gently deflate the dough by pressing it down, then shape it according to your desired final bread form. Whether you’re making a classic round loaf, baguettes, or braided bread, shaping requires a bit of practice but is immensely satisfying once mastered.
Baking in Your Oven
Get your oven preheated to the right temperature and make sure you time your bake accordingly for that perfect loaf.
You’ll need some essential baking tools like a baking sheet or a loaf pan to get started.
Once your bread is done, remember to cool it properly on a wire rack to prevent sogginess.
Oven Temperature and Timing
When baking the Kenwood bread recipe in your oven, make sure the temperature and timing are essential to achieve a perfect loaf every time. Proper oven temperature is vital for a successful bake. Preheat your oven to 375°F (190°C) for a golden-brown crust color and a well-risen loaf.
Keep an eye on the dough rise during the final proofing stage; it should double in size before baking. Once the dough has proofed, place it in the oven and set a timer for 30-35 minutes. The aroma of freshly baked bread will fill your kitchen as you wait.
Baking Tools Needed
To achieve a successful bake when using your oven for the Kenwood bread recipe, make sure you have the following essential baking tools ready. First, confirm your oven is preheated to the correct temperature by placing a reliable thermometer inside. This will help you monitor and adjust the heat for best baking results.
Next, consider the placement of your oven racks to promote even baking. For dough hydration and fermentation, you may need a spray bottle for misting water to create steam in the oven. Additionally, having a baking stone or steel can help regulate the oven’s temperature and provide a consistent heat source.
These tools will assist you in mastering the art of baking delicious bread with your Kenwood.
Proper Cooling Techniques
For successful baking results with your Kenwood bread, mastering proper cooling techniques after baking in your oven is essential to maintain the bread’s texture and flavor. Once your bread is done baking, resist the temptation to slice into it immediately. Allow it to cool properly on a wire rack for about 30 minutes. This cooling period helps the moisture inside the bread redistribute evenly, guaranteeing a moist and delicious loaf. To further enhance the freshness of your bread, store it correctly. Keep it in a bread box or a paper bag at room temperature. When it’s time to slice your bread, use a serrated bread knife for clean cuts that won’t squish the bread. Enjoy your freshly baked Kenwood bread with these simple but effective techniques.
| Bread Storage & Freshness | Bread Slicing Techniques |
|---|---|
| Store in bread box or paper bag at room temperature | Use a serrated bread knife |
| Ensure proper ventilation for freshness | Cut with a gentle sawing motion |
| Avoid storing in the refrigerator | Start from the top crust down |
| Keep away from direct sunlight | Use a cutting board for stability |
| Consume within a few days for best taste | Aim for consistent slice thickness |
Cooling and Slicing
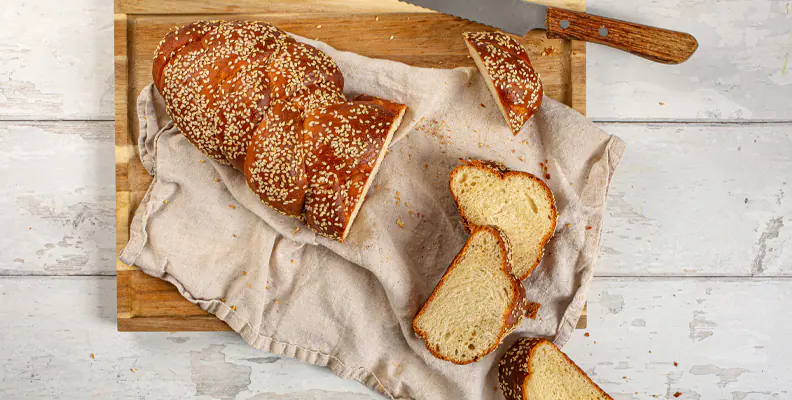
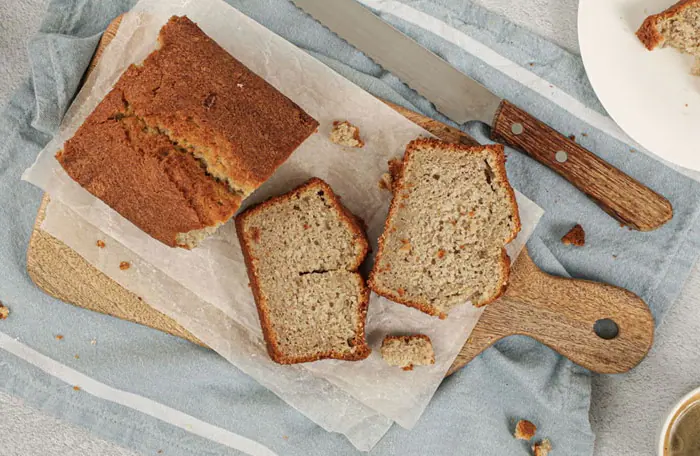
Allow the freshly baked Kenwood bread to cool for at least 15 minutes before slicing it into delectable, even pieces. This cooling period allows the bread to set properly, making it easier to slice without squishing. When it comes to slicing techniques, a serrated bread knife works best to achieve clean cuts without crushing the loaf. Remember to slice with a gentle sawing motion to maintain the bread’s structure.
Once sliced, consider serving suggestions like toasting the bread and spreading it with butter and jam for breakfast or making a savory sandwich with your favorite fillings for lunch. If you have leftovers, explore storage options such as wrapping the bread in a clean kitchen towel or storing it in an airtight container to maintain freshness.
Experiment with different bread variations by adding ingredients like seeds, nuts, or dried fruits to the dough for unique flavors and textures. Enjoy the process of cooling and slicing your homemade Kenwood bread, savoring each moment from the warm oven to the table.
Kenwood Bread Recipe
Course: Breakfast, BrunchCuisine: VariousDifficulty: Intermediate1
servings15
minutes3
hours150
kcalKenwood Bread Recipe yields a delicious, fluffy loaf perfect for breakfast or brunch. With simple ingredients and precise instructions, this recipe promises a homemade bread experience that's both rewarding and delightful.
Ingredients
500g strong bread flour
7g sachet fast-action yeast
1 ½ tsp salt
300ml warm water
1 tbsp olive oil
Directions
- In a large mixing bowl, combine flour, yeast, and salt.
- Gradually add warm water and olive oil, mixing to form a dough.
- Knead the dough on a floured surface until smooth and elastic.
- Place dough in a greased bowl, cover, and let it rise until doubled in size.
- Punch down the dough, shape it into a loaf, and transfer to a greased loaf tin.
- Cover and allow to rise again until doubled.
- Preheat oven to 220°C (425°F).
- Bake the loaf for 25-30 minutes until golden brown and sounds hollow when tapped.
- Allow to cool before slicing and serving. Enjoy your homemade Kenwood bread!
Enjoying Your Homemade Bread
After savoring the process of cooling and slicing your homemade Kenwood bread, the next step is to explore the delightful experience of enjoying your freshly baked creation. To maintain the bread’s freshness, consider storing it in a bread box or a paper bag at room temperature. This will help preserve its softness and flavor for longer periods.
Now, onto toppings and spreads! Let your creativity flow when deciding how to enhance your bread. Classic choices like butter and jam are always a hit, but don’t be afraid to try something new. Avocado slices with a sprinkle of salt and pepper, or a drizzle of honey paired with ricotta cheese can elevate your simple slice of bread to gourmet status.
Whether you prefer sweet or savory, the key is to experiment and find what tantalizes your taste buds. Enjoy your homemade bread with your favorite hot beverage, or turn it into a delicious sandwich. The possibilities are endless when it comes to savoring your Kenwood bread creation.
Frequently Asked Questions
Can I Use Whole Wheat Flour Instead of All-Purpose Flour for This Recipe?
Yes, you can substitute whole wheat flour for all-purpose flour in many recipes. It adds a nutty flavor and boosts nutritional value. Remember, whole wheat flour can make the texture denser, so adjust liquid amounts and baking time accordingly for best results.
How Can I Adjust the Recipe for High Altitude Baking?
When baking at high altitudes, tweak the recipe like a magician waving a wand. Adjust baking time, ingredient ratios, and oven temperature for perfect loaves. Elevate flavors by experimenting with spices and extracts.
What Is the Best Way to Store Homemade Bread for Freshness?
To keep homemade bread fresh, store it in a paper bag or bread box at room temperature for a few days. For longer freshness, freeze slices in airtight bags. Avoid the fridge as it can dry out the bread.
Can I Add Nuts or Seeds to the Bread Dough for Extra Flavor?
Sprinkle nuts or seeds in your bread dough for a burst of flavor and added nutritional benefits. Get creative with your combinations, experimenting with baking techniques to enhance the taste and texture of your loaf.
Is It Possible to Make This Recipe Gluten-Free by Using Alternative Flours?
You can definitely tackle baking challenges and explore flour substitutions to make the recipe gluten-free. Get creative with recipe variations to cater to different dietary needs, offering allergen-friendly options that everyone can enjoy.
Conclusion-Kenwood Bread Recipe
As you slice into your freshly baked Kenwood bread, you aren’t just cutting through dough – you’re cutting through time itself. Each bite is a journey through the ancient art of breadmaking, a tradition passed down through generations.
The warmth, the aroma, the taste – all speak to the care and craftsmanship that went into creating this simple yet profound staple of human sustenance. So savor each bite, and let the tradition live on.