

To make Irish Wheaten Bread Recipe mix whole wheat and all-purpose flour with yeast and dairy substitute like almond or oat milk. Combine dry ingredients, add buttermilk and mix gently. Knead for 8-10 minutes, shape into a loaf, and bake until golden crust forms. Cool on a rack, then slice carefully. Serve warm with butter and sea salt for a scrumptious treat. Enhance the flavor with honey, butter, or toasting. Presentation matters for a delightful experience. Experiment with accompaniments and pair with different beverages for varied tastes. Mastering this recipe will surely tantalize your taste buds with every bite.
Contents
Key Takeaways
- Use a mix of whole wheat and all-purpose flour for a balanced texture.
- Opt for active dry or instant yeast for leavening the dough.
- Consider almond or oat milk as dairy alternatives for a unique flavor.
- Experiment with different flour types and dairy substitutes for personalization.
- Customize the bread with creative ingredients like seeds, nuts, or honey for added flavor.
Ingredients Needed
When baking Irish Wheaten Bread, you’ll need to gather the following ingredients. For the baking tips, opt for a mix of whole wheat and all-purpose flour to achieve the perfect texture. The blend adds a nutty flavor and a soft crumb.
You can choose between active dry yeast or instant yeast based on your preference and time availability. Active dry yeast requires proofing in warm water, while instant yeast can be mixed directly with the dry ingredients.
For dairy substitutes, consider using almond milk or oat milk to maintain the moistness of the bread without compromising on flavor. These alternatives work well with the recipe and cater to those with dietary restrictions.
Experimenting with different flour types and dairy substitutes can lead to exciting variations of Irish Wheaten Bread. Get creative with your choices to customize the bread to your liking while enjoying the freedom of baking in your kitchen.
Mixing the Dough
To begin mixing the dough for your Irish Wheaten Bread, carefully combine the dry ingredients in a large mixing bowl. Start by whisking together whole wheat flour, baking soda, salt, and any optional seeds or nuts for added texture. Create a well in the center of the dry ingredients and pour in the buttermilk and honey mixture. Use a wooden spoon or your hands to gently mix the ingredients until a sticky dough forms. Be mindful not to overmix, as this can result in a tough final product.
When mixing the dough, remember that the consistency should be moist but not too wet. Adjust by adding a little more flour if needed until you achieve a soft, slightly sticky texture. Experiment with different mixing variations such as folding or stirring to see what works best for you.
Allow the dough to rest for about 10 minutes before shaping it into a round loaf or placing it in a bread tin. Cover the dough and let it rise for approximately 30 minutes to an hour, depending on the desired fluffiness of the final bread.
Kneading and Shaping
After mixing the dough for your Irish Wheaten Bread, the next step is to knead and shape it to prepare for baking. Important kneading is vital for developing the bread’s texture.
To knead effectively, use the heel of your hand to push the dough away from you, then fold it back over itself. Rotate the dough a quarter turn and repeat. This process should be done for about 8-10 minutes until the dough becomes smooth and elastic.
When it comes to shaping the dough, there are various techniques to achieve the desired loaf shape. Depending on your preference, you can shape the dough into a round or oval loaf. To shape a round loaf, gently tuck the edges underneath to create a smooth surface. For an oval loaf, flatten the dough into a rectangle, then roll it up tightly starting from one end.
Make sure the dough consistency is neither too sticky nor too dry as this can impact the final bread texture.
Baking the Loaf
Now that you’ve mastered kneading and shaping your Irish wheaten bread dough, it’s time to talk about baking the perfect loaf.
The key points to focus on include kneading the dough just right for the ideal texture, and setting your oven to the correct temperature for that beautiful golden crust.
Keep a close watch on the clock to guarantee your bread is baked to perfection without overdoing it.
Kneading the Dough
Begin by gently folding the dough over itself, then pressing it down with the heel of your hand, repeating until a smooth, elastic texture is achieved. This process helps develop the gluten in the dough, giving your bread a lovely texture.
Pay attention to the dough consistency; it should be slightly tacky but not sticky. If it’s too dry, add a little water; if it’s too wet, sprinkle some flour. As you knead, use a shaping technique that involves tucking the edges underneath to form a smooth ball.

Oven Temperature and Time
As you shape your dough into a smooth ball, the next step involves preheating your oven to the precise temperature needed for baking the loaf to a golden perfection.
Here are some baking tips and best practices for achieving the perfect crust texture and color variations:
- Preheat Properly: Make sure your oven is fully preheated before placing the bread inside.
- Use a Baking Stone: For a crustier loaf, consider baking your bread on a preheated baking stone.
- Steam the Oven: Generate steam in the oven during the first few minutes of baking for a beautiful crust.
- Rotate the Loaf: To ensure even browning, rotate the bread halfway through the baking time.
- Check for Doneness: Tap the bottom of the loaf – a hollow sound indicates it’s ready.
Cooling and Slicing
Once your freshly baked Irish Wheaten Bread is out of the oven, it’s important to allow it to cool properly for the best texture and flavor.
To achieve even slices, make sure the loaf is completely cooled to avoid crumbling.
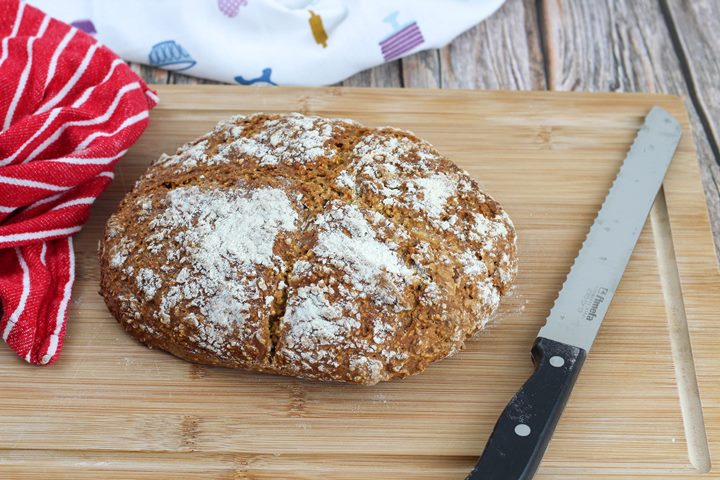
When it’s time to slice, using a serrated knife in a gentle sawing motion will help maintain a neat appearance for serving.
Proper Cooling Methods
For optimal results, make sure your Irish Wheaten Bread has cooled sufficiently before slicing into it. Here are some tips to guarantee proper cooling and slicing:
- Allow Ample Time: Let the bread cool on a wire rack for at least 1 hour.
- Cover Loosely: Once cooled, cover the bread loosely with a clean kitchen towel to prevent it from drying out.
- Avoid Sealing: Don’t seal the bread in a container until it has completely cooled to room temperature.
- Slice Carefully: Use a serrated knife to slice the bread evenly without squishing it.
- Enjoy Fresh: Irish Wheaten Bread tastes best when served slightly warm with butter and a sprinkle of sea salt.
These steps will help you savor every delicious slice of your freshly baked bread.
Slicing Techniques for Evenness
Wondering how to achieve perfectly even slices of Irish Wheaten Bread every time? To master the art of precision cutting, use the right knife techniques for the best results.
Start by choosing a sharp serrated knife, which will glide effortlessly through the bread without crushing its delicate texture. Guarantee each slice is of uniform thickness by gently sawing back and forth in a smooth motion.
This technique helps maintain the bread’s texture and crumb consistency, giving you slices that are both visually appealing and enjoyable to eat. By paying attention to your knife skills and cutting with care, you’ll be able to serve up beautifully even slices of Irish Wheaten Bread that are sure to impress your guests.
Presentation and Serving
To guarantee ideal presentation and serving of your Irish Wheaten Bread, follow these steps for cooling and slicing. Once your bread is out of the oven, allow it to cool on a wire rack for about 30 minutes. This will help establish the crumb and prevent it from becoming too dense when sliced.
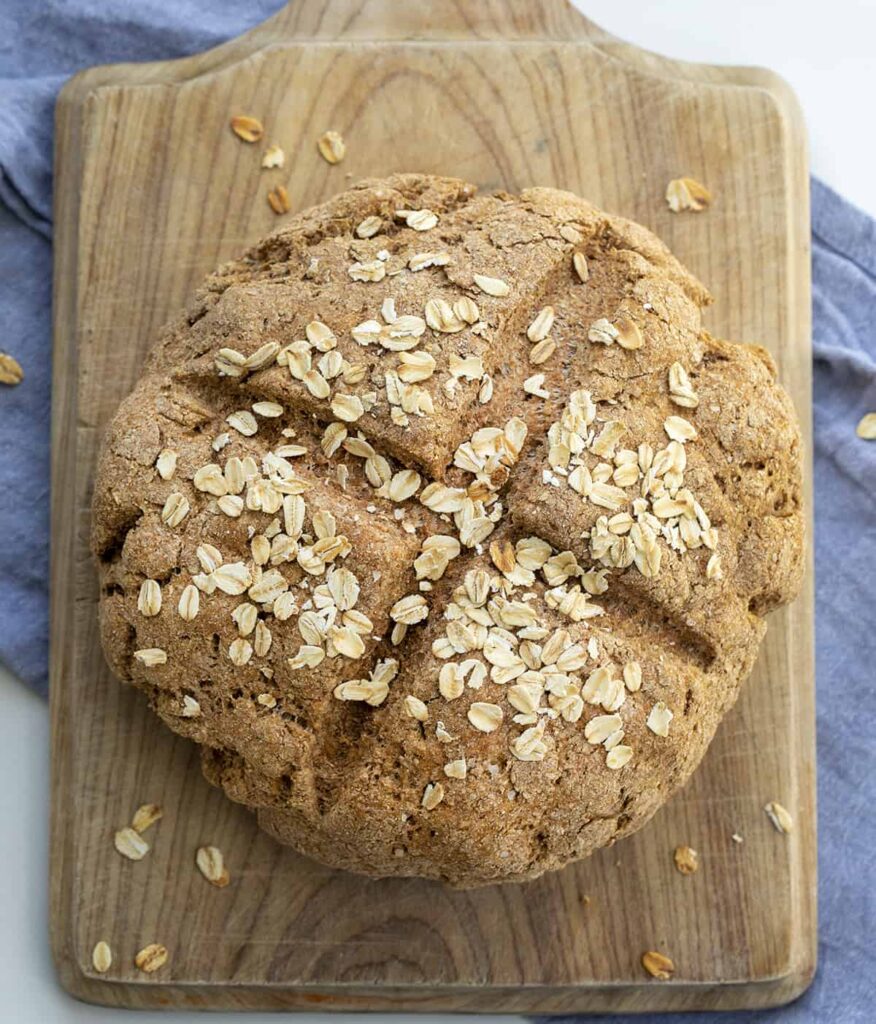
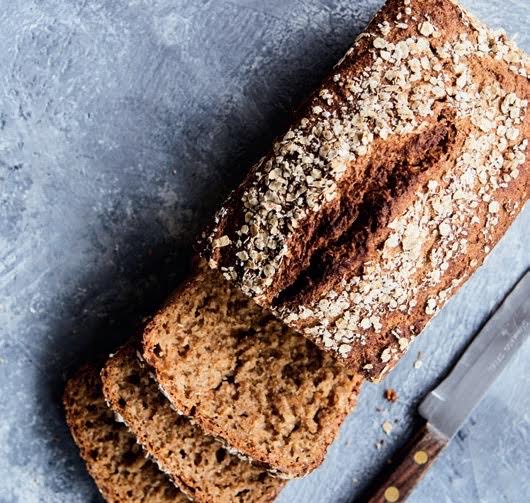
When it comes to slicing your bread, use a serrated bread knife to guarantee clean cuts without squishing the loaf. Aim for slices of medium thickness to showcase the texture of the bread effectively. For a finishing touch, you can garnish your Irish Wheaten Bread with a sprinkle of oats or a drizzle of honey. Now, your bread is ready to be served and enjoyed!
- Allow the bread to cool on a wire rack
- Use a serrated bread knife for clean cuts
- Slice the bread into medium-thick slices
- Garnish with oats or honey
- Serve and enjoy your Irish Wheaten Bread
When serving your Irish Wheaten Bread, consider pairing it with creamy butter or a sharp cheddar cheese. A hot cup of tea or a glass of cold milk can complement the bread’s hearty flavors perfectly.
For a more festive touch, you can serve the bread on a wooden board or a rustic plate. Get creative with your presentation to make the experience even more enjoyable. Let your guests customize their slices with different toppings or spreads to add a personal touch to their meal. Enjoy this traditional Irish treat with your favorite beverages and accompaniments for a delightful dining experience.

Irish Wheaten Bread Recipe
Course: BreadCuisine: IrishDifficulty: Easy12
servings15
minutes45
minutes180
kcalIrish Wheaten Bread, also known as Brown Soda Bread, is a traditional Irish bread made with whole wheat flour and buttermilk. It's quick and easy to prepare, requiring no yeast or rising time, and offers a hearty, wholesome flavor perfect for any meal.
Ingredients
2 cups whole wheat flour
1 cup all-purpose flour
1 teaspoon baking soda
1 teaspoon salt
2 tablespoons brown sugar
1 1/2 cups buttermilk
1/4 cup melted butter (optional)
Directions
- Preheat the oven to 375°F (190°C) and grease a loaf pan or baking sheet.
- In a large bowl, combine the whole wheat flour, all-purpose flour, baking soda, salt, and brown sugar.
- Create a well in the center of the dry ingredients and pour in the buttermilk and melted butter, if using.
- Mix gently until a soft dough forms. Do not overmix.
- Transfer the dough to the prepared loaf pan or shape it into a round loaf and place on the baking sheet.
- Bake in the preheated oven for 40-45 minutes, or until the bread is golden brown and a toothpick inserted into the center comes out clean.
- Allow the bread to cool on a wire rack before slicing.
Serving and Enjoying
When serving and enjoying this delightful Irish Wheaten Bread, consider pairing it with creamy butter and a drizzle of honey for a delicious experience. The bread pairing of rich butter and sweet honey complements the hearty flavor and slightly nutty undertones of the wheaten bread, creating a symphony of tastes in every bite.
As you take a warm slice and spread a generous amount of butter, notice how it melts into the bread, enhancing its moist and dense texture. If you have a preference for a crustier exterior, lightly toasting the slices can add a delightful crunch while keeping the inside soft and tender.
To truly savor this traditional Irish treat, enjoy it with a hot cup of tea or coffee, allowing the flavors to mingle on your palate. The simplicity of the ingredients in the wheaten bread allows for versatility in accompaniments, so feel free to experiment with different spreads or toppings to suit your taste buds.
With each bite, relish the comforting warmth and wholesome goodness of this homemade bread, perfect for any time of the day.
Frequently Asked Questions
Can I Substitute Whole Wheat Flour With All-Purpose Flour?
Yes, you can substitute whole wheat flour with all-purpose flour in your recipe. The baking results may differ slightly. All-purpose flour might yield a lighter texture compared to whole wheat flour, altering the taste subtly. Adjust liquids accordingly for desired consistency.
How Long Should I Let the Dough Rise?
You can let the dough rise until it doubles in size, usually around 1-2 hours. The rising time may vary depending on the flours used. A longer rise creates a lighter texture. Bake at 375°F for a crisp crust.
Can I Add Nuts or Seeds to the Bread?
Yes, you can definitely add nuts or seeds to your bread. Nutty variations and seed additions will elevate your loaf, providing crunchy textures and unique flavors. Experiment freely to create a personalized and delicious recipe.
Should I Preheat the Baking Pan Before Adding the Dough?
To achieve a perfect crust texture and maintain even baking, preheat the baking pan before adding the dough. This step helps guarantee the baking temperature, promotes proper oven placement, and enhances the consistency of the dough.
Can I Freeze the Bread for Later Use?
When it comes to baking tips, freezing techniques can be a game changer. Yes, you can freeze the bread for later use! Slice it before freezing for easy access to deliciousness anytime. Enjoy your freshly baked bread on demand.
Conclusion-Irish Wheaten Bread Recipe
Now that you’ve baked your delicious Irish wheaten bread, it’s time to savor every bite. Remember, ‘bread is the staff of life,’ and this hearty loaf is sure to be a staple in your kitchen.
Whether enjoyed warm with butter or toasted with jam, this bread is a true taste of Ireland. So sit back, relax, and indulge in the simple pleasure of homemade bread.
Sláinte!