So, you’ve mastered the art of making plain bread. Congratulations! Now, it’s time to take your bread-making skills up a notch with a little something called herb bread.
Oh, the possibilities that lie within those green little leaves! In this discussion, we’ll explore the secrets of creating a mouthwatering herb bread that will leave you craving for more.
But trust me, it’s not just about adding a sprinkle of herbs and calling it a day. There’s a whole world of flavors waiting to be discovered, and I promise you won’t be disappointed.

Contents
- 1 Key Takeaways
- 2 Ingredients
- 3 Mixing the Dough
- 4 Adding the Herbs
- 5 Proofing the Bread
- 6 Baking the Bread
- 7 Serving and Enjoying
- 8 Nutrition facts
- 9 Frequently Asked Questions
- 9.1 Can I Substitute Dried Herbs for Fresh Herbs in This Herb Bread Recipe?
- 9.2 How Long Does the Dough Need to Proof Before Baking?
- 9.3 Can I Use a Bread Machine to Make This Herb Bread Recipe?
- 9.4 Can I Freeze the Baked Herb Bread for Later Use?
- 9.5 How Long Can I Store the Baked Herb Bread Before It Goes Bad?
- 10 Conclusion
Key Takeaways
- Harvest herbs at their peak freshness and flavor to ensure the best taste and health benefits.
- Properly measure ingredients and knead the dough to maintain the right balance and achieve a light and airy texture.
- Choose fresh herbs for vibrant colors and fragrant scents, and finely chop them to release their essential oils.
- Experiment with different herb combinations and alternative herbs to create unique and flavorful herb bread.
Ingredients
To create a flavorful herb bread, gather the essential ingredients that will infuse your loaf with aromatic goodness. When it comes to choosing the right herbs for your bread, the possibilities are endless. You can experiment with various combinations to find the perfect blend that suits your taste buds. Some popular herbs to consider include rosemary, thyme, basil, oregano, and dill. These herbs not only add a burst of flavor but also provide numerous health benefits.
When it comes to storing and preserving herbs for future use, there are a few tips to keep in mind. First, it’s important to harvest your herbs at the right time. For most herbs, this is when they’re at their peak freshness and flavor.
Next, you can dry your herbs by tying them in small bundles and hanging them upside down in a dry, well-ventilated area. Alternatively, you can also freeze your herbs by chopping them and placing them in ice cube trays filled with water or oil. This way, you can easily pop a herb-infused ice cube into your bread dough whenever you need it.
Mixing the Dough
Now that you have gathered the perfect blend of aromatic herbs for your herb bread, it’s time to dive into the exciting process of mixing the dough. This is where the magic happens, as the combination of herbs and dough come together to create a flavorful and fragrant loaf.
To help you achieve the perfect dough consistency, here are some tips to keep in mind.
First, let’s talk about the different types of herbs you can use in your herb bread. The options are endless and can be tailored to your taste preferences. Some popular choices include rosemary, thyme, basil, and oregano. These herbs not only add a burst of flavor but also provide a delightful aroma that will fill your kitchen as the bread bakes.
To ensure your dough reaches the ideal consistency, it’s important to follow a few guidelines. Start by measuring your ingredients accurately to maintain the proper balance. Too much flour can result in a dense and dry loaf, while too little can make the dough sticky and difficult to work with. Additionally, kneading the dough for the recommended amount of time is crucial for developing gluten and achieving a light and airy texture.
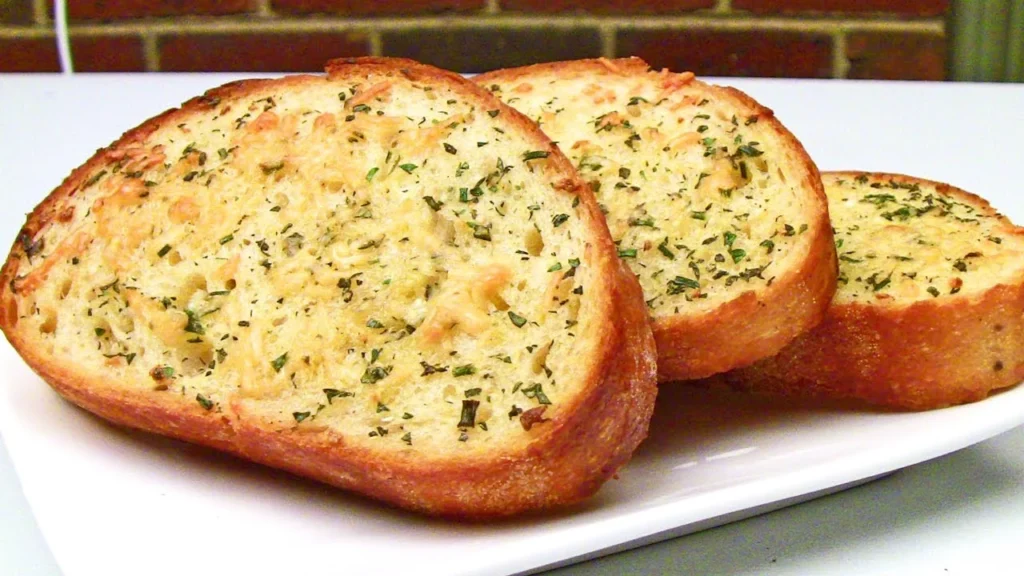
Adding the Herbs
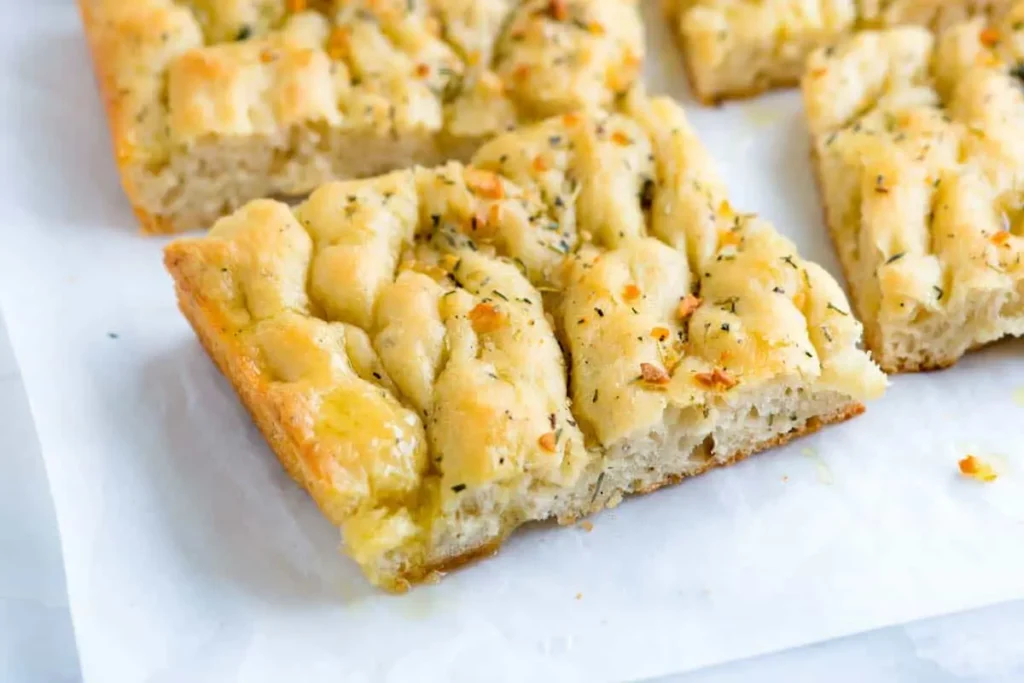
Enhance the flavor and aroma of your herb bread by carefully incorporating the herbs into the dough mixture. Choosing the right herbs is crucial in achieving the perfect balance of flavors. When selecting herbs for your bread, opt for fresh ones whenever possible. Their vibrant colors and fragrant scents will infuse your bread with a delightful taste and aroma.
Some popular choices for herb bread include rosemary, thyme, basil, and oregano. These herbs provide a robust and savory flavor that pairs well with a variety of dishes. However, don’t be afraid to experiment with alternative herbs to create a unique and personalized bread. Consider trying dill, chives, sage, or even a combination of herbs for a more complex flavor profile.
To incorporate the herbs into the dough, finely chop them to release their essential oils. This will ensure that the flavors are evenly distributed throughout the bread. Gently fold the herbs into the dough mixture, being careful not to overmix. You want the herbs to be evenly dispersed without creating a dense texture.
Adding herbs to your bread not only elevates its taste but also adds visual appeal. The specks of green scattered throughout the loaf make it a visually enticing addition to any table. So go ahead, choose your favorite herbs, and let your creativity shine through in your homemade herb bread.
Proofing the Bread
Now it’s time to tackle the crucial step of proofing the bread.
The first point to consider is the time and temperature. The dough needs to be left in a warm place to rise, usually for about an hour, until it has doubled in size.
This allows the yeast to activate and release carbon dioxide, giving the bread its light and airy texture.
Time and Temperature
To ensure your herb bread rises to perfection, you must carefully control the time and temperature during the proofing process. This step is crucial as it allows the dough to ferment and develop its flavor.
The optimal temperature for proofing herb bread is around 75 to 85 degrees Fahrenheit. If it’s too cold, the yeast will be sluggish and won’t produce enough carbon dioxide. On the other hand, if it’s too hot, the yeast may become too active and result in a dense loaf.
The proofing time can vary depending on the room temperature, but it usually takes around 1 to 2 hours. Keep an eye on the dough, it should double in size.
Proper Yeast Activation
As you move on to the crucial step of proofing the bread, you’ll want to ensure proper yeast activation for that perfect herb bread. Proper yeast activation is essential to achieve a light and fluffy texture and to bring out the full flavor of the herbs.
Here are some tips to troubleshoot common mistakes in yeast activation:
- Check the expiration date of your yeast. Using expired yeast may result in poor activation.
- Use warm water, around 105-110°F, to activate the yeast. Water that’s too hot can kill the yeast, while water that’s too cold may not activate it fully.
- Add a pinch of sugar to the water and yeast mixture. The sugar provides food for the yeast, helping it to activate more efficiently.
Baking the Bread
Now that your dough has been proofed and risen beautifully, it’s time to dive into the next step: baking the bread. This is where the magic happens and your kitchen fills with the irresistible aroma of freshly baked bread.
First, you’ll carefully transfer the dough onto a baking sheet, shaping it into a loaf or any desired shape.
Then, you’ll pop it into a preheated oven and let the heat work its wonders, transforming the dough into a golden, crusty masterpiece.

Mixing the Ingredients
Begin by gathering all the necessary ingredients for the herb bread recipe, as this will ensure a smooth and efficient mixing process.
Now, let’s explore the world of herbs and discover the perfect ones to elevate your herb bread to new heights. Whether you prefer the earthy aroma of rosemary, the fragrant freshness of basil, or the subtle spiciness of thyme, the choice is yours. Experiment with different combinations to create a flavor profile that suits your taste buds.
When it comes to achieving the perfect texture, remember these essential tips:
- First, measure your ingredients accurately to maintain the right balance.
- Second, mix the ingredients gently but thoroughly, using a wooden spoon or your hands.
- Lastly, don’t overmix, as this can result in a dense and tough loaf.
With these tips, you’ll be well on your way to baking a mouthwatering herb bread that will leave everyone craving for more. Enjoy the freedom to create and savor the delicious flavors of homemade bread.
Kneading the Dough
To knead the dough for your herb bread, take a moment to prepare your work surface and gather your tools. Kneading is an essential step in bread-making that shouldn’t be overlooked.
The importance of the kneading technique lies in its ability to develop gluten, a protein that gives bread its structure and texture. As you knead, you’ll notice the dough becoming smoother and more elastic.
Different types of breads, such as baguettes, sourdough, and ciabatta, all require kneading to activate the gluten and create the desired crumb structure.
Proofing and Baking
Once the dough has been kneaded to perfection, it’s time to move on to the crucial step of proofing and baking the herb bread. This is where the magic happens, as the yeast fermentation takes place, creating those delightful air pockets that give the bread its light and fluffy texture.
As the dough rests and rises, the flavors of the herbs intensify, adding a burst of aromatic goodness to every bite.
Here’s what you need to do next:
- Gently shape the dough into a loaf and place it in a greased bread pan.
- Cover the pan with a clean kitchen towel and let it proof in a warm, draft-free area until it doubles in size.
- Preheat your oven to the desired temperature, allowing it to reach the perfect heat for crust development.
Now, with the dough fully proofed and the oven ready, it’s time to bake your herb bread to golden perfection. Enjoy the freedom of creating a delicious loaf that will fill your home with an irresistible aroma.
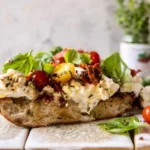
Serving and Enjoying
Enhance your culinary experience by savoring the delectable flavors of our herb bread. Once your bread is baked to perfection, it’s time to explore the various ways you can serve and enjoy this savory treat. From different herb combinations for bread flavoring to creative serving suggestions, there are endless possibilities to tantalize your taste buds.
To start, let’s take a look at some popular herb combinations that can elevate the flavor of your bread. The table below showcases five herb combinations that work beautifully with herb bread:
| Herb Combination | Flavor Profile |
|---|---|
| Rosemary and Thyme | Earthy and aromatic |
| Basil and Garlic | Fresh and zesty |
| Dill and Chives | Light and refreshing |
| Sage and Onion | Savory and robust |
| Cilantro and Lime | Bold and tangy |
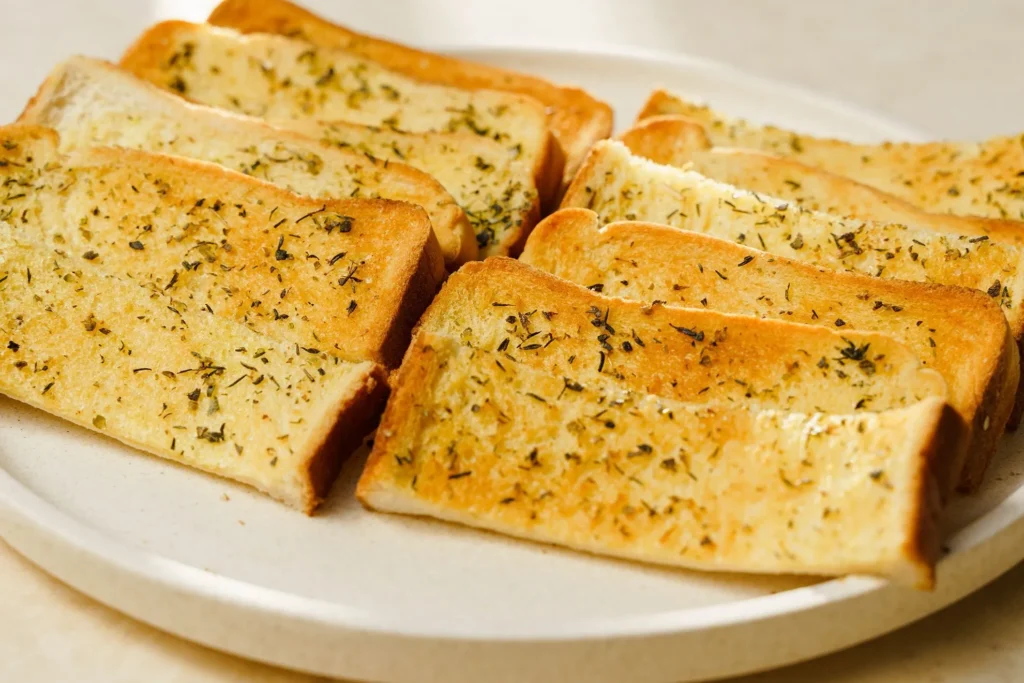
Now that you have your herb bread with an enticing flavor, it’s time to get creative with how you serve and enjoy it. Here are some ideas to get you started:
- Toasted Bruschetta: Slice your herb bread, toast it, and top it with fresh tomatoes, basil, and a drizzle of balsamic glaze.
- Herb Bread Crostini: Cut your herb bread into bite-sized pieces, toast them, and serve with your favorite dips like hummus or roasted red pepper dip.
- Herb Bread Sandwich: Use your herb bread as the base for a flavorful sandwich with your choice of fillings, such as roasted vegetables or herbed cream cheese.
- Herb Bread Panzanella: Cube your herb bread, toss it with fresh tomatoes, cucumbers, onions, and a tangy vinaigrette for a delightful salad.
- Herb Bread Brunch: Slice your herb bread and use it to make delicious French toast or avocado toast for a scrumptious brunch.
With these herb combinations and serving ideas, you can truly make the most of your herb bread and indulge in a culinary experience that is both satisfying and flavorful. So go ahead, unleash your creativity, and enjoy the versatility of herb bread in all its delicious glory.
Nutrition facts
- Calories: 80-100 kcal
- Total Fat: 1-2g
- Saturated Fat: 0-0.3g
- Cholesterol: 0-1mg
- Sodium: 150-200mg
- Total Carbohydrates: 15-18g
- Dietary Fiber: 1-2g
- Sugars: 1-2g
- Protein: 2-3g
Frequently Asked Questions
Can I Substitute Dried Herbs for Fresh Herbs in This Herb Bread Recipe?
You can substitute dried herbs for fresh herbs in the herb bread recipe, but using fresh herbs has its benefits. Fresh herbs add a vibrant flavor and aroma that can elevate the taste of your bread.
How Long Does the Dough Need to Proof Before Baking?
To achieve a perfect rise and flavor in your herb bread, the dough needs to proof for at least 1-2 hours. However, if you’re in a hurry, you can try alternative methods like using a warm oven or a proofing box.
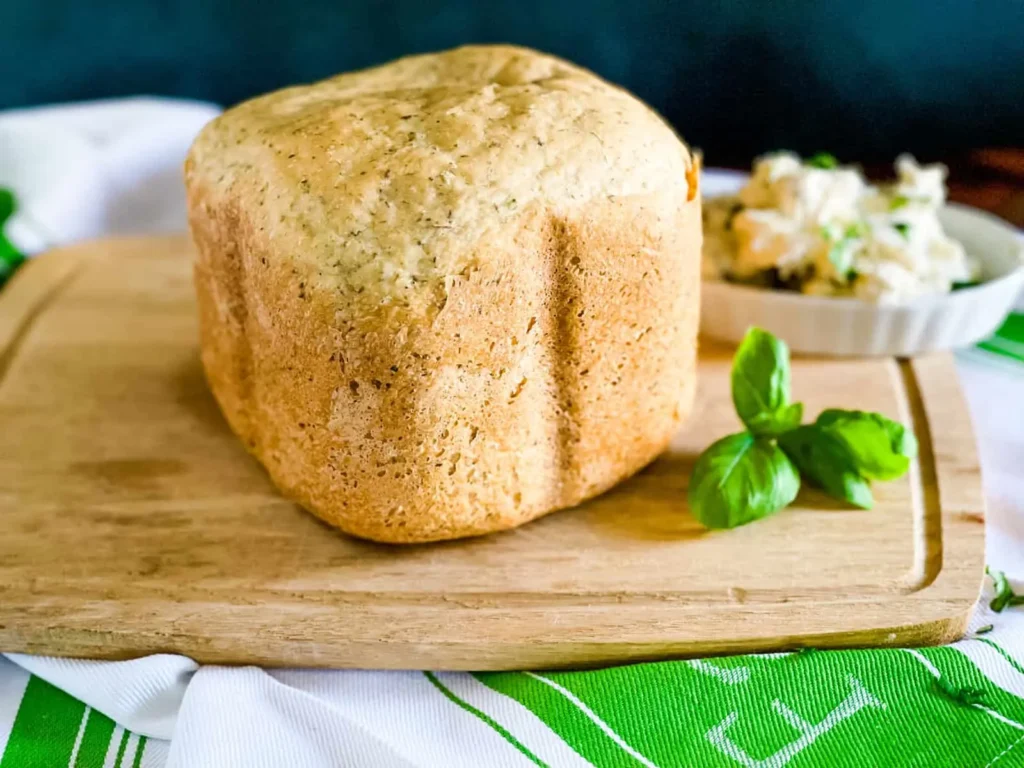
Can I Use a Bread Machine to Make This Herb Bread Recipe?
Yes, you can use a bread machine to make this herb bread recipe! Simply follow the machine’s instructions for adding ingredients and selecting the appropriate setting. Don’t have a bread machine? No worries! I’ll share some tips for making herb bread without one.
Can I Freeze the Baked Herb Bread for Later Use?
Yes, you can freeze the baked herb bread for later use. Simply wrap it tightly in plastic wrap or place it in a freezer bag. It will stay fresh and ready whenever you crave a slice of homemade goodness.
How Long Can I Store the Baked Herb Bread Before It Goes Bad?
You can store your baked herb bread for about 3-4 days before it goes bad. To ensure a longer shelf life, make sure to store it in an airtight container or bag in a cool, dry place.
Conclusion
In conclusion, this herb bread recipe is a must-try for all bread lovers. The combination of fragrant herbs and the soft, chewy texture of the bread is simply irresistible.
Imagine serving slices of this freshly baked herb bread alongside a hearty bowl of tomato soup on a chilly evening. The aroma and taste will transport you to a cozy café in the heart of Tuscany.
Trust me, once you try this recipe, you’ll never go back to store-bought bread again.