Indulge in a flavorful adventure with Gram Flour Bread Recipe. Explore the gluten-free magic of chickpea flour, teasing your taste buds with tantalizing additions like fresh rosemary, garlic powder, and Parmesan cheese. Preheat your oven and express your creativity with endless flavor combos. Knead the dough with care, crafting a dough that’s light and airy. Shape your bread for a visual feast, experimenting with artistic twists. Bake to perfection, savor the golden crust and soft crumb. Learn the secrets of testing doneness and the art of slicing. Discover tips for storage and enjoying this homemade goodness.
Contents
- 1 Key Takeaways
- 2 Ingredients Needed for Gram Flour Bread
- 3 Step-By-Step Instructions for Preparation
- 4 Mixing and Shaping the Bread Dough
- 5 Baking the Gram Flour Bread
- 6 Gram Flour Bread Recipe
- 7 Cooling and Slicing the Finished Bread
- 8 Serving Suggestions and Storage Tips
- 9 Frequently Asked Questions
- 10 Conclusion-Gram Flour Bread Recipe
Key Takeaways
- Experiment with versatile gluten-free options like almond or coconut flour for different textures and flavors.
- Enhance the bread with additional flavors such as rosemary, thyme, garlic powder, sun-dried tomatoes, or Parmesan cheese.
- Follow precise baking instructions for optimal results, including setting the oven temperature and adjusting baking time.
- Test doneness using visual cues and techniques like the golden brown crust, hollow sound, knife test, and crumb texture.
- Serve with creative toppings like avocado smash, honey, or nuts, and store properly for freshness or freeze for longer shelf life.
Ingredients Needed for Gram Flour Bread
To bake a delicious Gram Flour Bread, gather the following essential ingredients. For those seeking flour alternatives or gluten-free options, gram flour, also known as chickpea flour, is the star of this recipe. Its nutty flavor and versatility make it a wonderful gluten-free substitute. You can also experiment with other flour alternatives like almond flour or coconut flour for a unique twist.
Now, let’s talk about flavor additions and herb combinations for your Gram Flour Bread. Fresh rosemary and thyme add a fragrant earthiness to the bread, while a touch of garlic powder or smoked paprika can elevate the taste to new heights. You can also try incorporating sun-dried tomatoes, olives, or even a sprinkle of Parmesan cheese for a Mediterranean flair. The beauty of this recipe lies in its adaptability, so feel free to get creative with your flavor combinations.
With these flour alternatives and gluten-free options, along with a variety of flavor additions and herb combinations, your Gram Flour Bread is sure to be a delicious and personalized creation.
Step-By-Step Instructions for Preparation
Start by preheating your oven to 350°F and greasing a loaf pan with butter or oil. The aroma of freshly baked bread will soon fill your kitchen, creating a warm and inviting atmosphere. As you gather your ingredients, consider the endless possibilities for flavor variations. You could add herbs like rosemary or thyme for a savory twist, or maybe some honey and nuts for a touch of sweetness and crunch.
When preparing the dough, keep in mind your texture preferences. Some might enjoy a denser loaf, while others prefer a lighter, airier crumb. Don’t be afraid to experiment with different ingredient substitutions to tailor the bread to your liking. Perhaps almond flour instead of regular flour for a nuttier taste, or coconut oil instead of butter for a hint of tropical flavor.
As the bread bakes, follow these baking tips to guarantee a perfect result. Keep an eye on the oven to prevent over-browning, and use a toothpick to check for doneness. Once ready, allow the bread to cool slightly before slicing into it. Enjoy the fruits of your labor and savor each delicious bite.
Mixing and Shaping the Bread Dough
Now that you’ve got your dough ready, it’s time to immerse yourself in the satisfying process of kneading and shaping.
Feel the softness of the dough between your fingers as you knead it to the perfect consistency. Then, get creative and shape it into loaves, rolls, or any form your heart desires.

Kneading the Dough
As you prepare to knead the dough for your gram flour bread, remember that this step is essential for developing the bread’s structure and texture.
The key to achieving the perfect dough consistency lies in finding the balance between a slightly sticky yet manageable texture. When kneading, use gentle pressure and rhythmic movements to stretch and fold the dough.
Incorporating kneading techniques like the push, fold, and turn method helps evenly distribute ingredients and develop gluten for a light and airy loaf.
Remember, the goal isn’t only to mix the ingredients but also to create a cohesive dough that will rise beautifully during baking.
Enjoy the process of kneading, as it’s where the magic of bread-making truly begins!
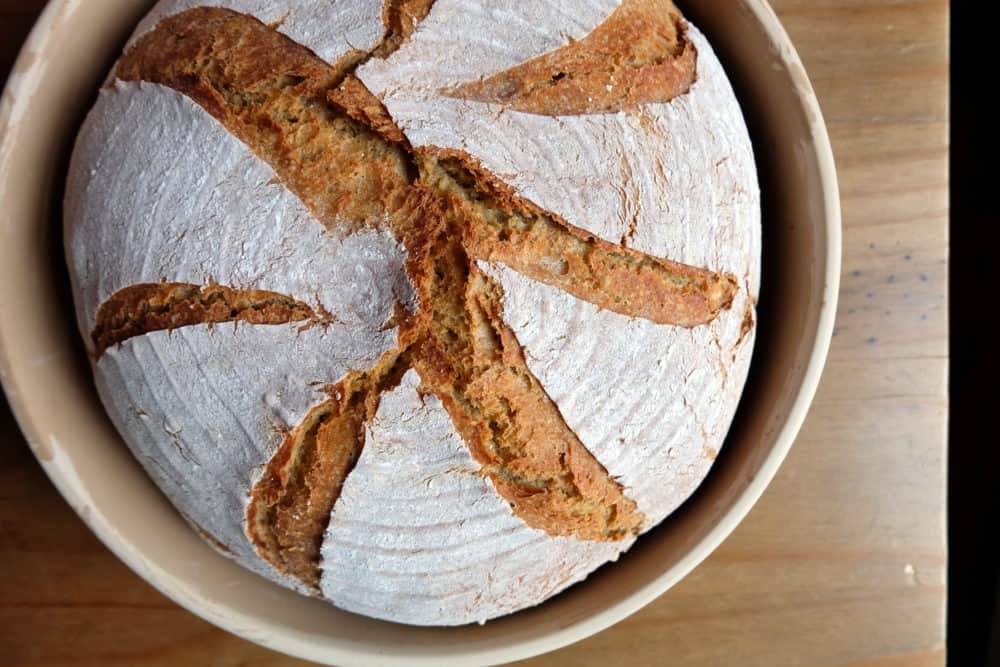
Forming Bread Shapes
When shaping your gram flour bread dough, consider the artistry in crafting each loaf into unique forms that not only enhance its visual appeal but also contribute to its texture and flavor profile. Embrace your creativity by experimenting with various bread sculpting techniques to achieve stunning and delicious results. From simple twists and braids to intricate patterns and designs, the shape of your bread can elevate the overall experience of enjoying it. Express yourself through your bread-making process and let your imagination run wild as you explore different creative bread shapes. Whether you opt for traditional forms or innovative structures, each loaf is a canvas waiting for your personal touch. Let your hands mold the dough into edible works of art that delight both the eyes and the taste buds.
| Creative Shapes | Description | Benefits |
|---|---|---|
| Braided Loaf | Interwoven strands | Enhanced presentation |
| Spiral Rolls | Swirled dough | Even baking |
| Flower-shaped Buns | Petal-like divisions | Unique look |
| Heart-Shaped Bread | Symbol of love | Great for special occasions |
| Animal-Shaped Rolls | Fun and playful designs | Kids love them |
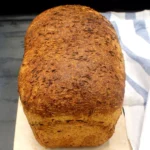
Baking the Gram Flour Bread
Now that you’ve shaped your gram flour bread, it’s time to bake it to perfection. Set your oven to the recommended temperature and keep an eye on the clock for that golden crust.
To make certain it’s done, insert a toothpick into the center – if it comes out clean, your delicious bread is ready to be enjoyed.
Oven Temperature and Timing
Set your oven to the recommended temperature and prepare to bake the delicious Gram Flour Bread for the perfect amount of time to achieve a golden crust and fluffy interior.
Baking variations can impact the outcome, so make sure your oven placement allows for even heat distribution. If you prefer a darker crust color, consider baking slightly longer, but keep an eye on it to prevent burning. The texture preferences of your bread, whether you like it more dense or airy, can also influence the baking time.
Trust your instincts and use visual cues like browning to gauge when it’s ready. With the right oven temperature and timing, you’ll soon be enjoying a freshly baked Gram Flour Bread that meets all your expectations.
Testing Bread Doneness
To guarantee your Gram Flour Bread is perfectly baked, rely on visual cues like a golden brown crust and a hollow sound when tapping the bottom to test for doneness.
Once the baking time is up, carefully remove the bread from the oven. Gently tap the bottom of the loaf – if it sounds hollow, it’s ready.
Another way to check is by using the knife test. Insert a clean knife into the center of the bread; if it comes out clean without any sticky dough attached, your bread is done.
The crumb texture should be soft and slightly springy, indicating a well-baked loaf. Trust your instincts and these simple tests to make sure your Gram Flour Bread turns out just right.

Gram Flour Bread Recipe
Course: BreadCuisine: Indian-inspiredDifficulty: Medium10
servings20
minutes50
minutes150
kcalGram Flour Bread Recipe offers a nutritious and flavorful alternative to traditional bread, using gram flour (chickpea flour) as a primary ingredient. This bread is rich in protein and has a unique, nutty taste, making it an excellent choice for those seeking gluten-free or high-protein bread options.
Ingredients
1 cup gram flour (chickpea flour)
1 cup all-purpose flour (or gluten-free flour blend)
1 cup water
2 tablespoons olive oil
1 tablespoon sugar
1 teaspoon salt
2 teaspoons baking powder
1 teaspoon cumin seeds (optional)
1 teaspoon dried herbs (optional)
1/4 teaspoon turmeric powder (optional)
Directions
- Preheat the oven to 350°F (175°C) and grease a loaf pan.
- In a large bowl, combine the gram flour, all-purpose flour, baking powder, salt, cumin seeds, dried herbs, and turmeric powder.
- In a separate bowl, mix the water, olive oil, and sugar until the sugar dissolves.
- Gradually add the wet ingredients to the dry ingredients, stirring until well combined and smooth.
- Pour the batter into the prepared loaf pan and smooth the top with a spatula.
- Bake in the preheated oven for 40-50 minutes, or until a toothpick inserted into the center comes out clean.
- Allow the bread to cool in the pan for 10 minutes, then transfer it to a wire rack to cool completely before slicing.
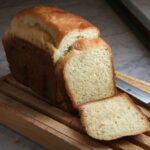
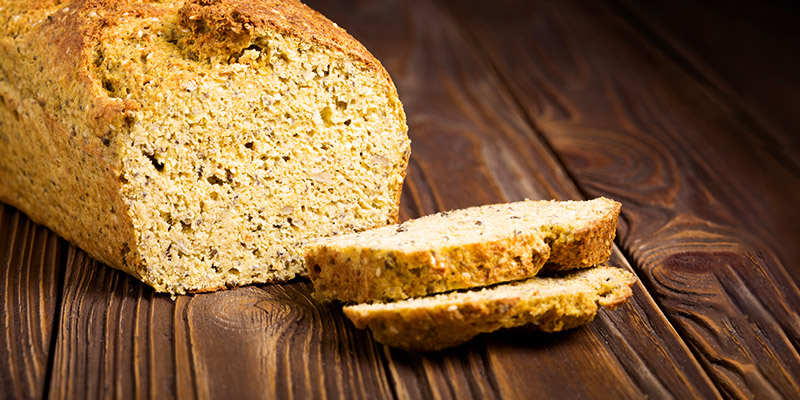
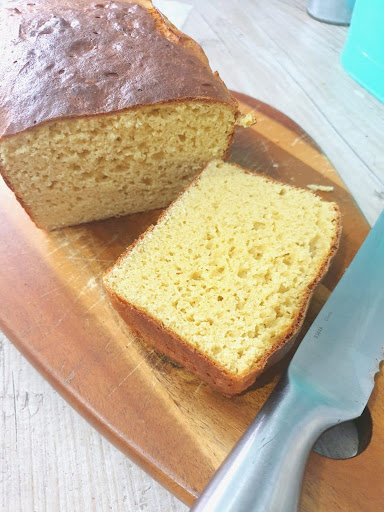
Cooling and Slicing the Finished Bread
After allowing the Gram Flour Bread to cool for at least 10 minutes, grab a sharp serrated knife to slice through its golden crust and reveal the fluffy interior within. The key to achieving perfect slices lies in the way you handle the knife. Make sure to use a gentle sawing motion instead of pressing down too hard, as this can squish the bread. For even slices, try to maintain a consistent thickness throughout.
When it comes to storing your freshly sliced bread, maintaining it in an airtight container or wrapped in plastic is crucial to preserve its moisture and prevent it from drying out. If you anticipate finishing the loaf within a day or two, leaving it at room temperature should suffice. However, for longer storage, consider freezing the slices individually for quick access later on.
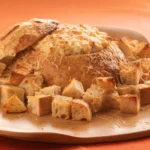
Serving Suggestions and Storage Tips
Enhance the experience of enjoying your Gram Flour Bread by pairing it with complementary spreads and toppings to elevate its flavors and textures. Here are some serving variations to inspire your culinary creativity:
- Avocado Smash: Top your Gram Flour Bread with a generous spread of mashed avocado, a sprinkle of red pepper flakes, and a drizzle of olive oil for a creamy and invigorating twist.
- Mediterranean Delight: Layer slices of fresh tomato, cucumber, and feta cheese on your Gram Flour Bread, then finish it off with a dollop of tzatziki sauce for a revitalizing Mediterranean-inspired snack.
- Sweet and Savory Combo: Spread a layer of fig jam on your Gram Flour Bread, add some prosciutto slices, and a handful of arugula to create a perfect balance of sweet and savory flavors.
When it comes to long-term storage, guarantee your Gram Flour Bread stays fresh by wrapping it tightly in plastic wrap or storing it in an airtight container. For extended freshness, you can also freeze individual slices and toast them when ready to enjoy. This way, you can savor your homemade bread for days to come.
Frequently Asked Questions
Can I Substitute Gram Flour With Another Type of Flour?
Yes, you can substitute gram flour with another type of flour in baking. Experiment with alternatives like almond flour or coconut flour for different flavor variations and texture comparisons. Enjoy exploring new baking techniques!
How Do I Store Leftover Gram Flour Bread?
When storing leftover bread, seal it in an airtight container or wrap it in foil to maintain freshness. To reheat, pop slices in the toaster or oven for a warm, crispy bite. Enjoy every delicious crumb!
Can I Add Extra Ingredients Like Nuts or Seeds?
You can absolutely add extra ingredients like nuts or seeds to your gram flour bread for flavor variations and texture enhancements. Get creative with your mix-ins to personalize your bread and make it uniquely yours!
Can I Bake the Bread in a Different Type of Pan?
Sure, you can definitely bake the bread in a different type of pan if you want to experiment with baking alternatives. Different pans can bring unique textures and shapes to your bread, so go ahead and have fun trying out new options!
Is It Possible to Freeze Gram Flour Bread for Later Use?
Sure, freezing your gram flour bread is totally doable! It’s a great way to extend its life and have a quick snack ready. Just wrap it well in plastic or foil before popping it into the freezer.
Conclusion-Gram Flour Bread Recipe
Now you have a delicious gram flour bread ready to enjoy!
Don’t worry if you don’t have all the ingredients on hand – feel free to get creative and swap in different herbs or spices to suit your taste.
This versatile bread is perfect for sandwiches, dipping in soups, or simply enjoying on its own.
Give it a try and impress your friends and family with your homemade bread baking skills!