


Do you crave the delicious aroma of freshly baked bread, straight out of a brick oven? Then you’re in luck! This brick oven bread recipe will guide you through the process of making your own mouthwatering loaf.
The freedom to knead and shape the dough with your own hands, the joy of watching it rise and proof, and the satisfaction of finally savoring a homemade slice are all within your reach.
No need to be a professional baker, because this recipe is designed for anyone who desires the simple pleasure of baking bread in their own kitchen.
So, roll up your sleeves, gather your ingredients, and let’s get started on this delightful journey to bread perfection.


Contents
- 1 Key Takeaways
- 2 Ingredients
- 3 Mixing the Dough
- 4 Proofing the Dough
- 5 Shaping the Loaf
- 6 Preparing the Brick Oven
- 7 Brick Oven Bread Recipe
- 8 Baking the Bread
- 9 Nutritional Facts:-
- 10 Frequently Asked Questions
- 10.1 How Long Should I Let the Dough Proof Before Shaping the Loaf?
- 10.2 Can I Use a Regular Oven Instead of a Brick Oven to Bake the Bread?
- 10.3 What Type of Flour Is Best for This Bread Recipe?
- 10.4 How Do I Know When the Bread Is Fully Baked and Ready to Be Taken Out of the Oven?
- 10.5 Can I Add Additional Ingredients Like Herbs or Cheese to the Bread Dough?
- 11 Conclusion
Key Takeaways
- Proper dough preparation and proofing are essential for making brick oven bread, including using the right ingredients, proper mixing and kneading techniques, and optimal proofing time and temperature.
- Temperature control is crucial during fermentation and proofing, with an ideal proofing temperature of around 75°F (24°C). Higher temperatures during baking can create a crispy crust.
- Shaping and rising the loaf should be done gently to maintain the dough’s structure, using techniques like folding and tucking the edges and allowing the shaped loaf to rise until doubled in size.
- Preparing and preheating the brick oven is important, ensuring it reaches the right temperature (450-500°F), preheating for at least 30 minutes to an hour, cleaning the oven, building a fire to heat the walls and floor, and monitoring the temperature throughout the process.
Ingredients
To make this delicious brick oven bread, you’ll need a few key ingredients. First, let’s talk about the different types of bread flour.
When it comes to making bread, you have a variety of options. All-purpose flour is a common choice, but for a more flavorful and robust bread, you might want to consider using bread flour. It has a higher protein content, which helps create a chewier texture and a better rise. Another option is whole wheat flour, which adds a nutty flavor and a denser crumb to your bread.
Now, let’s move on to the different types of yeast. Active dry yeast is the most widely available and needs to be dissolved in water before using. Instant yeast, on the other hand, can be added directly to the dry ingredients. It activates faster and gives your bread a quicker rise.
Mixing the Dough
Now it’s time for you to mix the dough for your delicious brick oven bread. The way you handle the dough will greatly affect the final texture and flavor of your bread.
One important aspect to consider is the dough hydration level, which refers to the amount of water in relation to the flour. A higher hydration level will result in a more moist and open crumb, while a lower hydration level will yield a denser texture.
To achieve the perfect dough consistency, you need to use the right kneading technique. This involves folding the dough over itself and pushing it away with the heel of your hand. Repeat this process until the dough becomes smooth, elastic, and slightly sticky. Remember to be patient and allow the gluten to develop fully.
Proofing the Dough
Now it’s time to focus on proofing the dough, a crucial step in the bread making process.
The optimal proofing time can vary depending on the recipe, but generally, you want the dough to double in size.
To achieve this, it’s important to maintain the right temperature, as warmer temperatures will speed up the proofing process while cooler temperatures will slow it down.
Optimal Proofing Time
Have you ever wondered how long you should let your dough proof for the perfect brick oven bread? The optimal proofing time depends on various factors, such as the type of yeast used, the temperature of your kitchen, and the desired texture of your bread. To help you determine the ideal proofing time for your dough, here is a table showcasing different proofing techniques and their corresponding time ranges:
| Proofing Technique | Time Range |
|---|---|
| Warm Proofing | 1-2 hours |
| Cold Proofing | 8-24 hours |
| Overnight Proofing | 12-16 hours |
When using warm proofing, the dough is left in a warm environment, around 80-85°F (27-29°C), to speed up the yeast activation process. Cold proofing, on the other hand, involves placing the dough in the refrigerator, which slows down yeast activity and develops a deeper flavor. Overnight proofing allows for a longer fermentation time, resulting in a more complex and flavorful bread. Experiment with these techniques and adjust the proofing time to achieve the desired results. Enjoy the freedom of creating your own perfect brick oven bread!
Importance of Temperature
To ensure the best results for your brick oven bread, it’s crucial to consider the temperature when proofing the dough. Temperature control during fermentation plays a significant role in the final outcome of your bread.
The ideal temperature for proofing the dough is around 75°F (24°C). This temperature allows the yeast to activate and ferment the dough, resulting in a light and airy texture. If the temperature is too low, the fermentation process will be slow, leading to a dense and heavy loaf.
On the other hand, if the temperature is too high, the dough will rise too quickly, resulting in a coarse and uneven texture. Additionally, temperature also plays a role in achieving a crispy crust. A higher temperature during baking will help create a golden and crunchy exterior, adding to the overall enjoyment of your brick oven bread.
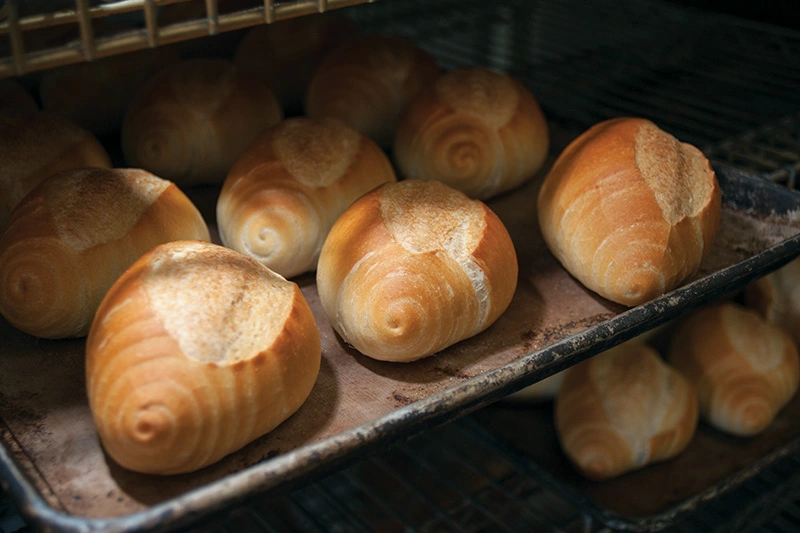
Shaping the Loaf
Shape the loaf by gently folding and tucking the edges under, creating a smooth and round shape. This step is crucial in achieving the perfect crust and ensuring an even rise.
There are different shaping techniques you can use, depending on the desired outcome. One popular method is the envelope fold, where you stretch the dough into a rectangle, then fold the top third down and the bottom third up, sealing the edges.
Another technique is the coil fold, where you roll the dough into a tight coil, tucking the end underneath. Whichever technique you choose, make sure to handle the dough gently to maintain its structure and avoid deflating it.
Once shaped, place the loaf on a parchment-lined baking sheet or in a greased bread pan, cover it with a clean kitchen towel, and let it rise until doubled in size.
Preparing the Brick Oven
Now that your loaf is shaped and ready to be baked, it’s important to prepare your brick oven properly for optimal results.
First, you need to ensure that the oven reaches the right temperature, which is typically around 450-500°F. This may require preheating the oven for at least 30 minutes to an hour, depending on its size and insulation.
Additionally, don’t forget to give your oven a thorough cleaning before baking to remove any debris or residue that could affect the flavor or texture of your bread.
Optimal Oven Temperature
Set your brick oven temperature to the optimal level before baking your bread.
Achieving even heat in the brick oven is crucial for a perfectly baked loaf of bread. To ensure temperature control, start by building a fire in the oven and allowing it to burn for about an hour. This will help heat the walls and floor of the oven, creating an even distribution of heat.
Once the fire has burned down, remove the ashes and embers, and close the oven door to trap the heat inside. Monitor the oven temperature using a thermometer, adjusting the fire if necessary. Aim for a temperature of around 450°F (230°C) for most bread recipes, but consult your specific recipe for exact temperature recommendations.
With the oven preheated to the optimal level, you’re now ready to move on to the next step of the bread-making process: preheating time required.

Preheating Time Required
To ensure proper heat distribution, start by preheating your brick oven for the recommended amount of time. Preheating your brick oven is an essential step in achieving the perfect bread.
Here are three preheating methods and their corresponding preheating temperatures:
- Traditional Method: This method requires building a fire in the oven and allowing it to burn for about 2-3 hours until the oven reaches a temperature of around 700°F (371°C). This method provides a strong and consistent heat source for baking.
- Gas Burner Method: If your brick oven has a gas burner, you can preheat it by turning on the gas and setting the temperature to around 650°F (343°C). Allow the oven to preheat for about 1-2 hours until it reaches the desired temperature.
- Electric Oven Method: For brick ovens with electric heating elements, set the temperature to around 600°F (315°C) and preheat for 1-2 hours.
Preheating your brick oven properly ensures that the heat is evenly distributed, resulting in a perfectly baked bread.
Once your oven is preheated, it’s time to move on to the next step: maintenance and cleaning.
Maintenance and Cleaning
To maintain and clean your brick oven, start by removing any ashes and debris from the previous preheating process. Use a metal shovel or brush to carefully scoop out the ashes, making sure not to disturb the coals that may still be hot. Dispose of the ashes in a designated ash bin or a metal container, ensuring that they’re completely extinguished.
Next, use a damp cloth or sponge to wipe down the interior walls of the oven, removing any remaining debris or soot. For stubborn stains, you can use a mild soap solution. Once the oven is clean, allow it to air dry completely before proceeding to bake the bread.
By following these maintenance tips and cleaning techniques, you’ll ensure that your brick oven is ready to produce delicious bread with each use.
Now, let’s move on to the next step: baking the bread.

Brick Oven Bread Recipe
Course: AppetizerCuisine: EuropeanDifficulty: moderate4
servings20
minutes20
minutes600
kcalThis brick oven bread is a testament to the artistry and tradition of artisanal bread-making. Its golden-brown, crusty exterior conceals a soft and airy interior, creating a delightful contrast in textures with each bite. The aroma wafting from the bread is a harmonious blend of yeasty warmth and a slightly nutty fragrance.
Ingredients
4 cups all-purpose flour
1 1/2 teaspoons salt
1 teaspoon sugar
1 packet (2 1/4 teaspoons) active dry yeast
1 1/2 cups warm water (110°F/43°C)
Cornmeal or flour for dusting
Directions
- In a small bowl, combine warm water and sugar. Stir until the sugar is dissolved.
- Sprinkle the yeast over the water and let it sit for about 5-10 minutes, or until it becomes frothy.
- In a large mixing bowl, combine the flour and salt.
- Make a well in the center of the flour mixture and pour in the activated yeast mixture.
- Gradually incorporate the flour into the wet ingredients until a dough forms.
- Transfer the dough to a floured surface and knead for about 8-10 minutes, or until the dough is smooth and elastic.
- Place the dough in a lightly oiled bowl, cover it with a damp cloth, and let it rise in a warm place for about 1-2 hours or until it has doubled in size.
- If you have a brick oven, preheat it to about 475°F (245°C).
- Punch down the risen dough and turn it out onto a floured surface.
- Shape it into a round or oval loaf.
- Place the shaped dough on a baking sheet or pizza peel dusted with cornmeal or flour.
- Cover it with a cloth and let it rise for another 30 minutes to an hour.
- Use a sharp knife or razor blade to make a few shallow slashes on the top of the dough. This helps the bread expand while baking.
- If using a brick oven, carefully transfer the dough to the preheated oven using a peel.
- If using a conventional oven, preheat it to 475°F (245°C) and bake the bread on a baking stone or directly on a baking sheet.
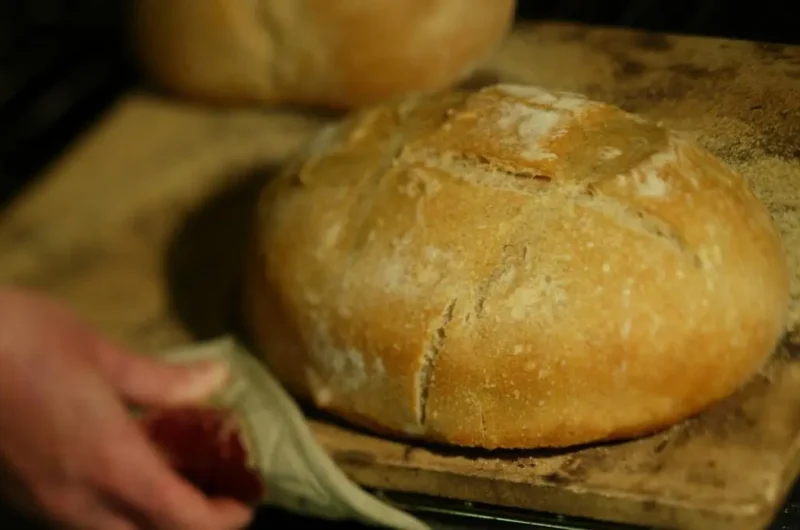
- Bake for about 20-25 minutes, or until the bread is golden brown and sounds hollow when tapped on the bottom.
- Allow the bread to cool on a wire rack before slicing.
Baking the Bread
Place the prepared bread dough onto a preheated brick oven stone. Now that your dough is ready, it’s time to bake it to perfection. Here are some baking techniques and troubleshooting tips to ensure you achieve the best results:
- Keep an eye on the temperature: Maintain a consistent temperature of about 450°F (232°C) throughout the baking process. This will help create a crisp, golden crust.
- Steam it up: Create steam in the oven by placing a pan filled with hot water on the oven floor. This will help the bread rise and develop a beautiful crust.
- Rotate and check: After about 15 minutes, rotate the bread to ensure even baking. Keep an eye on the color and texture, checking for a deep golden brown crust and a hollow sound when tapped on the bottom.
Nutritional Facts:-
Serving Size: 1 slice
Calories: 180
Total Fat: 1g
Saturated Fat: 0g
Cholesterol: 0mg
Sodium: 400mg
Total Carbohydrates: 36g
Dietary Fiber: 2g
Sugars: 1g
Protein: 6g
Frequently Asked Questions
How Long Should I Let the Dough Proof Before Shaping the Loaf?
You should let the dough proof for about an hour before shaping the loaf. This allows the yeast to work its magic and develop the flavors. As for shaping techniques, there are various methods you can try.
Can I Use a Regular Oven Instead of a Brick Oven to Bake the Bread?
You can totally use a regular oven instead of a brick oven to bake the bread. It’s like finding an alternate route to your destination. Just adjust the temperature and time accordingly. Enjoy your freedom!
What Type of Flour Is Best for This Bread Recipe?
For this recipe, different types of bread flour can be used, such as all-purpose flour or bread flour. To achieve a crispy crust, make sure to preheat the oven and bake the bread at a high temperature.
How Do I Know When the Bread Is Fully Baked and Ready to Be Taken Out of the Oven?
You’ll know the bread is fully baked when it has a golden brown crust, sounds hollow when tapped on the bottom, and the internal temperature reaches around 200°F. Trust your senses and experience.
Can I Add Additional Ingredients Like Herbs or Cheese to the Bread Dough?
You can definitely add herbs or cheese to your bread dough! It’s a great way to enhance the flavor. Just be mindful of the proportions and make sure the dough can still rise properly. Get creative and try different combinations for a delicious twist!


Conclusion
Well, congratulations! You have successfully followed the precise and detailed steps to create a brick oven bread that will surely impress your friends and family.
Now, sit back and bask in the glory of your culinary expertise as the heavenly aroma of freshly baked bread fills your kitchen.
Just remember, this bread is so good that you might find yourself being bombarded with requests to share the recipe. But hey, who can blame them?
Enjoy your delicious creation and revel in the envy of all those who didn’t have the skill or patience to make their own.