Are you ready to embark on a culinary adventure that will set your taste buds free? Look no further than this braided sourdough bread recipe, a metaphorical journey that will unleash your inner bread artist.
With its golden crust and soft, pillowy interior, this bread is the key to ultimate freedom in your kitchen. As you knead the dough, you’ll feel the stress of the day melt away, replaced by a sense of liberation and accomplishment.
With each braid carefully crafted, you’ll find yourself becoming one with the dough, weaving your own masterpiece. So, gather your ingredients, roll up your sleeves, and get ready to experience the pure joy and freedom of creating your very own braided sourdough bread.


Contents
- 1 Key Takeaways
- 2 Ingredients
- 3 Mixing and Fermentation
- 4 Shaping and Braiding
- 5 Proofing and Baking
- 6 Braided Sourdough Bread Recipe
- 7 Serving and Storing
- 8 Nutritional Facts:-
- 9 Frequently Asked Questions
- 9.1 Can I Substitute the All-Purpose Flour With Whole Wheat Flour in This Recipe?
- 9.2 How Long Does It Typically Take for the Sourdough Starter to Become Active and Ready for Use?
- 9.3 Can I Freeze the Braided Sourdough Bread Dough Before It Goes Through the Final Proofing Stage?
- 9.4 What Should I Do if My Braided Sourdough Bread Is Not Rising as Much as I Expected During the Proofing Stage?
- 9.5 Can I Add Other Ingredients Like Nuts or Dried Fruits to the Braided Sourdough Bread Dough?
- 10 Can I Use a Bread Machine to Make Braided Sourdough Bread?
- 11 Conclusion
Key Takeaways
- Braided sourdough bread can be made with basic ingredients like flour, water, and salt, with the option to add herbs, dried fruits, or nuts for flavor variations.
- The dough for braided sourdough bread is divided into strands and woven together in a braided pattern, with the option to experiment with different braiding styles and decorative toppings.
- Proper proofing and baking techniques, such as using a baking stone or cast iron skillet and spraying water on the dough, can help achieve a crispy crust.
- To serve and store braided sourdough bread, it is recommended to wrap it in plastic wrap or store it in an airtight container, slice it thickly for serving, and toast the slices before serving with butter or spreads. It can be stored at room temperature for up to two days or frozen for longer storage, with the option to slice it and place parchment paper between each slice to prevent sticking.
Ingredients
To make this delicious braided sourdough bread, you’ll need a variety of ingredients.
First, you’ll need the basic sourdough bread ingredients: flour, water, and salt. However, what sets this bread apart are the additional ingredients that give it its unique flavor. There are different variations of sourdough bread flavors you can try, such as adding herbs like rosemary or thyme for a savory twist, or adding dried fruits and nuts for a sweet and nutty flavor.
When it comes to achieving the perfect crust, there are a few tips to keep in mind. One important tip is to preheat your oven at a high temperature and place a pan of water on the bottom rack to create steam. This will result in a crisp and golden crust. Another tip is to brush the bread with an egg wash before baking, which will give it a shiny and beautiful finish.
Mixing and Fermentation
After you have gathered your ingredients for the braided sourdough bread, it’s time to move on to the next step: mixing and fermentation. This is where the magic happens, transforming simple ingredients into a delicious, tangy loaf of bread. Here are some key aspects to consider during this process:
- Types of sourdough starters: There are various types of sourdough starters to choose from, such as a traditional wild yeast starter or a commercial sourdough starter. Each has its own unique flavor profile and characteristics, so you can experiment and find the one that suits your taste.
- Different fermentation techniques: Fermentation is a crucial step in sourdough bread-making. You can opt for a long, slow fermentation, allowing the dough to develop complex flavors over time. Alternatively, a shorter fermentation period can result in a milder flavor. It’s up to you to decide how tangy and flavorful you want your bread to be.
- Temperature and timing: The temperature at which you ferment your dough can greatly affect the final outcome. Warmer temperatures encourage faster fermentation, while cooler temperatures slow it down. Adjusting the timing and temperature allows you to control the process and achieve the desired results.


Shaping and Braiding
Once you have mixed and fermented your sourdough bread dough, it’s time to shape and braid it into a beautiful loaf.
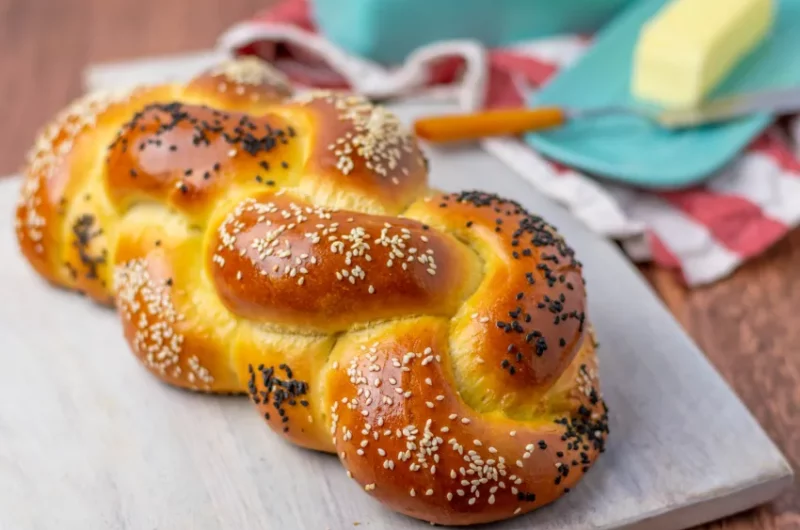
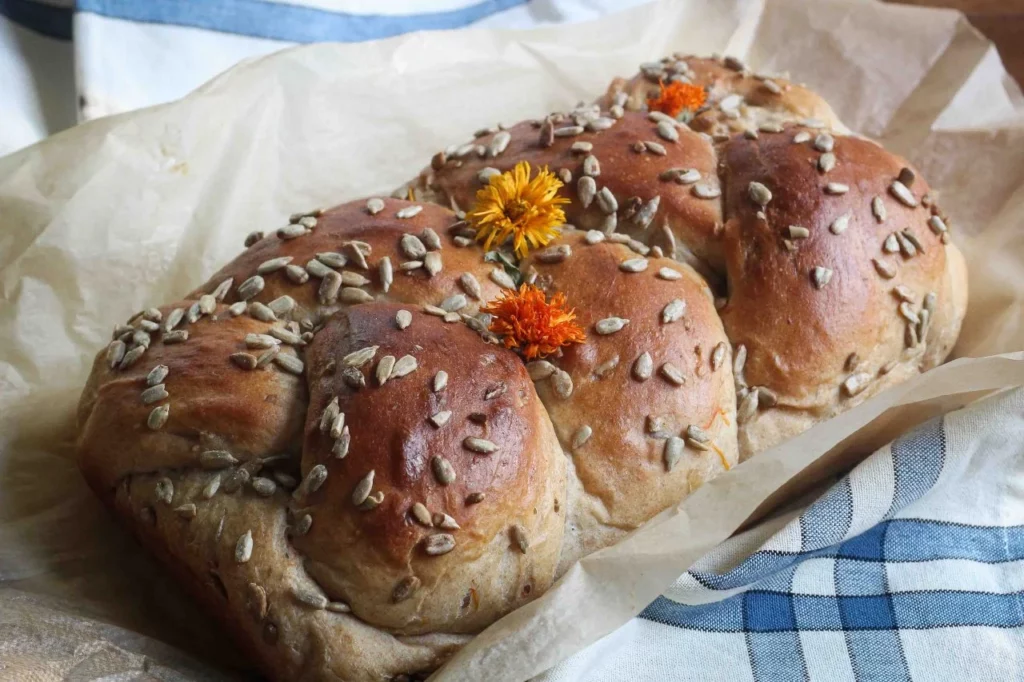
Braiding techniques can add an elegant touch to your bread, making it not only delicious but visually appealing as well.
To begin, divide your dough into equal portions and roll them into long strands. Then, carefully weave the strands together, alternating over and under, until you have created a braided pattern.
You can experiment with different braiding styles, such as a simple three-strand braid or a more intricate six-strand braid, to achieve different looks.
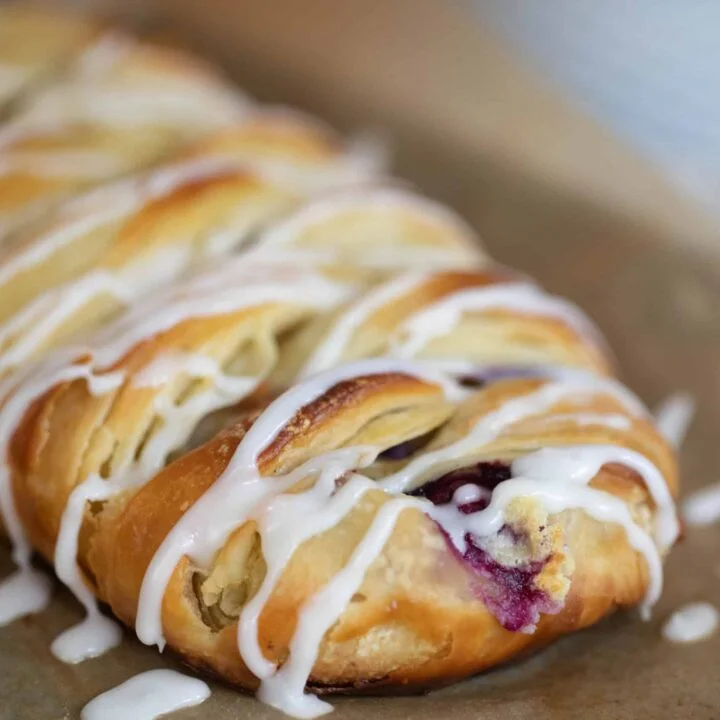
Once you have braided your dough, you can enhance its appearance by adding decorative toppings like sesame seeds, poppy seeds, or even a dusting of flour. These toppings not only add flavor but also create a visually stunning bread.
Now that your dough is shaped and braided, it’s time to move on to the next step: proofing and baking, where the magic truly happens.
Proofing and Baking
Now that your dough is shaped and braided, the final step is proofing and baking to bring out the best flavors and textures in your bread. Here are some tips to help you achieve perfection:
- Different types of sourdough starters: Experiment with different starters to find the one that suits your taste. Whether it’s a classic white starter or a whole wheat one, each will impart its unique flavor to your bread.
- Proper proofing: Give your braided bread enough time to rise. This will allow the flavors to develop and the dough to become light and airy. Keep it covered in a warm place to ensure a good rise.
- Achieving a crispy crust: To get that satisfying crunch, preheat your oven with a baking stone or a cast iron skillet. Spraying water on the dough just before baking will create steam, resulting in a crusty exterior.
By following these tips, you’ll be on your way to baking a delicious, braided sourdough bread with a crispy crust that will impress your taste buds and those around you.
Enjoy the freedom of experimenting with different starters and techniques to make each loaf uniquely yours.

Braided Sourdough Bread Recipe
Course: AppetizersCuisine: Sourdough, ArtisanalDifficulty: Medium4
servings10
hours40
minutes300
kcalDiscover the artistry of sourdough baking as we present our Braided Sourdough Bread Recipe. This unique twist on the classic sourdough brings a delightful blend of rustic charm and culinary sophistication to your kitchen. From the crisp crust to the tangy crumb, this bread promises a truly artisanal experience.
Ingredients
1 cup active sourdough starter
1/2 cups warm water
4 cups bread flour
1/2 teaspoons salt
1 tablespoon honey
Sesame seeds or flaxseeds (optional, for topping)
Directions
- In a large bowl, combine sourdough starter, warm water, and honey.
- Gradually add flour and salt, mixing until a shaggy dough forms.
- Knead the dough on a floured surface until smooth.
- Place the dough in a greased bowl, cover, and let it rise for 4-6 hours or until doubled.
- Punch down the dough and divide it into three equal parts.
- Roll each part into a rope and braid them together, pinching the ends.
- Place the braided dough on a baking sheet, cover, and let it rise for another 2-3 hours.
- Preheat the oven to 400°F (200°C). Brush the dough with water, sprinkle seeds (if using), and bake for 30-35 minutes until golden brown.
Serving and Storing
To serve and store your braided sourdough bread, carefully wrap it in plastic wrap or place it in an airtight container to maintain its freshness. After all the effort put into making this delicious bread, you want to ensure it stays as fresh as possible.
When serving, consider slicing the bread into thick, hearty pieces. The braided shape of the bread adds a beautiful touch to any table setting. For added flavor, you can toast the slices and serve them with butter or your favorite spreads.
As for storage, the best method is to keep the bread at room temperature for up to two days, or you can freeze it for longer storage. When freezing, slice the bread before freezing and place parchment paper between each slice to prevent sticking.
Nutritional Facts:-
Calories: Approximately 180 per serving
Protein: 5g
Carbohydrates: 35g
Fat: 1g
Saturated Fat: 0g
Cholesterol: 0mg
Fiber: 2g
Sugar: 1g
Sodium: 300mg
Frequently Asked Questions
Can I Substitute the All-Purpose Flour With Whole Wheat Flour in This Recipe?
Yes, you can substitute all-purpose flour with whole wheat flour in this recipe. However, keep in mind that it may alter the taste and texture of the bread. Experiment to find the perfect balance for your preference.
How Long Does It Typically Take for the Sourdough Starter to Become Active and Ready for Use?
Typically, it takes about 5-7 days for your sourdough starter to become active and ready for use. During this time, the wild yeasts in the starter multiply, creating the perfect foundation for your bread making process.
Can I Freeze the Braided Sourdough Bread Dough Before It Goes Through the Final Proofing Stage?
Yes, you can freeze the braided sourdough bread dough before the final proofing stage. This allows for convenience and flexibility in your baking schedule. You can also experiment with alternative flours to add unique flavors to your sourdough bread. Enjoy the freedom of frozen dough!
What Should I Do if My Braided Sourdough Bread Is Not Rising as Much as I Expected During the Proofing Stage?
If your braided sourdough bread isn’t rising as much as expected during proofing, don’t fret. Troubleshooting tips for flat bread include checking yeast freshness, warm environment, and sufficient time for fermentation.
Can I Add Other Ingredients Like Nuts or Dried Fruits to the Braided Sourdough Bread Dough?
You can definitely add nuts or dried fruits to your braided sourdough bread dough! Just make sure to incorporate them evenly and adjust the baking time accordingly for a tasty and textured treat.

Can I Use a Bread Machine to Make Braided Sourdough Bread?
Yes, you can use an Amish bread machine recipe to make braided sourdough bread. The bread machine can help with the mixing and kneading process, while you can shape the dough into a braid and bake it in the oven for a delicious homemade bread.
Conclusion
In conclusion, this braided sourdough bread recipe is a delightful combination of flavors and textures.
The tangy sourdough provides a perfect contrast to the soft, chewy interior, making each bite a truly satisfying experience.
So whether you’re a seasoned bread baker or just starting out, give this recipe a try and impress your friends and family with your baking prowess.
Trust me, this bread is the bomb-dough!