Are you ready to experience the ultimate bread-making adventure? Look no further than this mind-blowing Bisquick White Bread Recipe.
Get ready to be amazed as you effortlessly create a loaf of fluffy, mouthwatering bread that rivals anything you can find in a bakery.
With just a few simple ingredients and some easy-to-follow steps, you’ll be enjoying the freedom of homemade bread in no time.
So grab your apron and let’s dive into this delicious journey together.


Contents
- 1 Key Takeaways
- 2 Bisquick White Bread Recipe
- 3 Ingredients Needed
- 4 Mixing the Dough
- 5 Shaping the Loaf
- 6 Baking the Bread
- 7 Cooling and Slicing
- 8 Enjoying Your Homemade Bread
- 9 Nutritional Facts:-
- 10 Frequently Asked Questions
- 10.1 Can I Use Whole Wheat Flour Instead of All-Purpose Flour in the Bisquick White Bread Recipe?
- 10.2 How Long Does It Take for the Dough to Rise After Mixing All the Ingredients?
- 10.3 Can I Add Additional Ingredients Such as Herbs or Cheese to the Bread Dough?
- 10.4 Can I Use a Bread Machine to Mix and Bake the Bisquick White Bread?
- 10.5 How Should I Store the Leftover Bread to Keep It Fresh for Longer?
- 11 Can I Use Bisquick Quick Bread Recipes to Make White Bread?
- 12 Conclusion
Key Takeaways
- Mixing techniques and proper kneading are important for achieving a light texture and rise in Bisquick white bread.
- Finding the right balance of hydration and elasticity in the dough is crucial for a well-formed loaf.
- Proper shaping and rising techniques ensure even baking and a uniform crust in Bisquick white bread.
- Preheating the oven, adjusting baking time, and allowing the bread to cool properly are important steps in achieving a golden crust and fluffy interior in Bisquick white bread.

Bisquick White Bread Recipe
Course: Bread/Side DishCuisine: AmericanDifficulty: Easy4
servings30
minutes1
hour30
minutes300
kcalDive into the world of baking mastery with our Bisquick White Bread Recipe. If you've ever craved the joy of homemade bread but thought it was too complex, think again. This recipe simplifies the process, offering you a delightful loaf with a soft interior and a golden, crispy crust. Get ready to become the bread hero of your household!
Ingredients
3 cups Bisquick baking mix
1 cup milk
3 tablespoons sugar
2 tablespoons melted butter
1 packet (2 1/4 teaspoons) active dry yeast
1/4 cup warm water
Directions
- In a large mixing bowl, combine the Bisquick baking mix and the activated yeast mixture
- Gradually add the milk, stirring continuously to form a soft dough.
- Knead the dough on a floured surface for about 5 minutes, ensuring it becomes smooth and elastic.
- Place the dough in a greased bowl, cover it, and let it rise in a warm place for 1 hour or until it doubles in size.
Ingredients Needed
To make Bisquick White Bread, you’ll need a few simple ingredients. This recipe offers a delightful alternative to traditional bread recipes, perfect for those who desire freedom in their culinary adventures.
The first ingredient you’ll need is 2 and ¾ cups of Bisquick mix. This versatile mix serves as the foundation for your homemade bread.
Next, grab 2 tablespoons of sugar, adding a touch of sweetness to your loaf.
You’ll also need 1 cup of milk to provide moisture and richness to the dough.
Lastly, gather 1 egg, which acts as a binding agent, holding everything together.
With these ingredients in hand, you’re ready to embark on your bread baking journey with Bisquick White Bread.
Mixing the Dough
Now, let’s talk about how to mix the dough properly to achieve the best results.
Mixing techniques play a crucial role in bread making, as they determine the texture and rise of the final product.
You’ll want to ensure that the dough is well combined without overmixing, as this can result in a dense loaf.
Mixing Techniques for Dough
Start by adding the required amount of Bisquick mix to a mixing bowl.
To achieve the perfect dough consistency, it’s important to use the right mixing techniques. Here are some tips to help you master the art of mixing dough:
- Kneading methods: Kneading is a crucial step in bread-making, as it develops gluten and creates a light, airy texture. Use the heel of your hand to push the dough away from you, fold it in half, and repeat. Continue this motion until the dough becomes smooth and elastic.
- Different types of dough hooks: If you have a stand mixer, experiment with different dough hooks to find the one that works best for you. A spiral dough hook is great for heavy doughs, while a C-shaped dough hook is ideal for lighter doughs.
By following these mixing techniques, you’ll be on your way to creating delicious homemade bread with Bisquick mix.
Enjoy the freedom of experimenting and discovering your own personal dough mixing style.


Optimal Dough Consistency
Mastering the art of mixing dough involves achieving the optimal consistency that will result in a light and airy texture for your homemade bread. When it comes to dough, two important factors to consider are hydration and elasticity.
The hydration level determines the amount of water in the dough, which affects its overall moisture content. Too little hydration can result in a dense and dry loaf, while too much can make the dough sticky and difficult to work with.
On the other hand, elasticity refers to the dough’s ability to stretch and hold its shape. A dough with good elasticity will be easier to shape and will rise better during baking.
Finding the right balance between hydration and elasticity is crucial for creating a delicious and well-formed loaf.
Now, let’s move on to shaping the loaf and bringing your bread to life.
Shaping the Loaf
Now it’s time to shape the loaf for that perfect Bisquick white bread.
Proper loaf shaping is essential to ensure even baking and a uniform crust. By shaping the loaf correctly, you can also control the texture of the crust, whether you prefer a softer or crunchier finish.
Lastly, don’t forget to adjust the rising time according to your desired level of fluffiness in the bread.
Proper Loaf Shaping
Once you have mixed the dough thoroughly, it’s important to shape the loaf properly. This step is crucial in achieving a well-formed and evenly baked bread. Here are some loaf shaping techniques to help you master this skill:
- Gently flatten the dough into a rectangular shape using your hands or a rolling pin.
- Starting from one end, tightly roll the dough into a log shape, ensuring that there are no air pockets.
- Pinch the seams together to seal the loaf and create a smooth surface.
Troubleshooting shaping issues:
- If the dough is sticky, lightly flour your hands and work surface to prevent sticking.
- If the dough springs back when you try to shape it, let it rest for a few minutes to relax the gluten before continuing.
- If the loaf ends up lopsided or uneven, gently reshape it using your hands.
Crust Texture Variations
To achieve different crust texture variations when shaping the loaf, you can experiment with different techniques and methods.
If you prefer a softer crust, try using a loaf pan to bake your bread. The enclosed space will trap moisture, resulting in a tender crust.
For a chewier texture, shape your dough into a free-form loaf and bake it directly on a baking sheet. This allows the crust to develop a slightly drier and more substantial texture.
If you desire a crispy crust, consider using a Dutch oven or a baking stone. These methods create a steamy environment during baking, which helps to achieve that delightful crunch.
Don’t be afraid to try different shaping techniques to achieve the crust flavor and texture that you desire.
Rising Time Adjustments
To achieve the desired shape and texture of the loaf, adjust the rising time while shaping it. Here are some tips to help you with this process:
- Adjusting yeast amount: Depending on your preference, you can increase or decrease the amount of yeast used in the recipe. More yeast will result in a faster rise, while less yeast will require a longer rising time.
- Using a bread machine: If you’re using a bread machine, be sure to follow the manufacturer’s instructions on the rising time. Most machines have pre-programmed settings that will automatically adjust the rising time for you.
- Shaping the loaf: Take your time when shaping the loaf to ensure it’s evenly formed. Gently knead the dough and shape it into a smooth, round ball. This will help create an aesthetically pleasing loaf with a consistent texture.
Baking the Bread
Now it’s time to bake your Bisquick white bread.
Preheat your oven to 375°F (190°C) and make sure your oven rack is positioned in the center.
Gently place your risen dough into the preheated oven and set the timer for 25-30 minutes. This is the baking time needed for a perfectly golden crust and a soft, fluffy interior.
As the bread bakes, your kitchen will be filled with a delightful aroma that will make your mouth water.
If you notice the top of the bread browning too quickly, you can tent it with aluminum foil to prevent it from burning.
Once the baking time is up, remove the bread from the oven and let it cool on a wire rack before slicing.
Now sit back, relax, and enjoy the fruits of your labor!
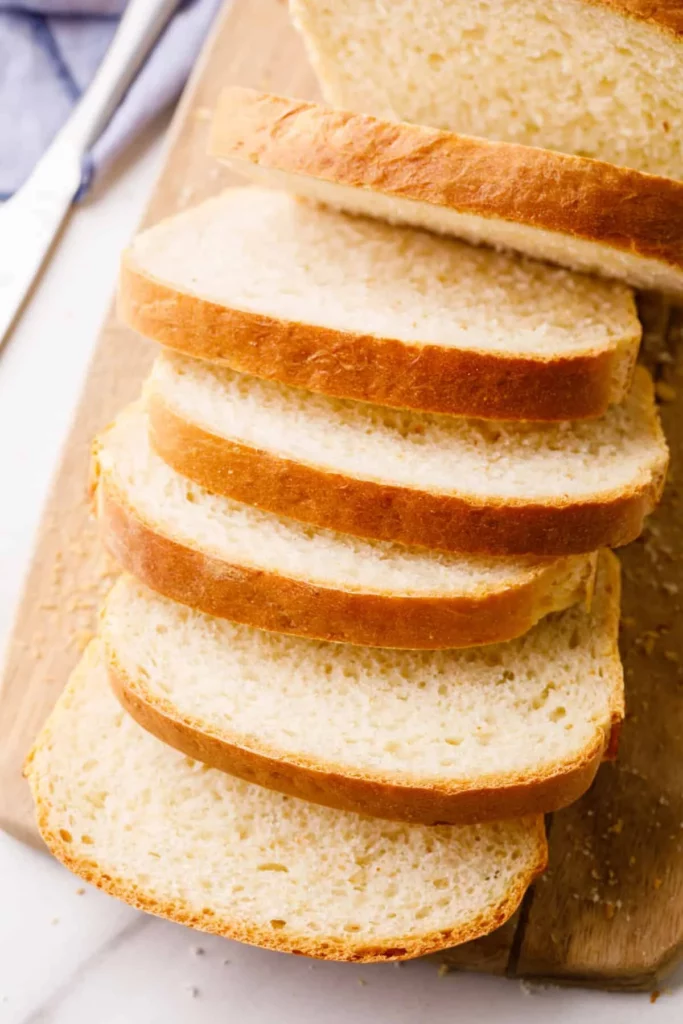
Cooling and Slicing
Once the bread has finished baking, allow it to cool on a wire rack before proceeding to slice it. Cooling the bread properly ensures that it sets and becomes easier to handle.
Here are some cooling techniques and slicing tips to help you achieve the best results:
- Give it time: Resist the temptation to slice into the bread immediately after it comes out of the oven. Allow it to cool for at least 30 minutes to an hour before cutting.
- Use a serrated knife: A serrated knife is perfect for slicing bread as it cuts through the crust without squishing the soft interior.
- Cut in a sawing motion: When slicing, use a gentle sawing motion instead of applying pressure. This will help maintain the bread’s shape and prevent it from getting squashed.
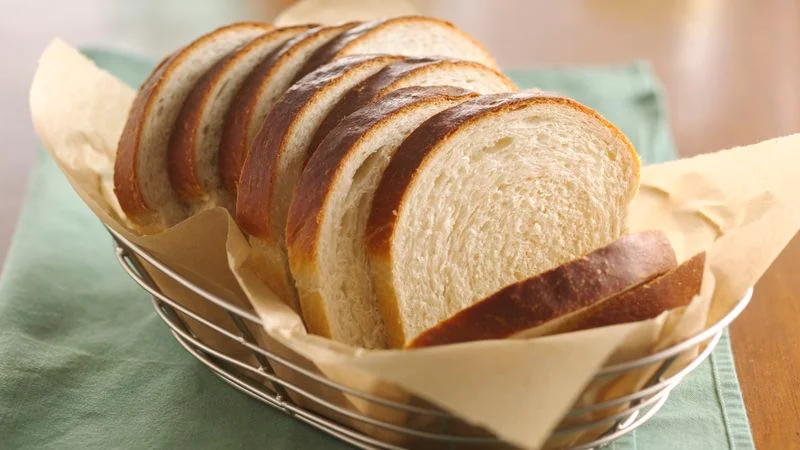
Enjoying Your Homemade Bread
Indulge in the satisfaction of savoring your freshly baked homemade bread. After all, you have put in the time and effort to create this delicious treat. Now it’s time to enjoy it to the fullest.
There are many serving suggestions for your homemade bread. You can slather it with butter or your favorite spreads, such as jam or Nutella. It also makes a great base for sandwiches, whether you prefer classic combinations like turkey and cheese or more adventurous options like avocado and bacon.
As for storage tips, make sure to wrap your bread tightly in plastic wrap or store it in airtight containers to keep it fresh. If you have leftovers, you can also freeze the bread for later enjoyment.
Nutritional Facts:-
- Calories: 180 kcal
- Protein: 3g
- Carbohydrates: 30g
- Fat: 5g
- Saturated Fat: 2.5g
- Cholesterol: 10mg
- Sodium: 380mg
- Fiber: 1g
- Sugar: 5g
Frequently Asked Questions
Can I Use Whole Wheat Flour Instead of All-Purpose Flour in the Bisquick White Bread Recipe?
Yes, you can use whole wheat flour instead of all-purpose flour in the Bisquick White Bread Recipe. Whole wheat flour has more nutrients and fiber, making it a healthier choice.
How Long Does It Take for the Dough to Rise After Mixing All the Ingredients?
After mixing the ingredients, the dough will take about 1-2 hours to rise. To troubleshoot common bread dough issues and achieve the perfect rise, make sure to use warm water and let it rest in a warm, draft-free area.
Can I Add Additional Ingredients Such as Herbs or Cheese to the Bread Dough?
Yes, you can absolutely get creative with the Bisquick White Bread Recipe! Add a burst of flavor by incorporating herbs and spices, or try different types of cheese for a delicious twist. Enjoy the freedom to experiment!
Can I Use a Bread Machine to Mix and Bake the Bisquick White Bread?
Yes, you can use a bread machine to mix and bake the Bisquick white bread. Here are some tips for making it in a bread machine: follow the recipe instructions, set the machine to the appropriate cycle, and enjoy freshly baked bread.
How Should I Store the Leftover Bread to Keep It Fresh for Longer?
To keep leftover bread fresh for longer, store it in an airtight container or wrap it tightly in plastic wrap. Place it in a cool, dry place like the pantry. Enjoy the freedom of enjoying fresh bread whenever you want!


Can I Use Bisquick Quick Bread Recipes to Make White Bread?
Yes, you can use delicious Bisquick quick bread recipes to make white bread. Simply follow the directions for a basic quick bread recipe and substitute the ingredients to make a traditional white bread. The versatility of these recipes allows for endless variations to suit your preferences.
Conclusion
In conclusion, making homemade bread using the Bisquick white bread recipe is a delightful experience.
With its simple ingredients and easy-to-follow directions, you can create a loaf that’s soft, fluffy, and bursting with flavor.
Just like a warm embrace, each slice of this bread is a comforting reminder of the love and care you put into it.
So go ahead, take a bite, and let this homemade bread transport you to a world of pure bliss.