

Ready to impress your taste buds with a homemade loaf of warm and crusty French bread? Look no further than Betty Crocker’s tried and true recipe.
With just a few simple ingredients and some easy-to-follow steps, you’ll be savoring the irresistible aroma of freshly baked bread in no time.
Whether you’re a seasoned baker or a novice in the kitchen, this recipe is sure to bring you a sense of freedom and satisfaction as you create your very own bakery-worthy masterpiece.
Get ready to knead, shape, and bake your way to bread heaven!


Contents
Key Takeaways
- The recipe provides tips for achieving a crispy crust on the French bread, such as preheating the oven to a high temperature and using water or egg wash.
- Different kneading techniques, like the stretch and fold method or the slap and fold method, can result in different textures of bread.
- Rising time variations can affect the texture and flavor of the bread, with shorter rising times creating lighter and airier bread, and longer rising times resulting in a chewier texture.
- Proper shaping, baking, and scoring techniques are important for achieving the perfect texture of the French bread, including preheating a baking stone or sheet and creating steam for proper rise and a chewy interior.

Betty Crocker French Bread Recipe
Course: AppetizerCuisine: FrenchDifficulty: Medium4
servings30
minutes2
hours30
minutes300
kcalEmbark on a culinary journey with Betty Crocker's French Elegance – a recipe designed to transport your taste buds to the charming streets of Paris. Indulge in the art of baking with this delightful French Bread creation that promises both simplicity and sophistication.
Ingredients
4 cups all-purpose flour
1 tablespoon sugar
1 tablespoon active dry yeast
1/2 cups warm water
1 tablespoon olive oil
2 teaspoons salt
Cornmeal for dusting
Directions
- In a bowl, dissolve sugar in warm water, then stir in yeast. Allow it to proof.
- Mix flour and salt in a large bowl. Add the yeast mixture and olive oil.
- Knead the dough until smooth and elastic. Let it rise until doubled in size.
- Punch down the dough, divide in half, and shape into loaves.
- Place on a baking sheet dusted with cornmeal, cover, and let rise again.
- Preheat oven to 375°F (190°C).
- Score the loaves, bake for 25-30 minutes until golden brown.
- Cool on wire racks.
Ingredients
To make Betty Crocker French Bread, you’ll need a few simple ingredients. One of the great things about this recipe is that it allows for different types of French bread variations. You can choose to make a classic baguette, a rustic boule, or even mini bread rolls.
The key to achieving a crispy crust lies in a couple of tips. First, make sure to preheat your oven to a high temperature, around 450°F (230°C), and place a pan of hot water in the bottom to create steam. This will help create a nice crust on the bread. Additionally, brushing the dough with water or an egg wash before baking will also contribute to a crispy crust.
Now that you know the ingredients and tips, it’s time to move on to the next step: mixing the dough.
Mixing the Dough
Now that you have gathered all your ingredients, it’s time to dive into the process of mixing the dough for your homemade French bread.
Kneading techniques play a crucial role in developing the bread’s texture and structure, so make sure to give it a good workout.
Additionally, don’t forget that rising time can vary depending on factors like room temperature and yeast activity, so be patient and allow the dough to double in size before moving on to the next step.
Kneading Techniques
You can achieve the perfect texture for your French bread by incorporating the kneading techniques while mixing the dough. Kneading is important for gluten development, which gives bread its structure and elasticity. The gluten strands form a network that traps the carbon dioxide produced by the yeast, allowing the bread to rise and resulting in a light and airy texture.
There are different kneading techniques that can be used to achieve different bread textures. For a chewier texture, you can use the stretch and fold method. This involves stretching the dough out into a rectangle, then folding it in thirds, like a letter. Repeat this process several times to develop the gluten further.
For a softer texture, you can use the slap and fold method. This involves slapping the dough onto the countertop, then folding it over itself repeatedly. This technique helps to develop the gluten while also incorporating air into the dough.
Experiment with different kneading techniques to find the one that gives you the desired texture for your French bread.

Rising Time Variations
For optimal results, vary the rising time when mixing the dough for your Betty Crocker French bread recipe. This will allow you to experiment with different types of French bread variations and achieve the perfect texture and flavor.
Here are some tips for achieving a crispy crust on your French bread:
- Shorter rising time: If you prefer a lighter and airier bread, reduce the rising time. This will result in a bread with a softer crust.
- Longer rising time: For a chewier texture and a more pronounced flavor, extend the rising time. This will allow the dough to develop more gluten, giving the bread a denser and crustier crust.
- Overnight rise: To enhance the flavor of your French bread, you can also opt for an overnight rise in the refrigerator. This slow fermentation process will create a more complex and flavorful bread.
- Steam in the oven: To achieve a crispy crust, it’s important to create steam in the oven during baking. You can do this by placing a pan of hot water on the bottom rack or by spritzing the dough with water before baking.
By varying the rising time, you can create different types of French bread variations and achieve a crispy crust.
Now, let’s move on to the next step: proofing the dough.
Proofing the Dough
Now that you’ve mixed the dough, it’s time to let it proof.
This step is crucial for developing the bread’s flavor and texture.
To ensure a successful proof, pay attention to rise time recommendations, maintain an ideal room temperature, and activate the yeast properly.
Rise Time Recommendations
In the Betty Crocker French Bread Recipe, ensure the dough’s rise time by following the recommended proofing duration. Proper proofing is crucial for achieving light, airy bread with a perfect texture. Here are some tips to help you get the best results:
- Activate the yeast: Before adding yeast to the dough, activate it by dissolving it in warm water (around 110°F) with a pinch of sugar. Let it sit for a few minutes until it becomes frothy. This ensures that the yeast is alive and active, ready to do its job.
- Follow the recipe’s rise time: The recipe will specify how long the dough needs to rise. Make sure to allow enough time for the yeast to work its magic and for the dough to double in size. This usually takes around 1-2 hours, but it may vary depending on the recipe.
- Keep an eye on the dough: Check the dough periodically during the rise time to ensure it’s progressing as it should. It should be puffy and visibly increased in size.
- Don’t rush it: Avoid the temptation to speed up the rise time by increasing the temperature or using too much yeast. This can result in a dense and uneven texture. Patience is key!
Ideal Room Temperature
To achieve optimal results when proofing the dough for the Betty Crocker French Bread Recipe, maintain the ideal room temperature. The ideal room temperature for proofing dough is around 75°F (24°C). This temperature range provides the optimal conditions for the yeast to ferment and the dough to rise properly.
Maintaining the right temperature is crucial to ensure that the dough rises evenly and develops the desired texture and flavor. If the room is too cold, the fermentation process will be slower, resulting in a denser bread. On the other hand, if the room is too warm, the dough may rise too quickly, leading to a bread with large air bubbles and a less desirable texture.
To help you maintain the ideal room temperature, here’s a table with some tips:
| Temperature | Tips |
|---|---|
| Too cold | – Place the dough near a warm oven or heating source. |
| Ideal | – Keep the dough in a draft-free area. |
| Too warm | – Place the dough in a cooler spot or refrigerate it briefly. |
Yeast Activation Techniques
First, activate the yeast by combining it with warm water and sugar. This step is crucial for ensuring that the yeast is alive and active before adding it to the dough. Here are some yeast activation techniques to help you troubleshoot any issues and understand the different types of yeast:
- Use warm water: The water should be between 105°F and 115°F. Too hot or too cold water can kill the yeast or prevent it from activating properly.
- Add sugar: Sugar acts as food for the yeast, helping it to grow and produce carbon dioxide, which makes the dough rise.
- Wait for bubbles: After combining the yeast, water, and sugar, let it sit for about 5-10 minutes. If the mixture becomes foamy and starts to bubble, it means the yeast is active and ready to be used.
- Different types of yeast: There are different types of yeast available, such as active dry yeast and instant yeast. Follow the recipe instructions to determine which type to use and how to activate it.
Shaping the Loaf
You will frequently shape the loaf of French bread when following this Betty Crocker recipe. Shaping the loaf is an important step in creating the perfect French bread, as it determines the final shape and texture of the bread.
There are different shaping techniques you can use, depending on your preference and the desired outcome. The most common technique is to roll the dough into a rectangle and then tightly roll it into a log shape. Another technique is to divide the dough into smaller portions and make individual baguettes.
If you encounter any issues while shaping the loaf, such as the dough sticking to your hands or not holding its shape, try dusting your hands and work surface with flour. This will help prevent sticking and make it easier to shape the loaf.
Now that you have shaped the loaf, it’s time to move on to the next step: baking the bread.
Baking the Bread
Now it’s time to bake the bread and enjoy the delicious results. Preheat your oven to 425°F (220°C) and follow these baking tips and tricks to ensure a perfect French bread:
- Use a baking stone or a baking sheet: Preheat the stone or sheet in the oven before placing the bread on it. This will help create a crisp crust.
- Create steam: Place a pan of hot water on the bottom rack of the oven. The steam will help the bread rise and develop a chewy interior.
- Score the bread: Use a sharp knife or razor blade to make diagonal slashes on the top of the bread. This will allow the bread to expand while baking.
- Troubleshooting common baking issues: If the bread is browning too quickly, cover it loosely with aluminum foil. If the bread isn’t browning enough, increase the oven temperature slightly.
With these tips and tricks, you’ll have a beautiful, golden French bread that’s crusty on the outside and soft on the inside. Enjoy!
Serving and Storing Options
To ensure your Betty Crocker French bread stays fresh and delicious, consider the following serving and storing options.
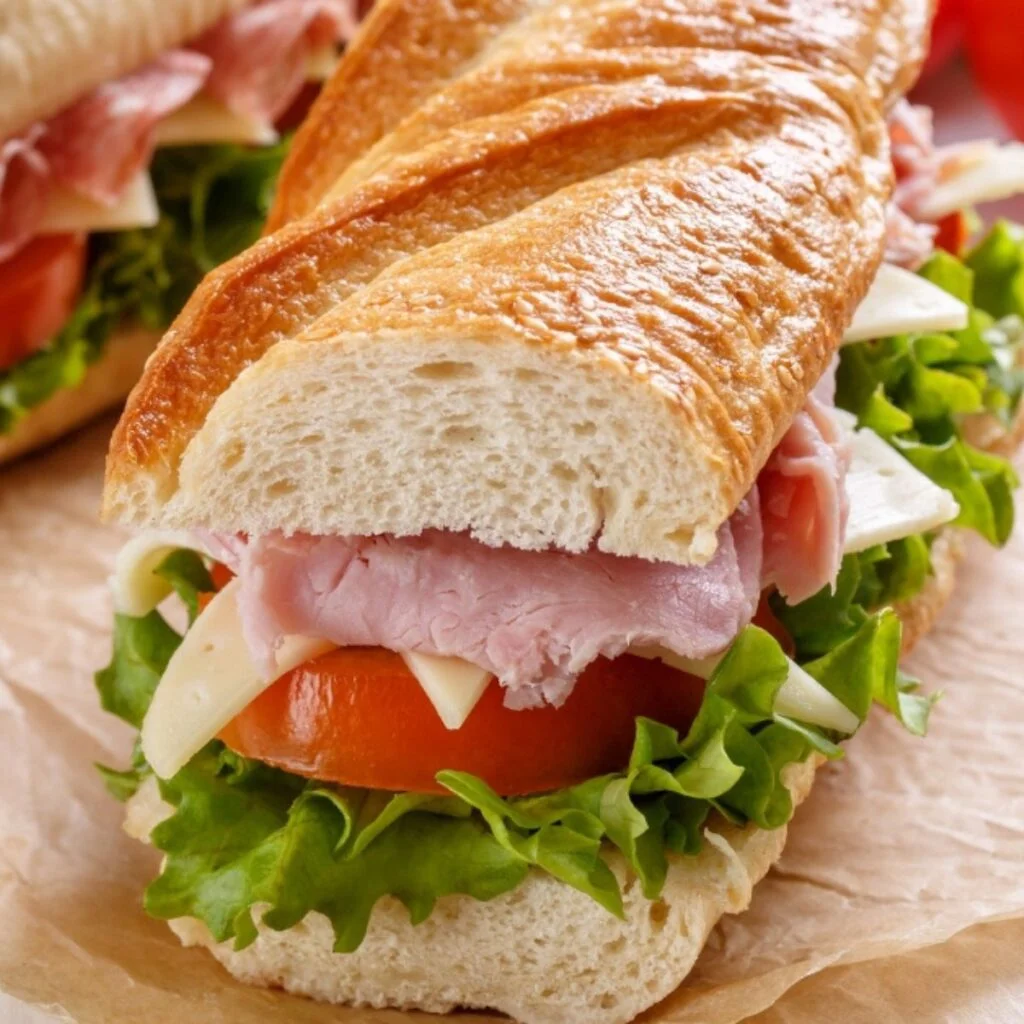
Once your bread is baked to perfection, it’s time to enjoy it. For serving suggestions, slice the bread and serve it warm with butter or your favorite spreads. You can also use it to make delicious sandwiches or crostini.
If you have leftovers, it’s important to store your bread properly to maintain its freshness. To store the bread at room temperature, wrap it tightly in foil or place it in a bread box.
If you want to extend its shelf life, you can freeze the bread. Simply slice it, wrap it in plastic wrap, and place it in a freezer bag. When you’re ready to enjoy it, just thaw it at room temperature or toast it for a crispy texture.
Nutritional Facts:-
- Serving Size: 1 slice
- Calories: 120
- Total Fat: 1g
- Saturated Fat: 0g
- Trans Fat: 0g
- Cholesterol: 0mg
- Sodium: 200mg
- Total Carbohydrates: 24g
- Dietary Fiber: 1g
- Sugars: 0g
- Protein: 3g
Frequently Asked Questions
How Can I Make the French Bread Dough Gluten-Free?
To make the French bread dough gluten-free, try using gluten-free alternatives like almond or rice flour. When baking with gluten-free dough, remember to add xanthan gum for better texture. Experiment and enjoy the freedom of gluten-free baking!
Can I Use a Bread Machine to Mix and Knead the Dough?
Yes, you can use a bread machine to mix and knead the dough for your French bread. It offers benefits like convenience and saves time. However, if you prefer alternative kneading methods, you can also do it by hand or use a stand mixer.
What Is the Ideal Room Temperature for Proofing the Dough?
The ideal room temperature for proofing dough is around 75°F. However, if you don’t have a warm room, there are alternative proofing methods like using a warm oven or a proofing box.
Can I Freeze the Shaped Loaf Before Baking It?
Yes, you can freeze the shaped loaf before baking it. This technique allows you the freedom to prepare the dough ahead of time and bake it whenever you desire. Remember, “good things come to those who wait.”
What Are Some Creative Serving Suggestions for the French Bread?
Get creative with your French bread! Try unique toppings like brie and fig jam, or make delicious bruschetta. Don’t let leftovers go to waste – make French bread pizza or use it for croutons in your salad. The possibilities are endless!

Can I Use the French Bread Recipe in a Bread Machine?
Yes, you can absolutely use the French bread recipe in a bread machine. Simply follow the instructions for your particular machine and enjoy delicious Betty Crocker recipes with ease. The bread machine will do the hard work for you, and you’ll have fresh, homemade French bread in no time.
Conclusion
In the warm embrace of the oven, the Betty Crocker French bread transforms from a simple mixture of ingredients into a golden masterpiece. With its crusty exterior and soft, chewy interior, this bread is a delight to the senses.
As you savor each bite, let it remind you that with a little time and effort, even the simplest ingredients can become something truly extraordinary. Whether enjoyed alone or shared with loved ones, this bread is a testament to the magic that can be found in the kitchen.