

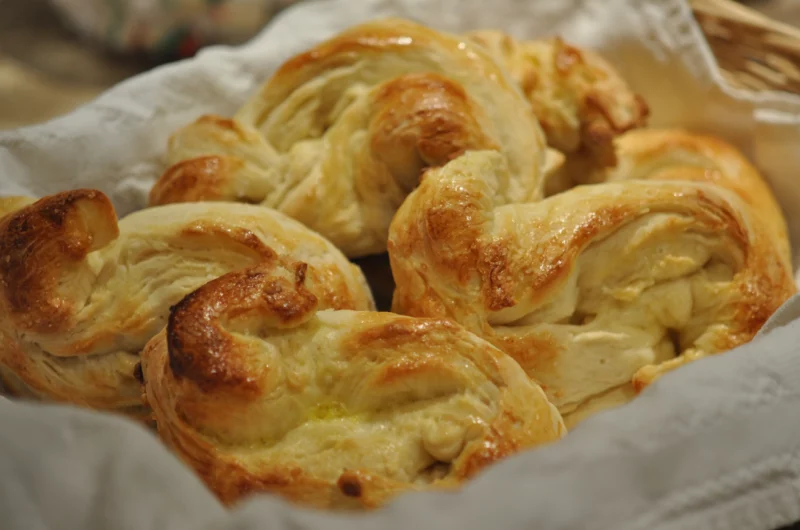
Imagine a warm slice of homemade bread, fresh from the oven, filling your kitchen with its heavenly aroma.
Now, picture yourself in Bethlehem, where tradition and history intertwine. As you knead the dough, you can’t help but feel a connection to the past, to the stories that have been passed down through generations.
This Bethlehem bread recipe is not just about nourishing your body, but also about embracing the freedom to create, to celebrate, and to connect with the rich tapestry of life.

Contents
- 1 Key Takeaways
- 2 Bethlehem Bread Recipe
- 3 Ingredients
- 4 Mixing the Dough
- 5 Proofing the Dough
- 6 Shaping and Baking
- 7 Serving Suggestions
- 8 Storing and Freezing
- 9 Nutritional Facts:-
- 10 Frequently Asked Questions
- 10.1 Can I Use a Bread Machine to Make Bethlehem Bread?
- 10.2 Are There Any Variations of Bethlehem Bread That I Can Try?
- 10.3 How Long Does It Typically Take for the Dough to Proof?
- 10.4 Can I Add Additional Ingredients, Such as Raisins or Nuts, to the Dough?
- 10.5 Can I Freeze the Dough After Shaping and Before Baking for Later Use?
- 11 Conclusion
Key Takeaways
- Proper proofing is essential for achieving a light and airy loaf of Bethlehem bread.
- Experimenting with different proofing times allows for customization of texture and flavor.
- Storing homemade bread in a cool, dry place and freezing it in individual portions can help maintain freshness.
- Revive stale bread by sprinkling it with water and reheating in the oven, or use it in various recipes like French toast, bread pudding, or croutons.
Bethlehem Bread Recipe
Course: SnacksCuisine: Middle Eastern, MediterraneanDifficulty: Medium4
servings30
40
minutes300
Indulge in the rich flavors of tradition with our Bethlehem Bread recipe. This time-honored delight brings the essence of Bethlehem to your table, making every bite a journey through culinary history.
Ingredients
4 cups all-purpose flour
1 packet active dry yeast
1 ½ cups warm water
2 tablespoons olive oil
1 teaspoon sugar
1 teaspoon salt
Directions
- In a bowl, dissolve sugar in warm water. Add yeast, let it activate.
- Mix flour and salt in a large bowl. Pour in the yeast mixture and olive oil.
- Knead the dough until smooth. Let it rise in a warm place until doubled.
- Shape the dough and place it in a greased pan. Let it rise again.
- Bake until golden brown. Enjoy the aroma filling your kitchen!
Ingredients
Gather all the necessary ingredients for making Bethlehem Bread. Before you begin mixing the dough, it’s important to have everything ready. You’ll need flour, yeast, sugar, salt, olive oil, and warm water. These basic ingredients form the foundation of the bread, but you can also experiment with flavor variations. Add herbs like rosemary or thyme for a savory twist, or incorporate honey or cinnamon for a touch of sweetness.
The mixing techniques for Bethlehem Bread are straightforward. Combine the dry ingredients in a large bowl, and then slowly add the warm water and olive oil. Use your hands or a wooden spoon to mix everything together until a soft, pliable dough forms.
Now that you have gathered your ingredients, let’s move on to the next step: mixing the dough.
Mixing the Dough
Now that you have all the necessary ingredients ready, it’s time to mix the dough for your Bethlehem Bread. Follow these kneading techniques to ensure a perfect consistency:
- Begin by combining the dry ingredients in a large mixing bowl. This includes flour, yeast, salt, and sugar.
- Make a well in the center of the mixture and gradually add the wet ingredients. This includes warm water, olive oil, and honey.
- Use your hands to mix everything together until a shaggy dough forms.
- Place the dough onto a lightly floured surface and knead it for about 10 minutes. Apply firm pressure and push the dough away from you, then fold it back over itself.
- If the dough is too sticky, add a little more flour. If it’s too dry, sprinkle a bit of water.
Once the dough has a smooth and elastic texture, you can move on to the next step of proofing it.
Proofing the Dough
Now it’s time to let your dough rest and rise, a process known as proofing. To achieve the best results, ensure your proofing conditions are ideal – a warm, draft-free area is key.
The length of time needed for proofing can vary depending on factors like room temperature and the recipe you’re using. Proper proofing allows the yeast to ferment, creating a light and airy texture in your bread.
Ideal Proofing Conditions
To achieve perfectly proofed dough, ensure that you allow it to rise in ideal conditions. This step is crucial for achieving soft and fluffy bread. Here are some tips to create the perfect proofing environment:
- Maintain optimal humidity levels: The ideal humidity for proofing dough is around 70%. This helps prevent the dough from drying out and forming a hard crust. You can achieve this by covering the dough with a damp cloth or placing a tray of water in the oven.
- Control the temperature: Yeast is sensitive to temperature, so it’s important to keep it in the right range. The optimal temperature for proofing dough is around 80°F to 85°F (27°C to 29°C). You can achieve this by using a proofing box or placing the dough in a warm spot, such as near a preheated oven or on top of the fridge.
- Avoid extreme temperatures: Extremely hot or cold temperatures can affect the yeast’s activity and result in uneven rising. Keep the dough away from drafts, direct sunlight, and cold areas to ensure consistent proofing.

Proofing Time Variations
Allow the dough to proof for different lengths of time to achieve varying levels of flavor and texture in your Bethlehem bread. The proofing time refers to the period during which the dough is left to rise after shaping.
Shorter proofing times result in a lighter, less dense loaf with a milder flavor. This is ideal if you prefer a softer texture and a more subtle taste.
On the other hand, longer proofing times lead to a denser, chewier bread with a stronger flavor. This is perfect for those who enjoy a heartier, more pronounced taste and a rustic texture.
Experiment with both shorter and longer proofing times to find your desired balance between lightness and density, and to cater to your personal flavor preferences.
Benefits of Proper Proofing
To achieve optimal flavor and texture in your Bethlehem bread, it’s important to understand the benefits of proper proofing. Proper proofing allows the dough to rise to its full potential, resulting in a light and airy loaf.
Here are three key benefits of proper proofing:
- Importance of temperature control:
- Maintaining the right temperature during proofing is crucial. Too warm, and the yeast will become overly active, leading to a quick rise and a dense texture. Too cold, and the yeast will be sluggish, resulting in a slow rise and a heavy loaf.
- Controlling the temperature ensures that the yeast ferments the dough at the correct pace, allowing it to develop complex flavors and a light, fluffy texture.
- Impact of yeast on the proofing process:
- Yeast is responsible for the fermentation process that gives bread its characteristic taste and texture. Proper proofing allows the yeast to metabolize the sugars in the dough, producing carbon dioxide gas, which creates air pockets and makes the bread rise.
- The longer the proofing time, the more time the yeast has to work its magic, resulting in a more flavorful and well-structured bread.
- Achieving the desired texture:
- Proper proofing allows the gluten in the dough to relax and stretch, resulting in a soft and chewy texture. It also gives the dough enough time to develop a thin, crispy crust on the outside.
- Rushing the proofing process can lead to a dense and underdeveloped structure, while giving the dough ample time to rise can create a light and airy loaf with a tender crumb.
Shaping and Baking
Shape and bake the Bethlehem bread using these simple steps.
Once your dough has gone through the proofing process, it’s time to shape it into the desired form. There are several shaping techniques you can use, such as braiding or forming it into a round loaf. Experiment and find a shape that appeals to you.
If you encounter any common baking issues, don’t fret. If the bread isn’t rising enough, check your yeast or give it more time to proof. If the crust is too dark, reduce baking time or cover the bread with aluminum foil halfway through.
Once you have shaped the dough, preheat your oven to the recommended temperature and place the bread in the center rack. Bake until golden brown and enjoy the heavenly aroma that fills your kitchen.
Now that your bread is ready, let’s move on to some serving suggestions.
Serving Suggestions
Once you have baked the golden brown Bethlehem bread, it’s time to explore some delightful serving suggestions. Get creative with your bread toppings and experiment with flavors that excite your taste buds. Here are a few ideas to inspire you:
- Spread a generous layer of creamy avocado on top of the warm bread slices, then sprinkle some chili flakes for a spicy kick.
- For a sweet option, try slathering your bread with Nutella and topping it with sliced strawberries and a drizzle of honey.
- If you’re in the mood for something savory, pair the bread with a tangy goat cheese spread and add a few sundried tomatoes for an extra burst of flavor.
These combinations are just the beginning, so let your imagination run wild and create your own unique combinations.
Now that you’ve explored serving suggestions, let’s move on to the next step: storing and freezing your delicious Bethlehem bread.
Storing and Freezing
After exploring serving suggestions for your golden brown Bethlehem bread, it’s time to learn how to properly store and freeze it.
To maintain the freshness and flavor of your homemade bread, there are a few storing methods you can follow. Firstly, ensure that the bread is completely cooled before storing it. Wrap it tightly in plastic wrap or aluminum foil to prevent air from entering. For longer storage, you can place the wrapped bread in a resealable plastic bag or airtight container.
When it comes to freezing techniques, slice the bread into individual portions and wrap each slice tightly in plastic wrap or place them in freezer-safe bags. To thaw, simply remove the desired number of slices from the freezer and let them defrost at room temperature or pop them in the toaster.
Nutritional Facts:-
- Calories: Approximately 150 per serving
- Protein: 4g
- Carbohydrates: 25g
- Fat: 3g
- Fiber: 1g
- Sugars: 1g
- Sodium: 200mg
Frequently Asked Questions
Can I Use a Bread Machine to Make Bethlehem Bread?
Yes, you can use a bread machine to make Bethlehem bread. The bread machine benefits include convenience and ease of use. However, keep in mind that traditional baking methods may result in a more authentic taste and texture.
Are There Any Variations of Bethlehem Bread That I Can Try?
Looking to switch up your Bethlehem Bread recipe? There are plenty of variations and unique twists you can try. Get creative and add your own personal touch to this classic recipe. Enjoy the freedom to experiment!
How Long Does It Typically Take for the Dough to Proof?
Typically, it takes around 1-2 hours for the dough to proof. This is the time needed for the yeast to activate and work its magic, creating those fluffy and delicious bread loaves.
Can I Add Additional Ingredients, Such as Raisins or Nuts, to the Dough?
Sure, you can add raisins or nuts to the dough for Bethlehem bread. This will enhance the flavor and texture, giving it a delicious twist. Experiment with different combinations to find what you love. Enjoy the freedom to customize your bread!
Can I Freeze the Dough After Shaping and Before Baking for Later Use?
Yes, you can freeze the dough after shaping and before baking for later use. Freezing the dough helps to preserve its freshness and allows you to conveniently bake it whenever you desire.

Conclusion
In conclusion, with just a few simple ingredients and a little bit of time, you can create a delicious and authentic Bethlehem bread that will transport you to the streets of the holy city.
The process of mixing, proofing, shaping, and baking may seem daunting, but the end result is well worth the effort.
So why wait? Get your hands on some fresh yeast and flour, and embark on a culinary adventure that will leave your taste buds begging for more.
Stay tuned for more mouthwatering recipes!