

Create a mouthwatering Hour Crusty Bread Recipe by combining flour, yeast, salt, and water to form a shaggy dough. Knead until smooth, then shape it before a final rise. In a preheated oven, bake the dough, scoring it for that perfect expansion. Achieve a crispy crust following simple tips, like precise timing and proper baking temperature. Master the art of baking crusty bread in just an hour with this straightforward recipe that promises a delightful crunch with each bite. See how easy it is to create your homemade loaf quickly!
Contents
Key Takeaways
- Use simple ingredients like flour, yeast, salt, and water for a quick crusty bread.
- Knead dough for 10 minutes until smooth and elastic for the perfect texture.
- Preheat oven adequately and bake at high temperature for a crispy crust.
- Experiment with different flour types or add herbs and cheese for unique flavors.
- Follow precise timing and techniques to master the art of baking crusty bread in just an hour.
Ingredients Needed
For this 1 Hour Crusty Bread recipe, you’ll need just a handful of simple ingredients to create a delicious loaf of bread. When it comes to crusty bread variations, you can experiment with different types of flour like whole wheat or rye to add unique flavors and textures to your bread. You can also add ingredients such as herbs, cheese, olives, or nuts to customize your crusty bread and make it your own.
Now, let’s talk about crusty bread storage tips. To keep your crusty bread fresh and crunchy, it’s best to store it in a paper bag or a bread box at room temperature. Avoid storing crusty bread in plastic bags as they can trap moisture and make the crust soft. If you have leftover crusty bread, you can freeze it by wrapping it tightly in plastic wrap and placing it in a freezer-safe bag. When you’re ready to enjoy it again, simply thaw it at room temperature or reheat it in the oven for that freshly baked taste.
Mixing the Dough
To begin mixing the dough for this 1 Hour Crusty Bread recipe, gather your ingredients and a large mixing bowl. Start by combining the flour, yeast, salt, and water in the bowl. Use a wooden spoon to mix everything together until a shaggy dough forms.
Once the ingredients are roughly combined, it’s time to start the kneading process. Lightly flour a clean surface and turn the dough out onto it. Use the heel of your hand to push the dough away from you, then fold it back over itself. Rotate the dough a quarter turn and repeat this process. Continue kneading for about 10 minutes or until the dough becomes smooth and elastic.
During the kneading process, pay attention to the dough consistency. It should be slightly tacky but not sticky. If the dough feels too wet, add a sprinkle of flour. If it’s too dry, dampen your hands slightly and continue kneading. Achieving the right dough consistency is key to getting a perfect crusty bread.
Preparing for Baking
With the dough now kneaded to perfection, your focus shifts towards readying the bread for its journey into the oven.
- Shaping the Loaf: Gently shape the dough into a round or oval shape, ensuring a smooth top to allow for proper crust development.
- Second Rise: Let the shaped dough rest for a final rise. This step is vital for dough fermentation, which enhances flavor and texture.
- Preheating the Oven: Preheat the oven to the required temperature. A hot oven is essential for achieving a crispy crust.
- Scoring the Dough: Just before baking, use a sharp knife or a blade to score the dough. This allows the bread to expand properly during baking and promotes even crust development.
Baking the Bread
Now that your dough is ready to bake, you’ll want to make sure your oven is preheated to the correct temperature for that perfect crust. Timing plays an essential role in achieving that ideal crunchy exterior and soft interior, so keep an eye on the clock.
These simple tips will help you master the art of baking crusty bread in just an hour.
Baking Temperature Tips
For perfect crusty bread, make sure your oven is preheated to the recommended temperature before placing the dough inside. Here are some essential baking temperature tips to help you achieve that crispy crust you desire:
- Preheat Properly: Guarantee your oven reaches the specified temperature before baking.
- Use an Oven Thermometer: For accurate temperature control, consider using an oven thermometer.
- Avoid Opening the Oven: Refrain from opening the oven door frequently during baking to maintain a consistent temperature.
- Bake on the Correct Rack: Position your bread in the middle rack for even heat distribution and best results.
Timing for Perfect Crust
To attain the perfect crust on your bread, guarantee precise timing during the baking process. The ideal crust color tips involve starting with a high temperature to achieve a deep golden brown hue. For an added crunchiness secret, consider brushing the loaf with water before placing it in the oven and creating steam by adding a tray of ice cubes. When aiming for a specific crust thickness, bake the bread for a shorter period for a thinner crust or a bit longer for a thicker one. To enhance the crust flavor, try adding toppings like seeds, herbs, or a sprinkle of sea salt before baking. Remember, mastering the timing is the key to achieving the crust of your dreams.
| Crust Color Tips | Crust Crunchiness Secrets |
|---|---|
| Start with high temp | Brush loaf with water |
| Aim for golden brown | Use ice cubes for steam |
| Crust Thickness Ideas | Crust Flavor Enhancements |
| Bake shorter for thin | Add seeds or herbs |
| Bake longer for thick | Sprinkle sea salt |
Achieving the Perfect Crust
To achieve the perfect crust on your crusty bread, pay attention to the texture and baking temperature.
The crust texture tips will help you achieve that crispy exterior that complements the soft interior of the bread.
Adjusting the baking temperature secrets can also make a significant difference in the final result.
Crust Texture Tips
Improve the crust of your homemade bread by implementing these expert tips for achieving the perfect texture.
- Consistency and Shaping: Guarantee your dough has the right hydration level to develop a crispy crust. Properly shape your bread before baking to encourage an even crust formation.
- Color and Flavor: Brushing your bread with an egg wash before baking can give it a beautiful golden color and add a rich flavor to the crust.
- Steam: Create steam in your oven during the first few minutes of baking by placing a pan of hot water on the bottom rack. This steam helps develop a crispy crust.
- Cooling: Allow your bread to cool completely on a wire rack after baking. This prevents the crust from becoming soggy and helps maintain its crispiness.

1 Hour Crusty Bread Recipe
Course: BakingCuisine: VariousDifficulty: Easy1
servings10
minutes50
minutes120
kcalThis 1 Hour Crusty Bread Recipe delivers delicious homemade bread in no time. With simple ingredients and minimal effort, enjoy the aroma of freshly baked bread wafting through your kitchen.
Ingredients
3 cups all-purpose flour
1 teaspoon salt
1 tablespoon sugar
1 tablespoon active dry yeast
1 1/2 cups warm water
Directions
- In a large bowl, combine flour, salt, sugar, and yeast. Mix well.
- Gradually add warm water to the dry ingredients, stirring until a sticky dough forms.
- Cover the bowl with a clean towel and let the dough rise in a warm place for 30 minutes.
- Preheat your oven to 400°F (200°C) and place a baking stone or baking sheet inside to preheat as well.
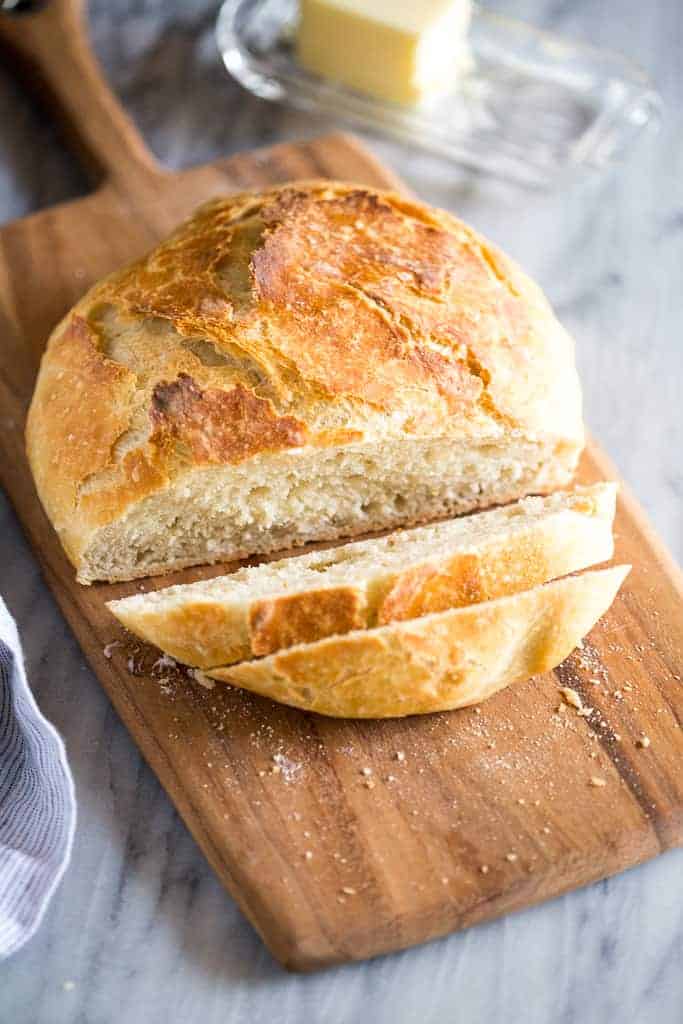
- Once the dough has risen, gently shape it into a loaf on a lightly floured surface.
- Transfer the shaped loaf onto the preheated baking stone or sheet.
- Using a sharp knife, make a few shallow slashes on top of the loaf.
- Bake for 30-35 minutes or until the bread is golden brown and sounds hollow when tapped on the bottom.
- Let the bread cool slightly before slicing and serving. Enjoy your freshly baked crusty bread!
Baking Temperature Secrets
For achieving the perfect crust on your homemade bread, mastering the baking temperature is essential to creating that ideal crispy exterior. Baking techniques and temperature control play an essential role in the crust development of your bread.
To achieve that desired crust, preheat your oven adequately; this initial burst of high heat helps the bread rise and creates a crisp crust. If you want a thicker crust, start baking at a higher temperature for the first 10-15 minutes and then lower it for the remaining time. Additionally, placing a pan of water in the oven while baking can create steam, aiding in crust development.
These oven tricks combined with precise temperature control will help you achieve that perfect crust on your bread.
Enjoying Your Freshly Baked Bread
Indulge in the warm, crispy goodness of your freshly baked bread as soon as it comes out of the oven. There’s nothing quite like the satisfaction of breaking into a loaf of bread you’ve made from scratch. To truly savor the moment, here are some tips to enhance your bread-eating experience:
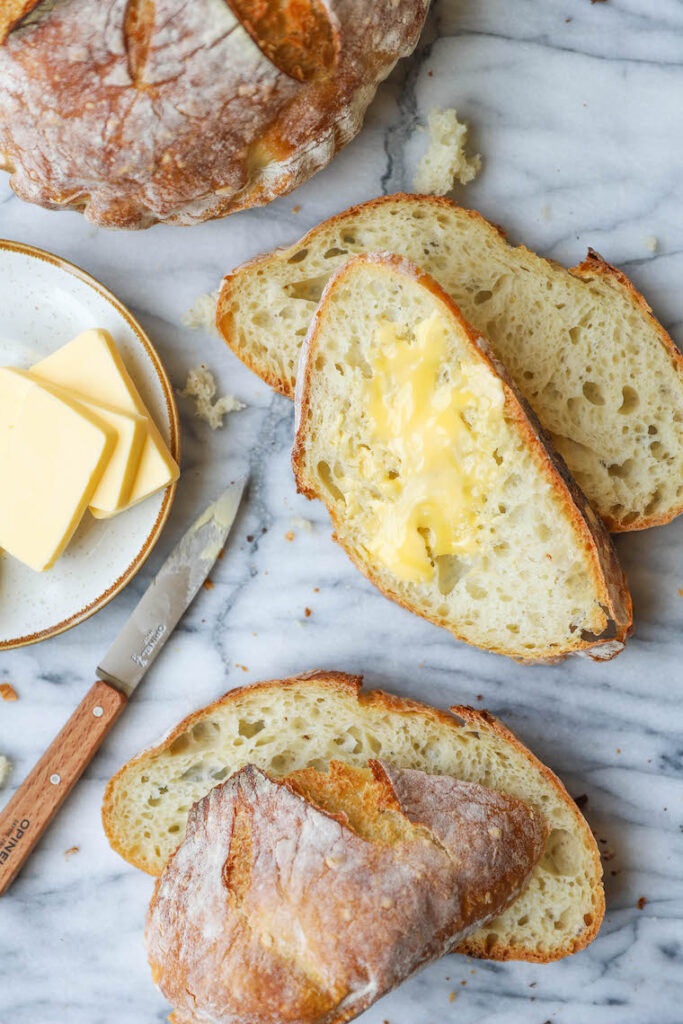
- Bread Slicing Techniques: Use a serrated knife to slice through the crust without squishing the soft interior. For a rustic feel, tear the bread with your hands.
- Pairing Suggestions: Enjoy your bread with a variety of toppings like butter, olive oil, cheeses, jams, or deli meats to elevate the flavors.
- Freshness Maintenance: To keep your bread fresh, store it at room temperature in a paper bag for up to two days. Avoid storing in plastic as it can make the crust soggy.
- Reheating Tips: If your bread has lost its crispiness, pop it in the oven for a few minutes to revive its crust and warm the inside.
Frequently Asked Questions
Can This Bread Recipe Be Made Gluten-Free?
Yes, you can make the bread recipe gluten-free by using alternative flours like almond or buckwheat. These flours can help achieve a crusty texture similar to wheat-based bread. Experiment with baking techniques for the perfect loaf.
Can I Substitute the All-Purpose Flour With Whole Wheat Flour?
Substituting all-purpose flour with whole wheat flour in the recipe will enhance the bread’s nutritional profile, providing a nuttier taste. However, whole wheat flour absorbs more liquid, affecting the texture. Adjust hydration levels for best results.
How Long Can I Store the Bread After Baking?
To keep your bread fresh, store it in a paper bag or bread box at room temperature for up to 3-4 days. Alternatively, freeze slices in airtight bags for longer shelf life. Avoid the fridge to prevent drying out.
Can I Freeze the Dough Before Baking?
Want to save time? Yes, you can freeze the dough before baking! By preparing the dough in advance, you can easily bake fresh bread later. Freezing dough allows for convenient baking and guarantees a warm, delicious loaf.
Can I Add Additional Ingredients Like Herbs or Cheese to the Dough?
Yes, you can enhance your bread by adding flavorful ingredients like herbs or cheese. These additions not only introduce exciting flavor variations but also contribute to unique texture preferences, making your homemade bread even more delicious.
Conclusion-1 Hour Crusty Bread Recipe
Now you can enjoy the satisfaction of baking your own crusty bread in just one hour! Don’t worry about the time it takes, the delicious aroma and taste of homemade bread will be worth it.
You might think baking bread is complicated, but with this easy recipe, you’ll be amazed at how simple and rewarding it can be.
So go ahead, give it a try and impress your family and friends with your baking skills!